Easy Portuguese Rolls Recipe
I love the whole bread making process. There is just something about working with dough. Yet, it doesn’t have to be hard! Homemade bread recipes can be super easy with just a few tools and a good recipe. And that’s where I come in! These Portuguese rolls are pretty easy to make. But a little different from papo secos which are the most typical type of rolls you’ll find in a Portuguese bakery. Instead, this recipe uses condensed milk and melted butter, which creates a lovely soft texture and adds a bit of sweetness. So similar to my Hawaiian Rolls, they are on the sweeter side but buttery too. However, these rolls are shaped more like my Garlic Knots, which makes them so pretty. But the best part is that a stand mixer does all the work! Yet, the recipe can be made by hand if you prefer. You can serve Portuguese rolls with a cup of coffee, alongside any meal, or make cute little hand and cheese or chicken salad sandwiches with them! However you choose to serve these delicious rolls, your family will love them!
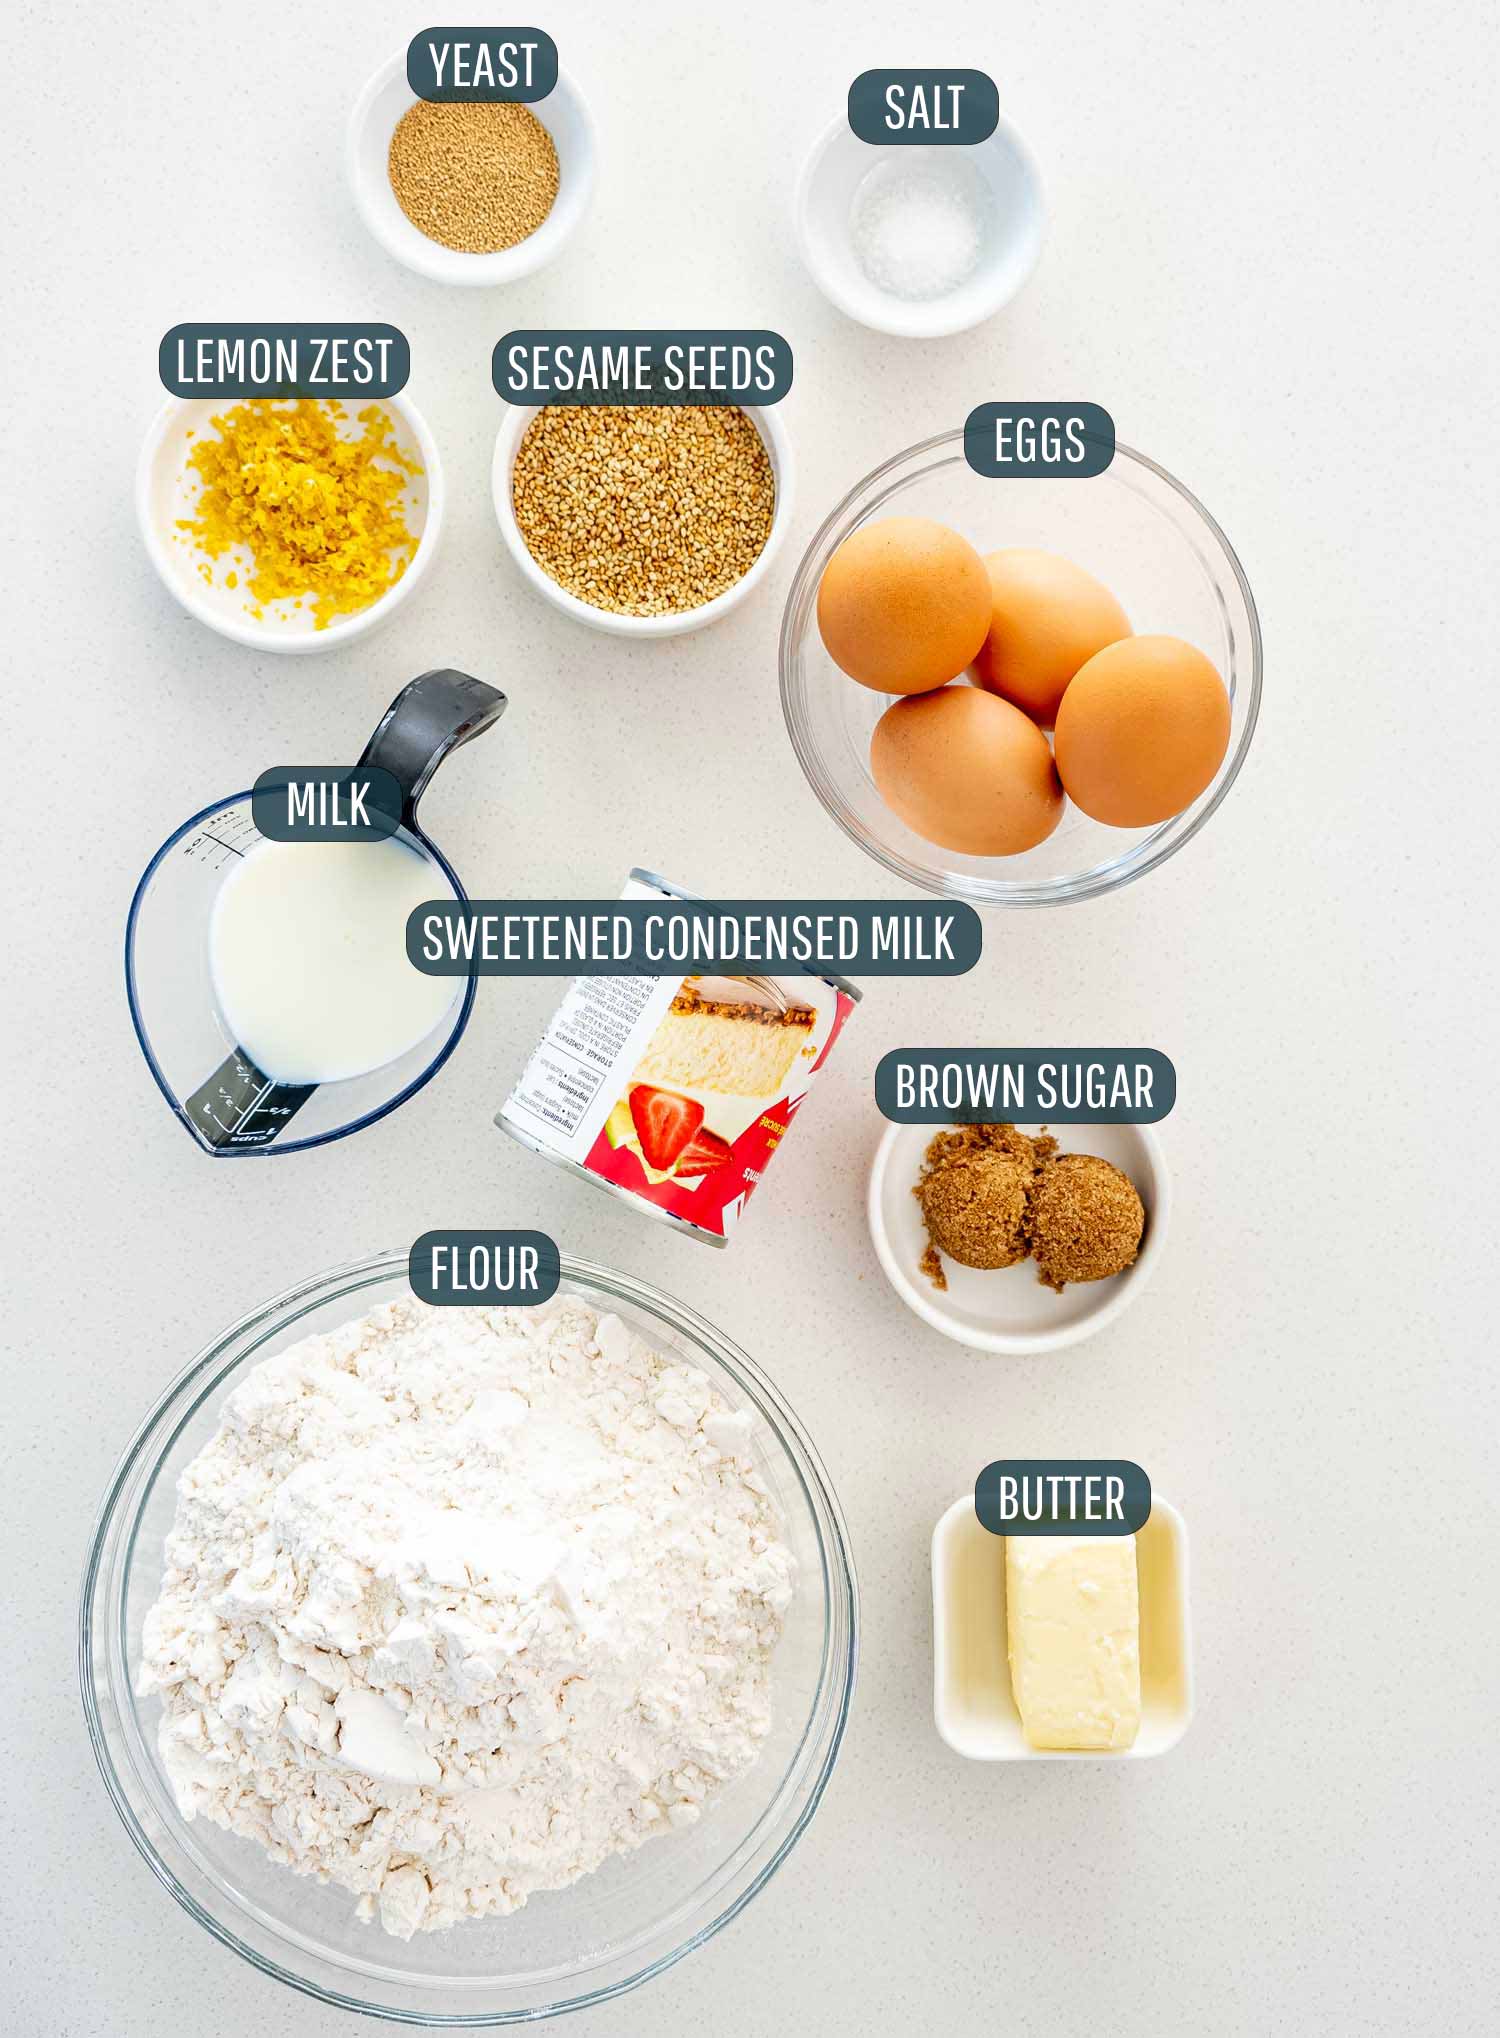
Butter – Always use unsalted butter to control the amount of added salt. You will need to melt the butter in this recipe. Milk – Any type of milk will work including plant-based varieties. But these few ounces of milk must be warm to activate the yeast properly. Eggs – Used in two different ways. Eggs add richness to the dough and are used to make an egg wash that creates crusty rolls. The eggs should be at room temperature. Condensed Milk – Adds a lovely sweetness to the dough. Flour – Simple all-purpose flour is all you need. However, if you have dietary restrictions you can use gluten-free 1-to-1 flour. But the remaining ingredients don’t need to be changed. Lemon Zest – Adds a hint of acid that enhances the flavor of the rolls. Brown Sugar – Helps to activate the yeast and add a touch of molasses. Salt – A dash of salt is important to help balance the sweetness. Active Dry Yeast – Make sure to check the expiration date on your yeast. It’s what gives the rolls rise. Sesame Seeds – I like to top my rolls with sesame seeds for a final layer of flavor. But it’s an optional ingredient.
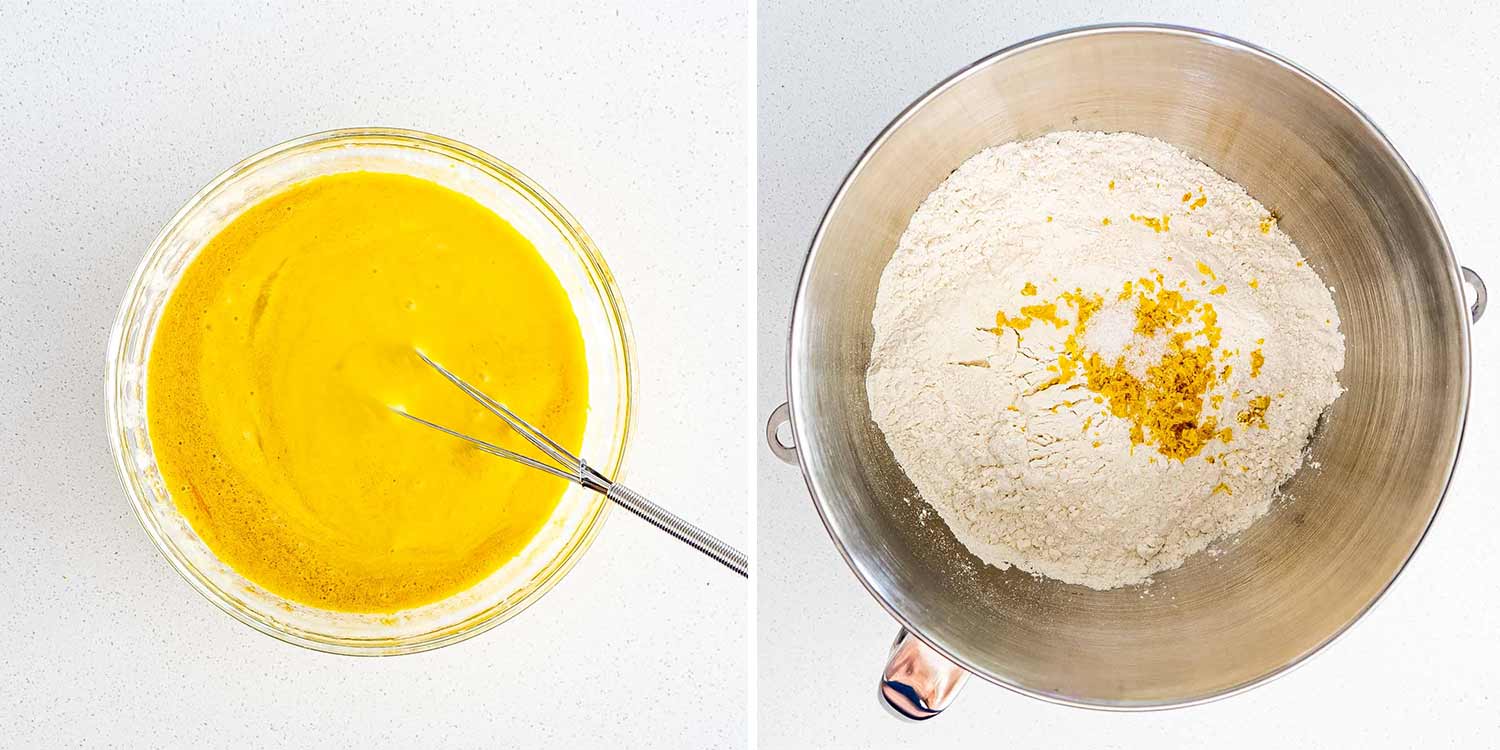
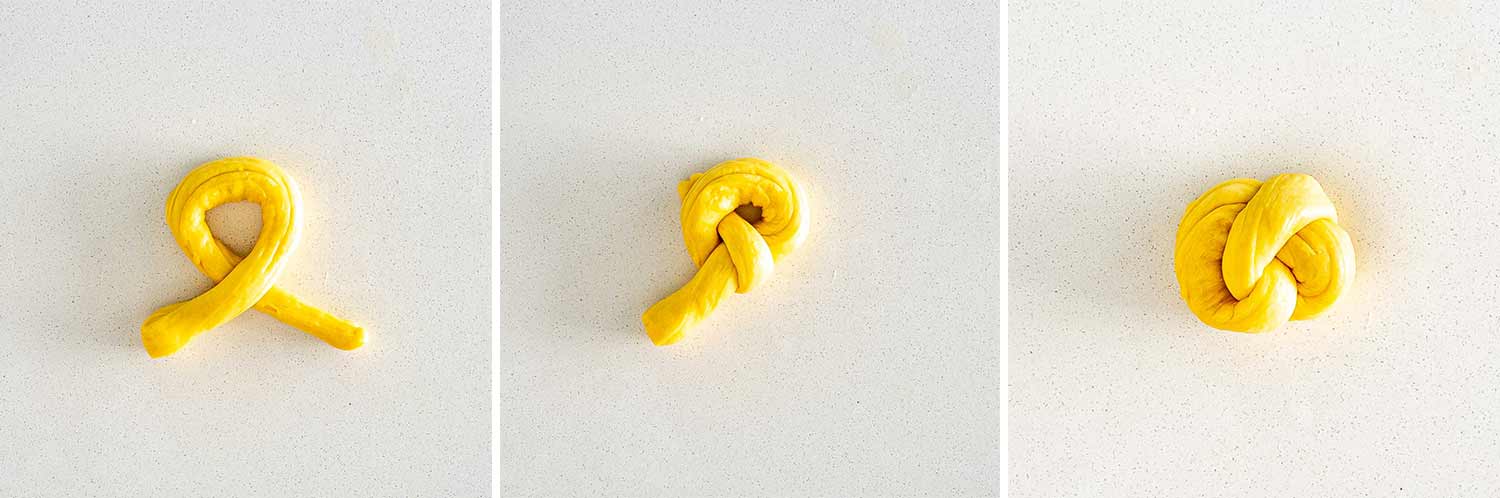
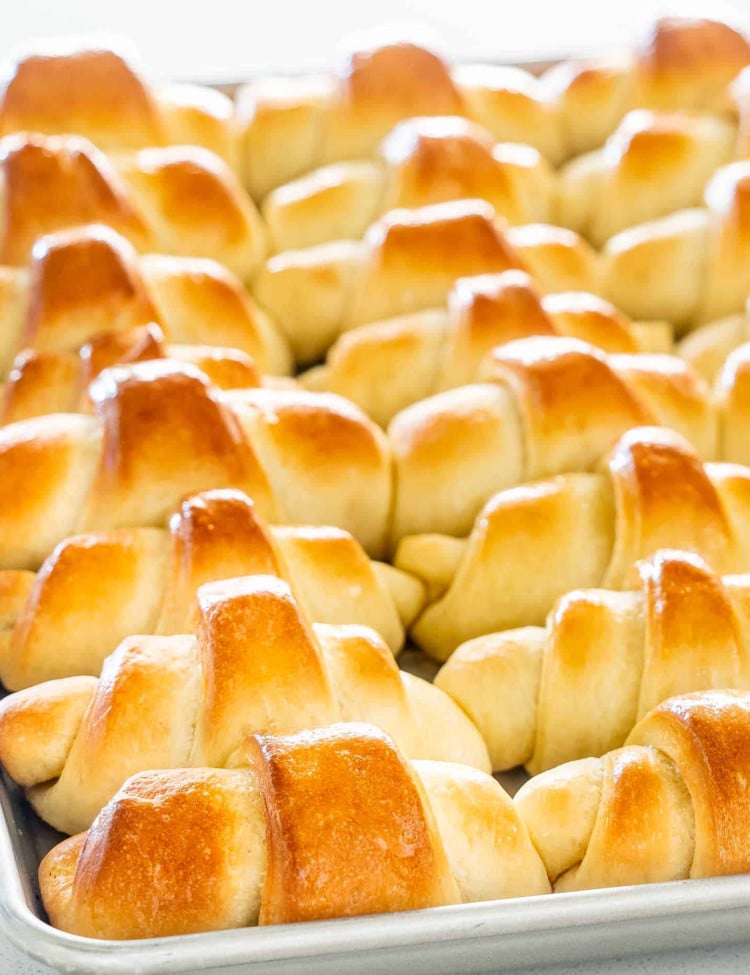
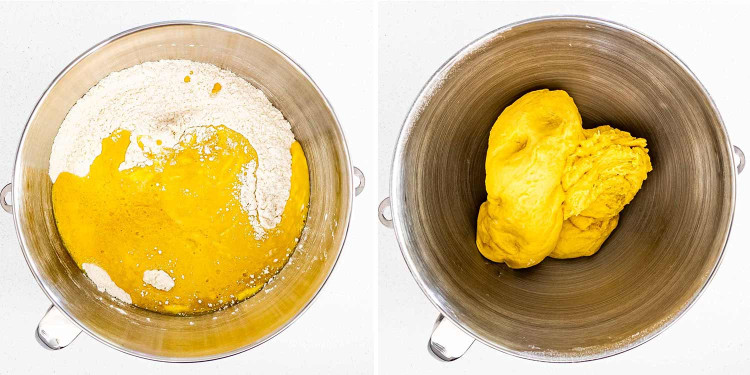
With the help of a stand mixer, making homemade rolls has never been easier! Just follow the simple instructions that I’ve outlined for you here and you’ll have delicious ready to eat rolls in no time! To begin, you have to bloom the yeast. Warm the milk up just a bit, but do not boil it. Then use a fork to combine it together with the yeast and brown sugar in a small bowl. Now, allow the mixture to sit undisturbed for 10 minutes until the yeast foams up. Note, if your yeast doesn’t bubble and rise don’t move forward with the recipe. It means that your yeast is dead. It’s important to combine the dry ingredients and wet ingredients separately before bringing them together. Start by adding the flour to the large bowl of your stand mixer along with the lemon zest and salt. Then mix everything together. Next, mix the wet ingredients together! Stir together the melted butter, eggs, condensed milk, and yeast mixture. All these ingredients need to be at room temperature for the dough to bind together correctly. Now that the wet and dry ingredients have been combined separately, you can then mix them together. First, pour the wet ingredients over the dry ingredients in the mixing bowl. Then use the dough hook to mix everything together for about 3 minutes on medium speed. It’s a very sticky dough. After the dough comes together you will need to let it rise! Form the dough into a smooth ball and then place it in a well oiled large glass or metal bowl. Then cover the bowl with a clean kitchen towel or plastic wrap. Now, set the dough in a warm dark place for about 1 to 1½ hours so that it can rise and has doubled in size. Once the dough has doubled in size, punch it down to let some of the air out. Then place the dough onto a clean surface and knead it a couple of times with your hands. It’s easier to work with when it’s sticky and elastic, so I didn’t add any flour, but you can put the dough on a lightly floured surface if you need to. Now, roll it into a long log with the palm of your hand. Then cut it into 12 equal portions of dough. You have 2 options here. You can form just plain round rolls or you can get a little fancy like I did. It’s actually quite easy to do and they come out beautifully. All you have to do is roll each small piece of dough into a long rope that is about 12 inches long with the side of your hand. Then make a knot with the rope of dough. Next, take one end that comes from underneath, roll it over, and then press it in the middle. Now, take the other end, fold it under, and pinch it in the middle. After you form each roll, place it onto a baking sheet. Now that the rolls are shaped, the dough needs to rise a second time to make them super soft! Cover the rolls on the baking sheet with a clean kitchen towel or plastic bag. Then allow the rolls to sit for about 25 to 30 minutes until they are about double in size. While the rolls are rising, preheat your oven to 350°F (177°C) to get it ready for baking. Then once the formed rolls have doubled in size, brush each one with the egg wash and sprinkle with sesame seeds or sugar. Once the oven is fully preheated, transfer the baking tray to the oven and bake the rolls for about 25 to 30 minutes. When they are done they will be fully baked inside and the top of the rolls will be golden brown in color.
Is There A Way To Speed Up The Dough Rise Time?
Yes, it is possible to speed up the dough’s rising time. Just heat your oven to 200°F (195°C) and then turn it off once the dough is ready. Now, place the dough in the oven with the door closed. The warm environment will encourage the dough to rise fairly quickly.
Can This Recipe Be Made With Instant Yeast?
I haven’t tried it, but it should work. However, instant yeast doesn’t need to be activated, so you can just add it in with the flour and start your dough from there.
Storage
These Portuguese rolls will keep at room temperature for up to 4 days in a container or bag. You can also store them in the freezer for up to 3 months in a sealed bag or wrapped really well in plastic wrap. Then when ready to eat, just allow the bread to thaw out at room temperature for a few hours and rewarm them at 300°F(149°C) for 10 minutes.