Up until my sophomore year of high school, I attended Chinese school every Saturday morning in San Francisco’s Chinatown. Each class was an excruciating three hours long with a few short recesses sprinkled in between. I often walked to the dim sum shops next door during recess to buy snacks like pork and cabbage potstickers. Eating them somehow made class go by a lot faster. That’s why I have a strong affinity for these dumplings.
HOW TO MAKE THE BEST PORK POTSTICKERS
DUMPLING WRAPPERS
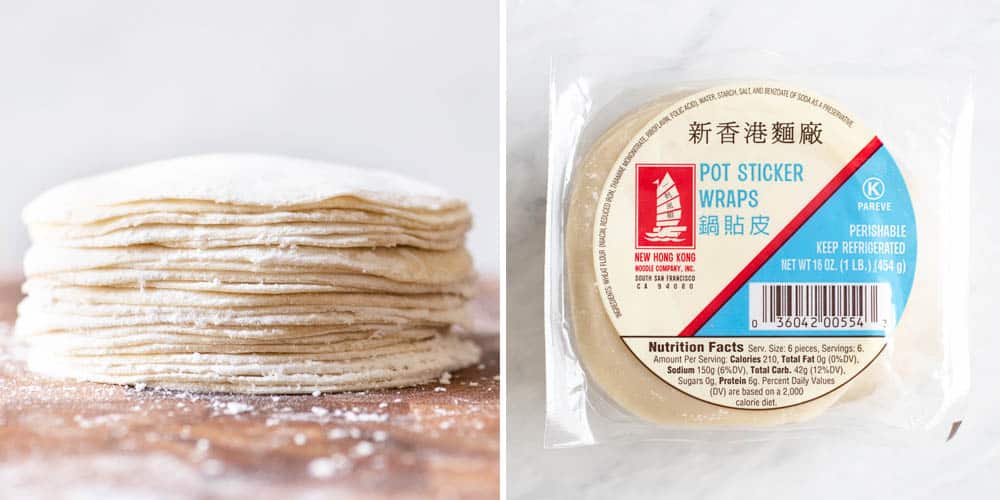
You have a choice between making fresh wrappers (or dumpling skins) or buying them from an Asian supermarket. If you want to make homemade dumpling wrappers, try my recipe here. Rolling out 30 something dumpling wrappers and then filling and pleating them can be a daunting task, even for me. That’s why I use store-bought wrappers often because it saves a few hours of my time. (See the photo above for the brand that I typically use.) For potstickers, you want to look for wrappers that are slightly thicker. These dumplings need to withstand the heat of pan frying and hot steam, so thicker wrappers are better suited for the task. You can usually find dumpling wrappers in the refrigerated sections of Asian supermarkets (often times near the tofu section). Gyoza wrappers work as well.
ACHIEVING JUICY & TENDER PORK FILLING
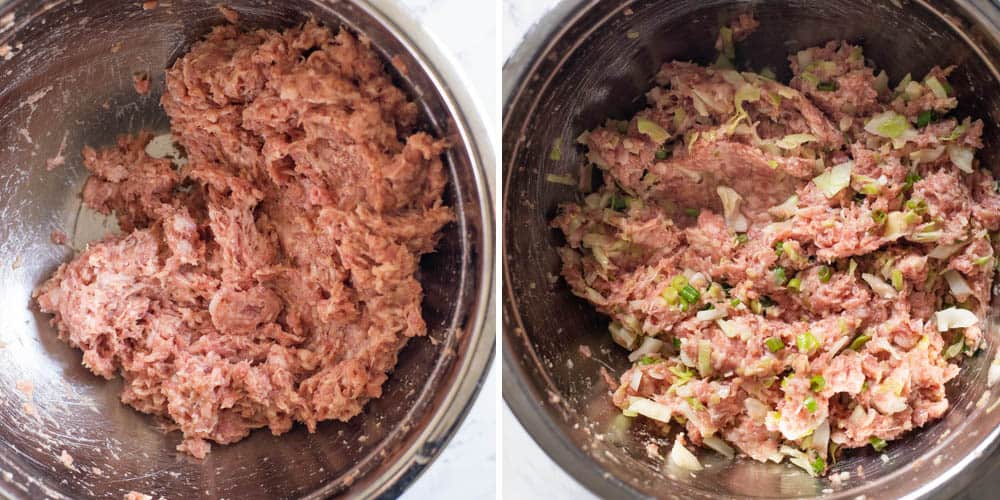
Stirring ground pork with starch and water for several minutes makes the meat more tender. I started doing this last year, and I have noticed the texture is better than when I do nothing to the meat. Typically, I stir the meat with tapioca starch, but cornstarch or potato starch works as well. When your stir the meat with the starch and water for a few minutes, you’ll start to notice that the meat turns into a paste-like consistency. That’s exactly what you want.
DUMPLING PLEATING METHOD
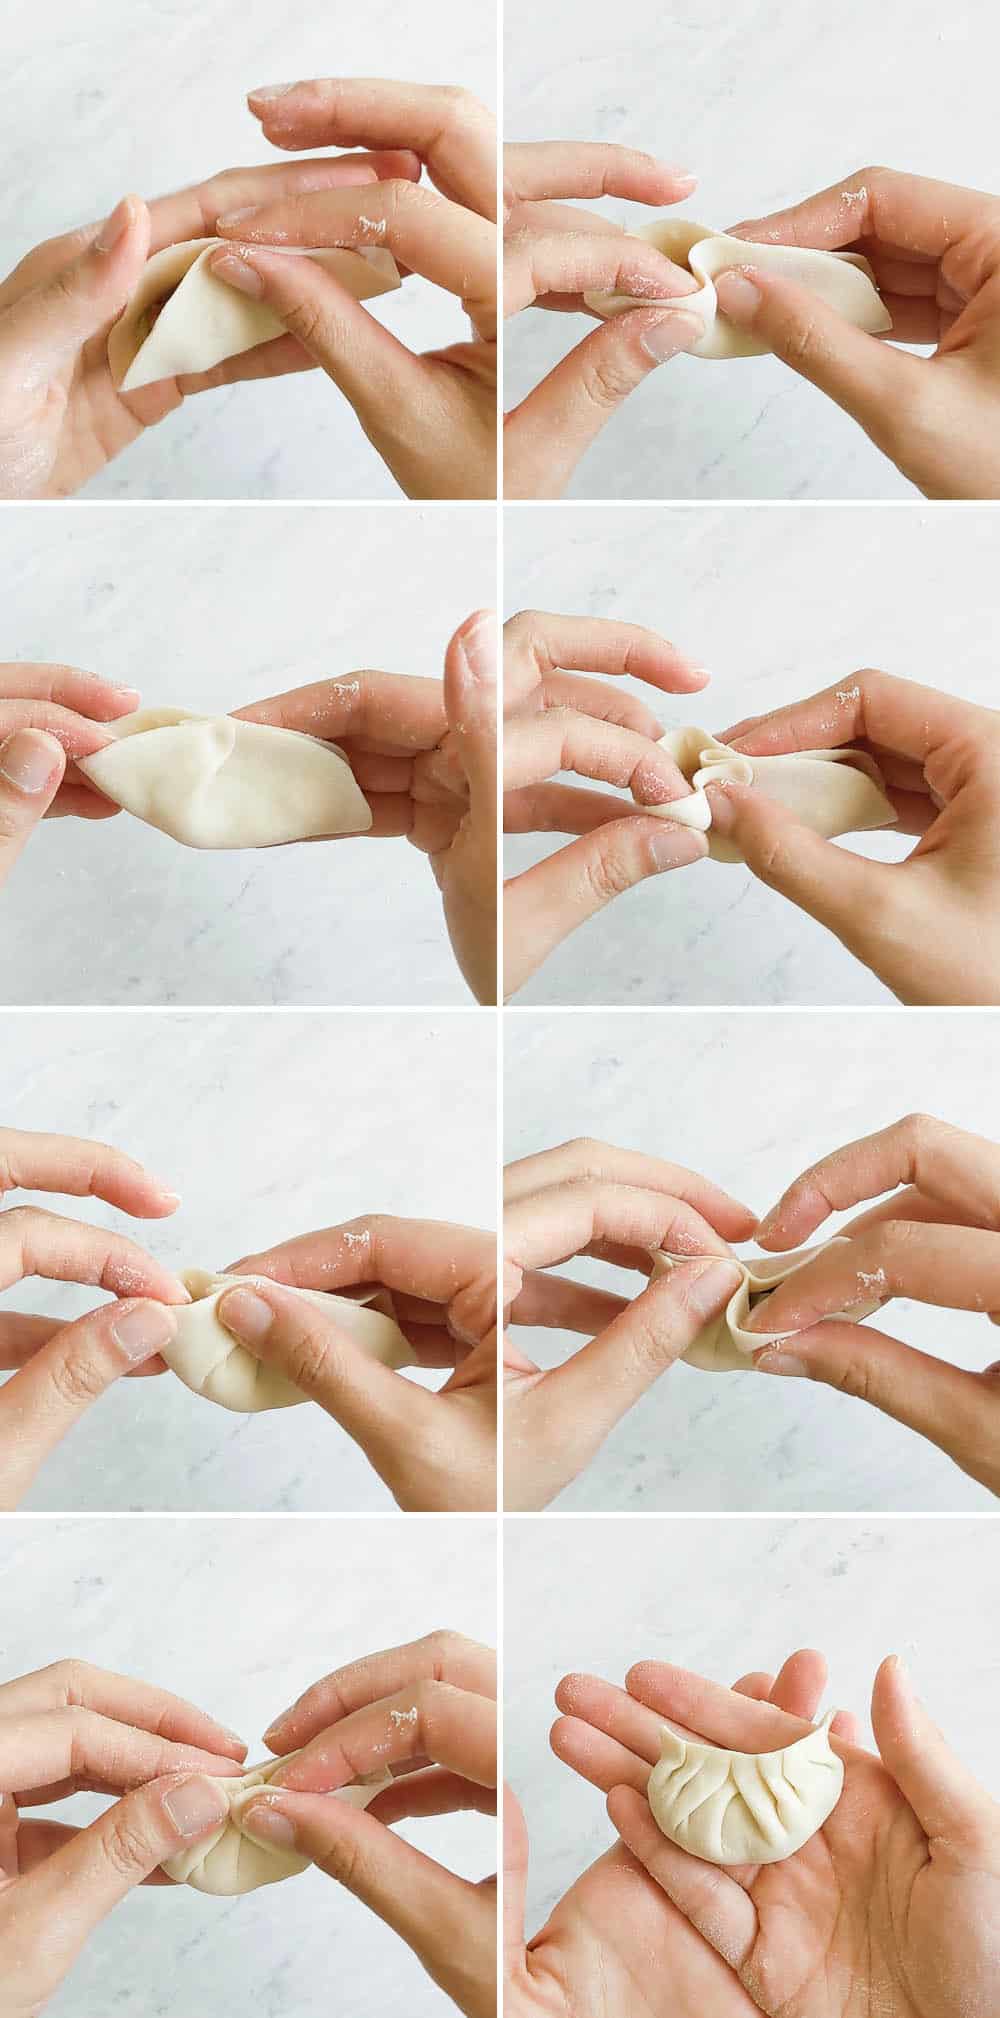
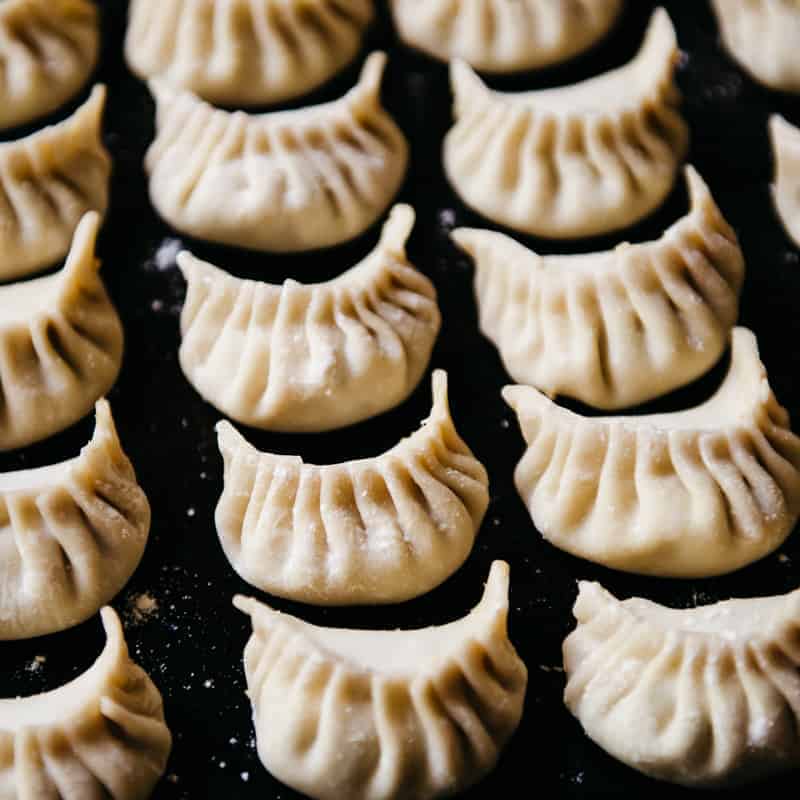
For these potstickers, I chose a pleating method where the pleats move towards the center, creating an inverted “v” shape in the middle (refer to photos above). It is not necessary to pleat them this way—I merely did this for aesthetic reasons. (Watch video at the top of the post or recipe card for a demonstration.) This method of pleating is a lot easier with fresh wrappers because you can seal the dumplings without water. It is more difficult with wet wrappers because the wrapper constantly sticks to your fingers as you pleat. The first step is to fold the dumpling in half, as if you were making a taco. Pinch the wrapper together in the center. The rest of the dumplings are not sealed yet except for the small pinch that you made at the center. Next, you’ll be creating pleats with the side of the dumpling that’s facing you. Start by creating pleats to the left of the pinched center. Use your index finger and thumb to gather dough to make a pleat towards the right. Then, press it down to seal. Once the pleat is sealed, move along the left of the dumpling wrapper and continue creating and sealing pleats towards the right. I made 4 pleats on this side of the dumpling. Once you are done on the left, repeat the same thing on the right. This time, you’ll seal the pleats to the left. To create the pretty “v” shape, I made sure that the first pleat on the right side completely overlapped the first pleat I made on the left side. Keep moving along the dumpling wrapper until you have finished sealing the entire dumpling. I made 4 pleats for this side as well. Be sure to seal the dumplings completely so that it doesn’t pop open as they cook. Again, if this pleat seems complicated, skip it. You can also try my alternate pleating techniques, which you can find here and here.
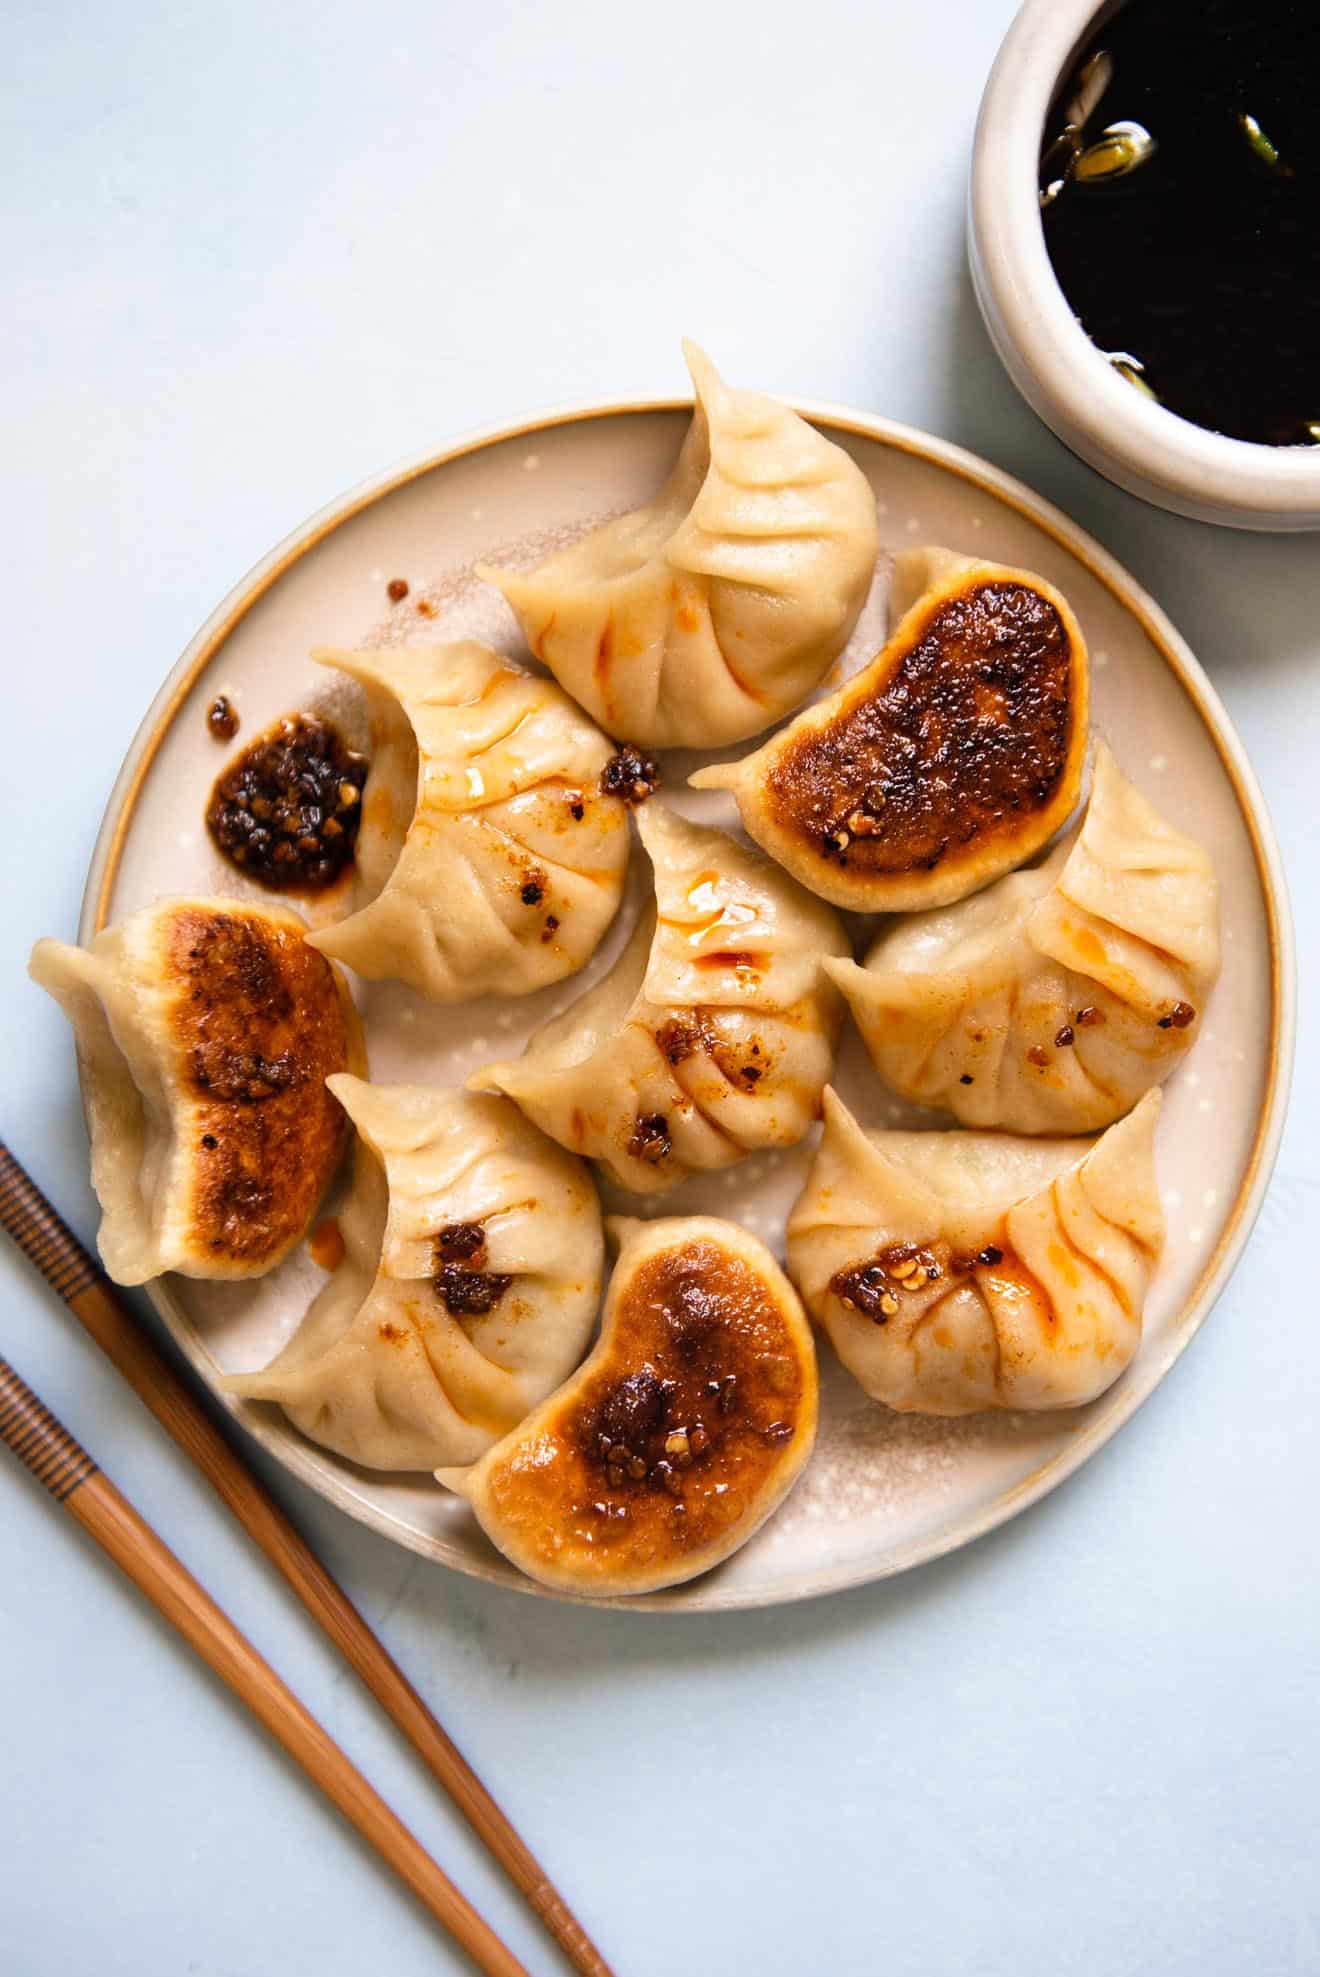
GETTING CRISPY BOTTOMS ON YOUR DUMPLINGS
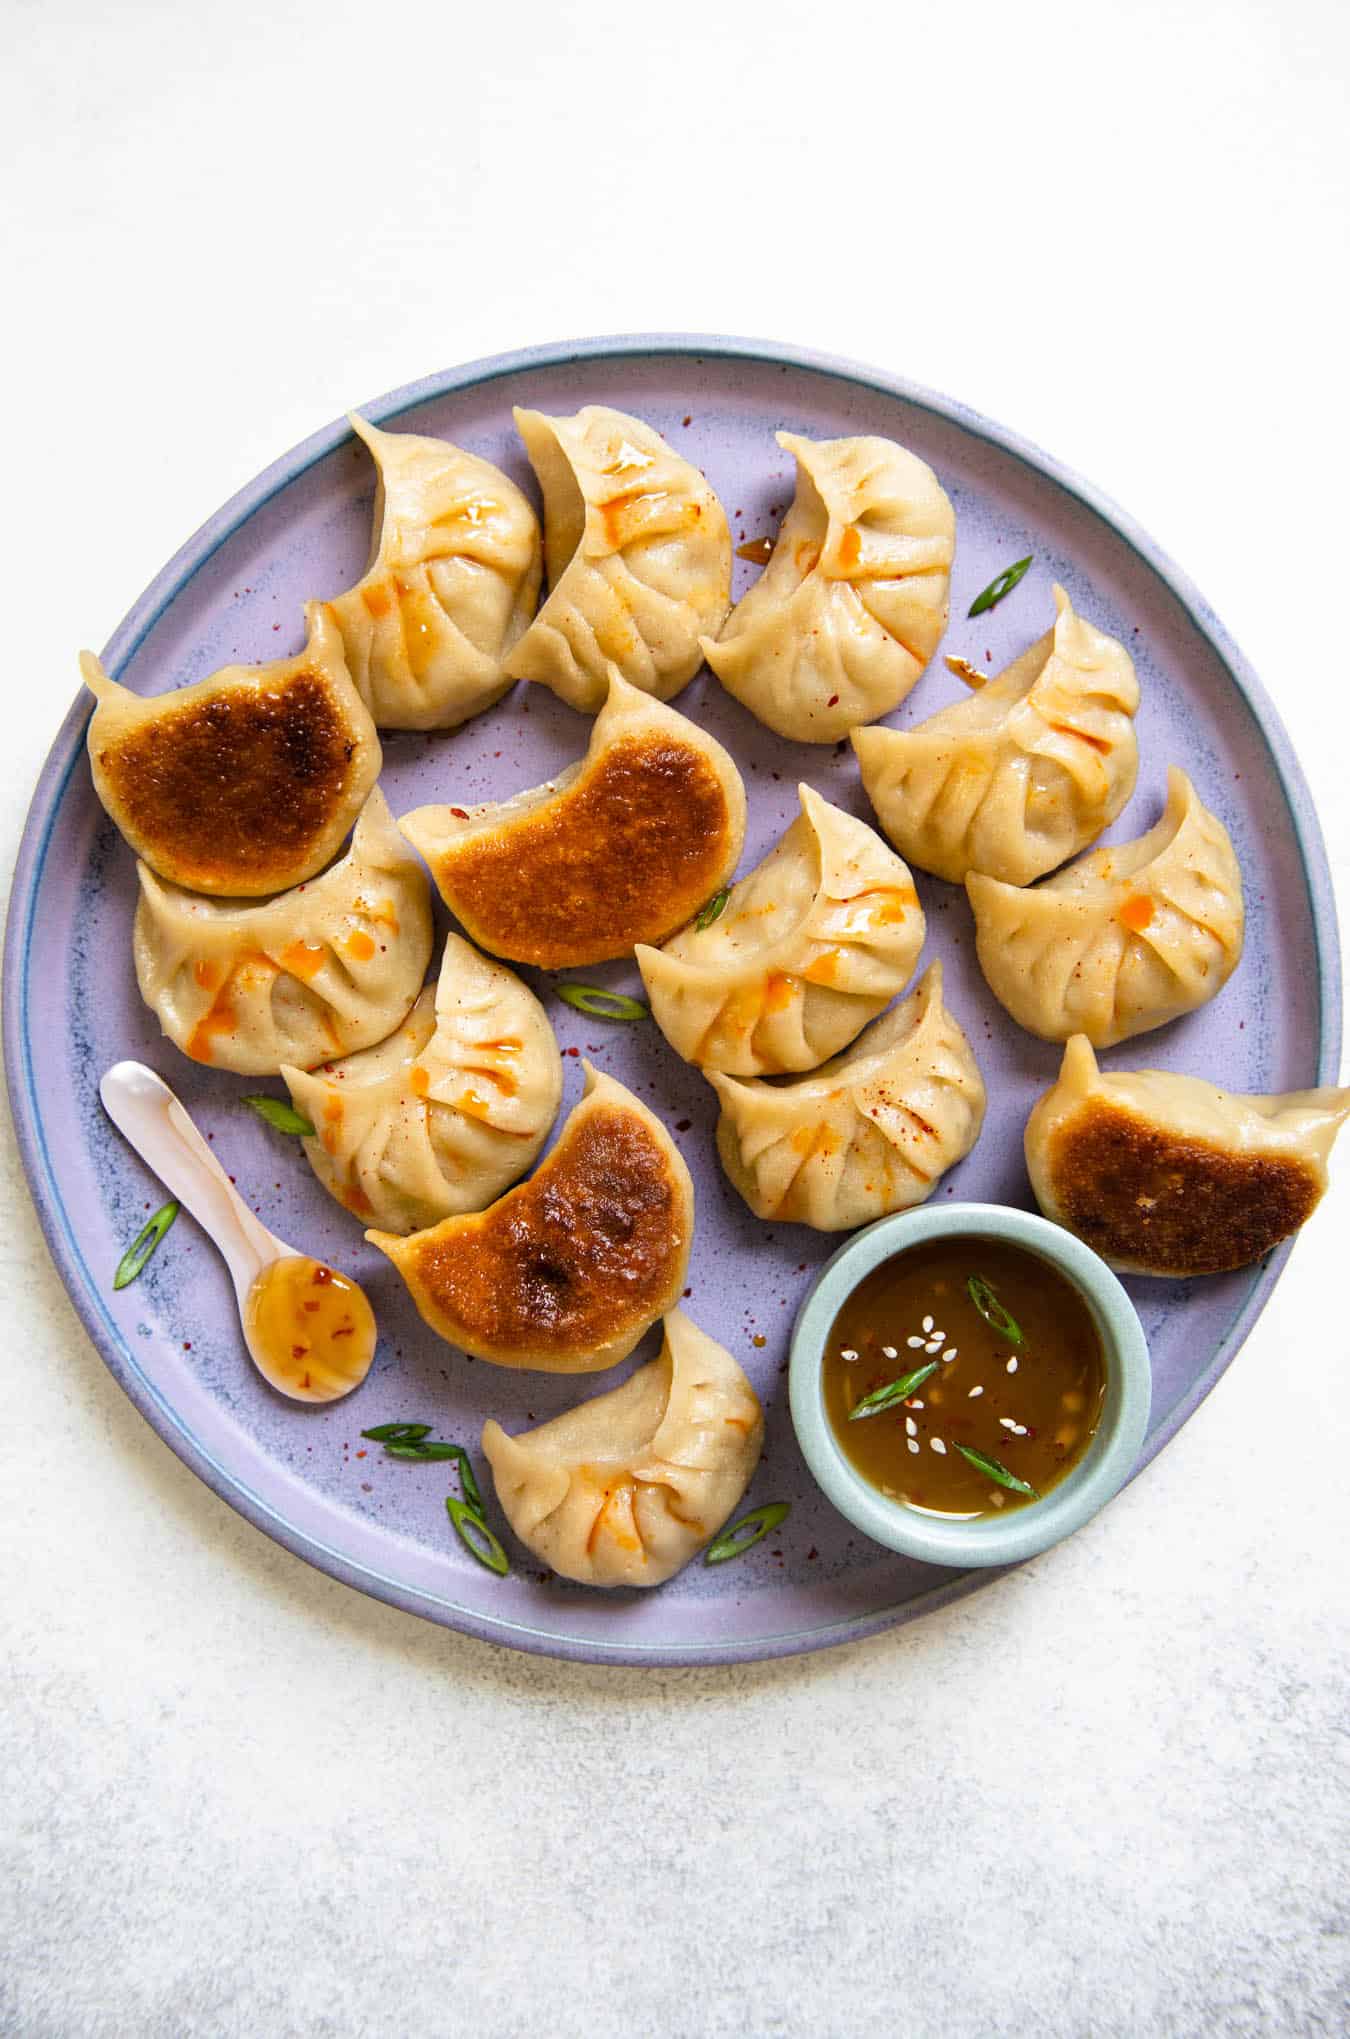
I love my potstickers super crispy and deep brown on the bottom. The best way to get your potstickers this way is to pan fry them for 2 to 3 minutes, until the potstickers are golden on the bottom. Then, pour water into the pan and cover the pan with a lid to steam. After 5 to 6 minutes of steaming, you should see the beautiful golden color on the bottoms of the dumplings. If you like boiling dumplings before pan frying, you probably won’t get the same kind of crispy bottoms because of all the moisture in the dumplings.
FREEZING POTSTICKERS
Freeze dumplings in a single layer for several hours. Make sure that the dumplings do not touch each other, as they can get stuck together once frozen. I like to line my plates with parchment paper so that the frozen dumplings don’t stick to the plate. See my how to freeze dumplings post for all my tips on this topic.
MORE DUMPLING RECIPES
Cantonese ShumaiVegetable PotstickersRed Curry Wontons with Zucchini NoodlesCurried Potato Fried DumplingsYou can also visit my complete dumpling archives here.