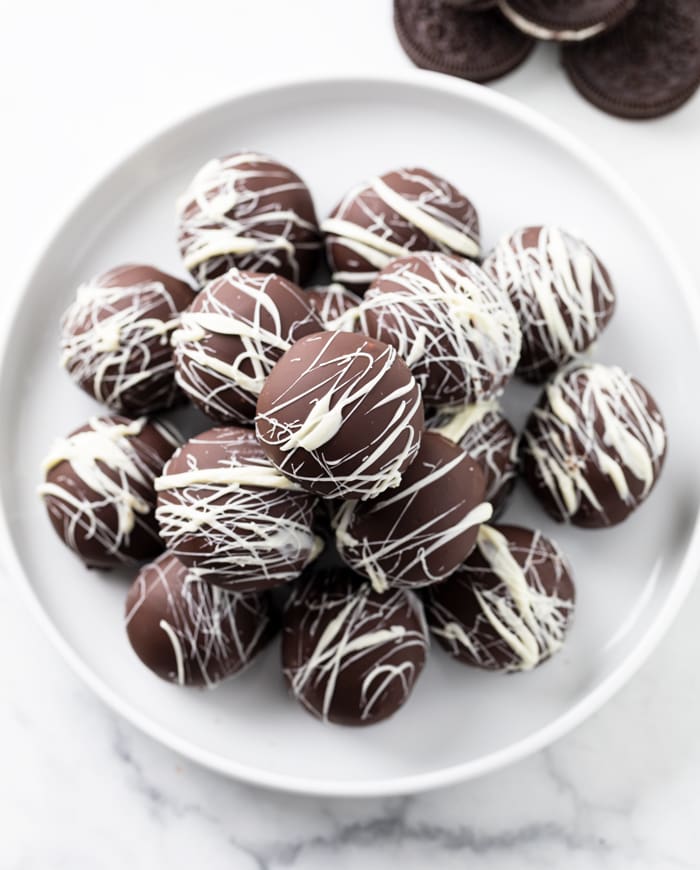
Lots of different color and topping options make these perfect for special occasions like birthdays, Christmas, and more.
Any dessert that looks as gorgeous as this and requires no baking has my full attention! These are so fun to decorate- you can make these in different colors and decorate them with sprinkles, crushed cookies, and more! There are a few key things to know in order to ensure that your chocolate is silky smooth! I also have great make-ahead and storage info for you, so let’s go!
How to Make Oreo Truffles
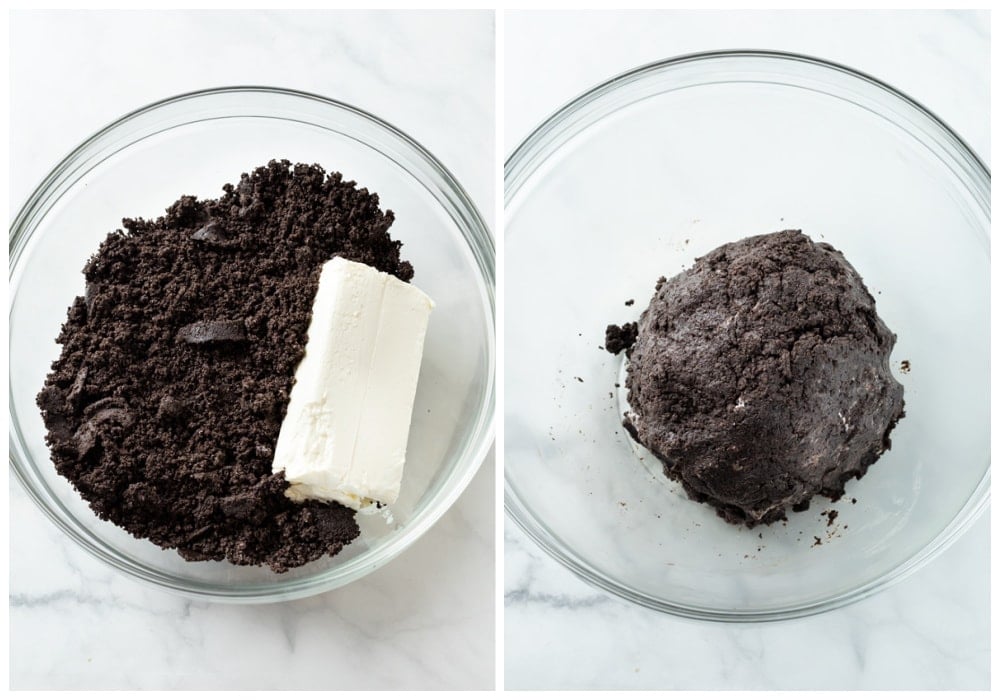
See recipe card below this post for ingredient quantities and full instructions. Pulse Oreos in a food processor to form fine crumbs. (You can also do this by hand.) Combine with softened cream cheese.
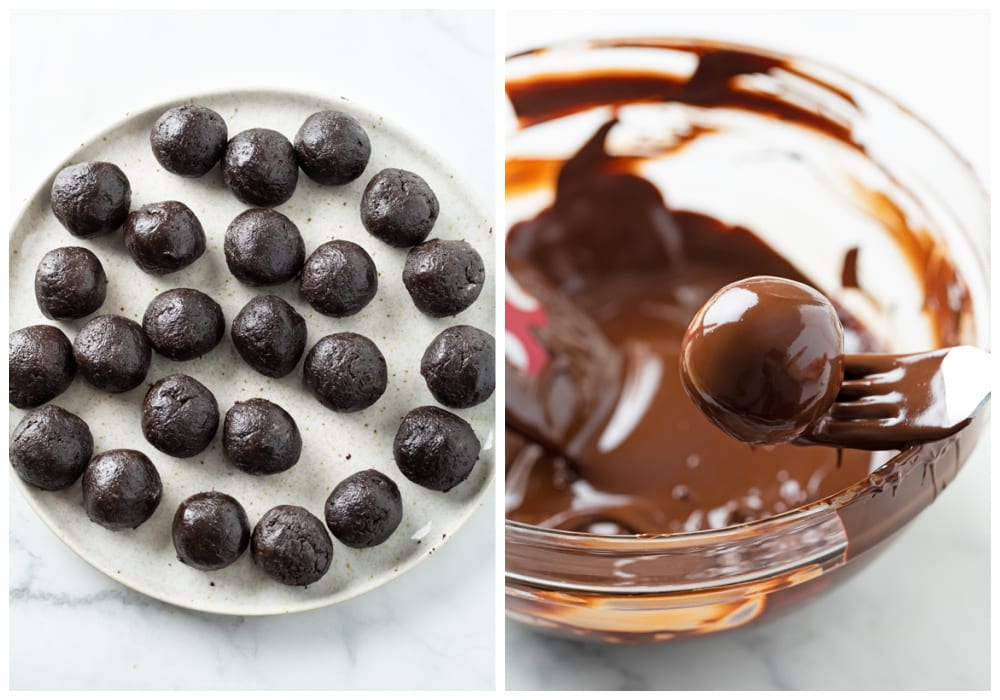
Roll into 1-inch balls and freezer for 30 minutes or more, then dip into melted chocolate.
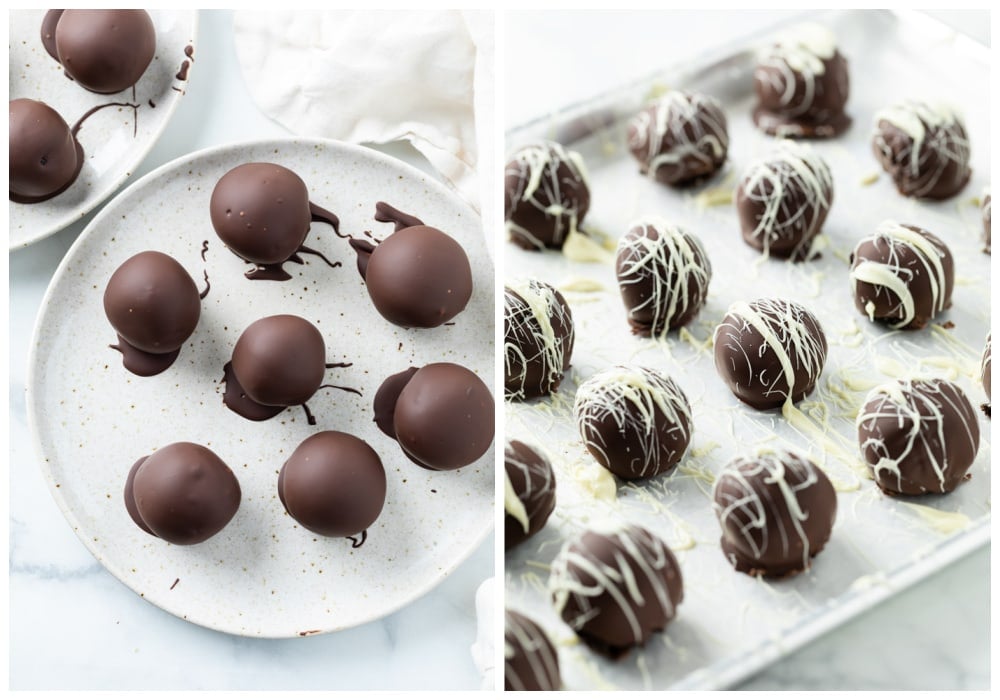
Transfer to the refrigerator to set for about 10 minutes. Melt more chocolate if desired and use a fork to drizzle it over the truffles. Refrigerate for 10 minutes or until ready to serve.
Make-Ahead Method
Oreo Truffles are a great make-ahead treat and can.be made up to 5 days of time and can be stored in the refrigerator until ready to serve! To make them longer than 5 days ahead, freeze them and let them thaw in the refrigerator prior to serving.
Storage
These can be stored in the refrigerator for up to 2 weeks or you can freeze them for up to 3 months.
Try These Next!
Tried This Recipe?
Leave a review, I love hearing your feedback! ⭐⭐⭐⭐⭐
Baker’s Bars- These melt smoothly in the microwave, (much better than chocolate chips, which typically require a double boiler for proper melting). Oil Based Food Coloring Baking Sheet and Wax Paper- Makes it easy to decorate and transfer to and from the fridge.