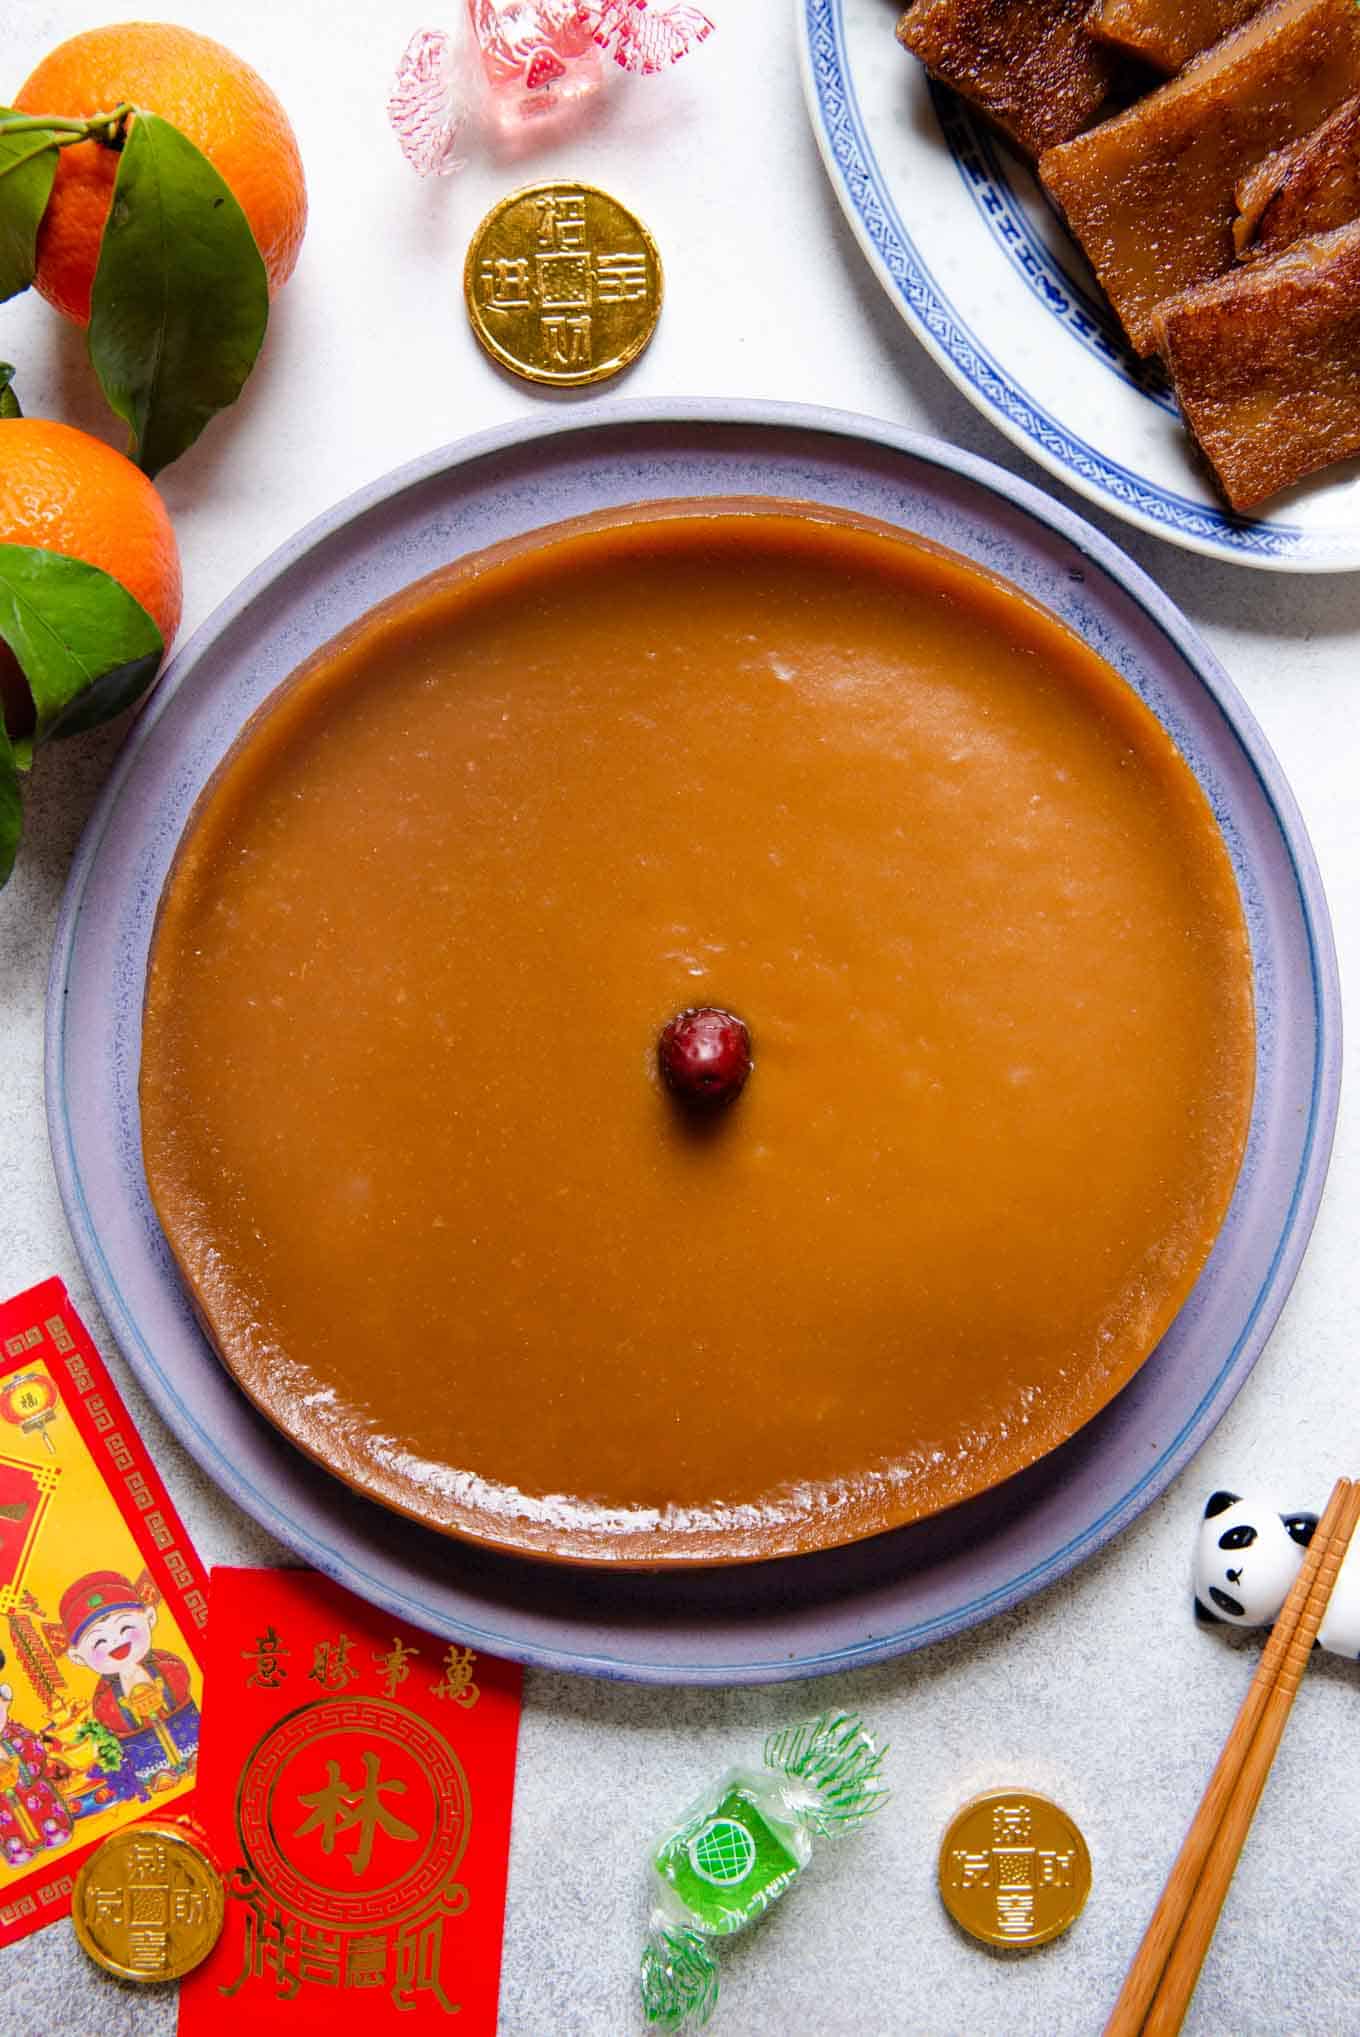
In Chinese culture, you eat dishes that carry auspicious meanings during new year celebrations. That means eating foods with names that sound similar to new year’s greetings. In terms of nian gao, the pronunciation of “糕” also sounds like the pronunciation of the character “高,” which means “high” or “tall.” Therefore, if you eat 年糕 during Lunar New Year, the upcoming year will be “年高,” a higher, better year than the last. Depending on which region of China you’re from, nian gao can look slightly different. Most commonly, nian gao refers to a steamed brown sugar rice cake that you decorate the house with for several days before eating. In some regions of China, nian gao can also refer to white unsweetened rice cakes that are sliced and stir fried into a savory dish. This is often referred to as “Shanghai nian gao” in English. Although my family is from Guangdong Province, we make something similar to Shanghai nian gao during Lunar New Year, but it’s called 迎年圓 (“welcoming [new] year dumplings”).
NIAN GAO INGREDIENTS
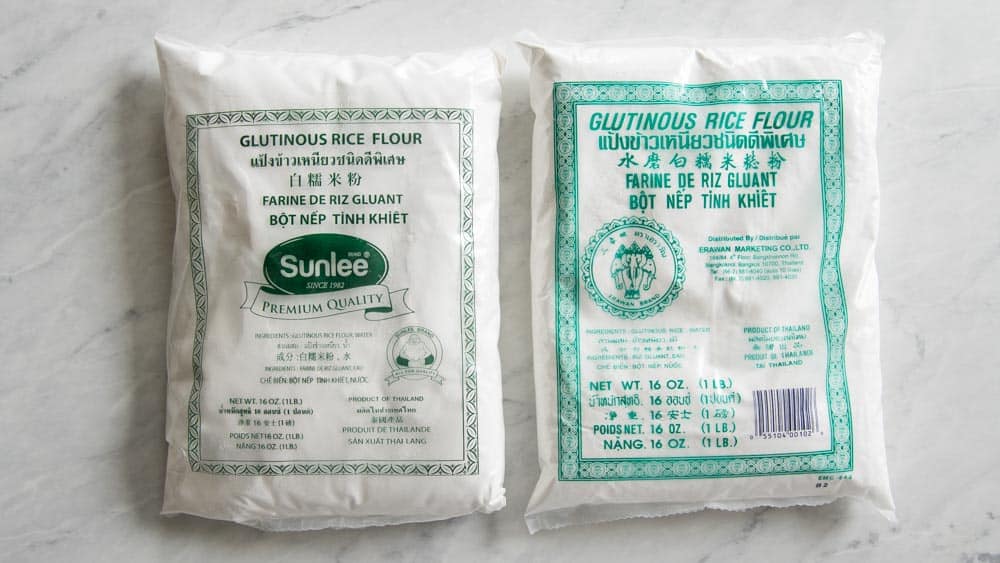
GLUTINOUS RICE FLOUR
Sweet nian gao is usually made with glutinous rice flour. The flour comes from ground glutinous rice or sticky rice. Typically, Mama Lin uses the Thai-style glutinous rice flour. They usually come in 1-pound see-through bags with a green label (see photo above). This is not the same as the flour that comes in the red label bags. The red label bags are rice flour, usually made from long-grain rice. If you use rice flour for this recipe, the texture of the nian gao won’t be right. You need glutinous rice flour to give this style of nian gao its soft and stretchy texture. If you can’t find Thai-style glutinous rice flour, you should be able to replace it with Mochiko or Bob’s Red Mill’s Sweet White Rice Flour. The texture will be slightly different, but these rice flours are close enough substitutes.
GROUND GINGER
For the batter, I’m adding ground ginger to give the nian gao more flavor. Mama Lin’s original recipe doesn’t include ground ginger, and I’ve always thought the flavor of the cake was a little too plain. When testing this recipe, I tried infusing ginger flavor by adding ginger slices to the brown sugar syrup and letting it sit overnight. Although I could taste some ginger flavor in the syrup, once the nian gao was completely cooked, I could barely taste any ginger flavor. That’s why I think ground ginger is the better way to add ginger flavor. You can probably substitute the ground ginger with 2 tablespoons of freshly zested ginger using a microplane zester. I love ginger flavor, so I added 4 teaspoons of ground ginger. I think the ginger flavor is very noticeable without being overpowering. Feel free to add more ground ginger if you want a more intense ginger flavor. Conversely, reduce the amount of ground ginger if you don’t like ginger as much or omit it completely.
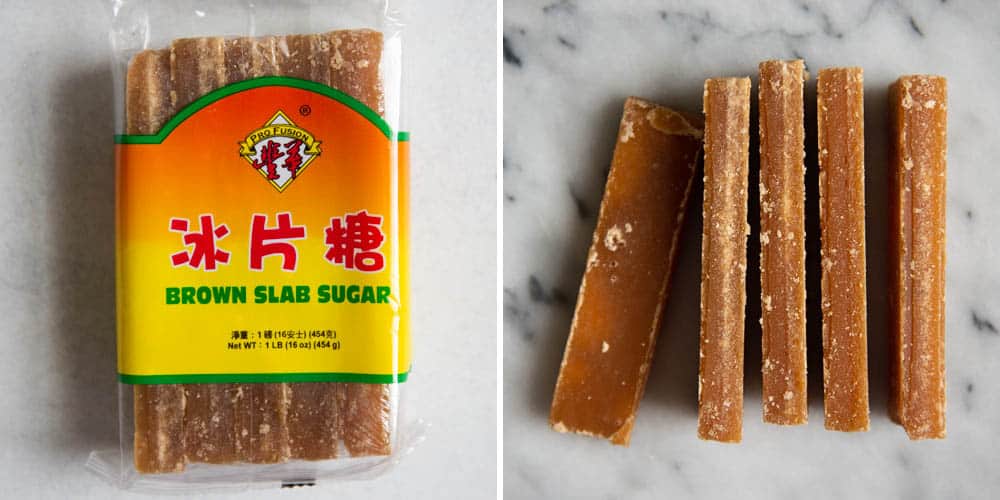
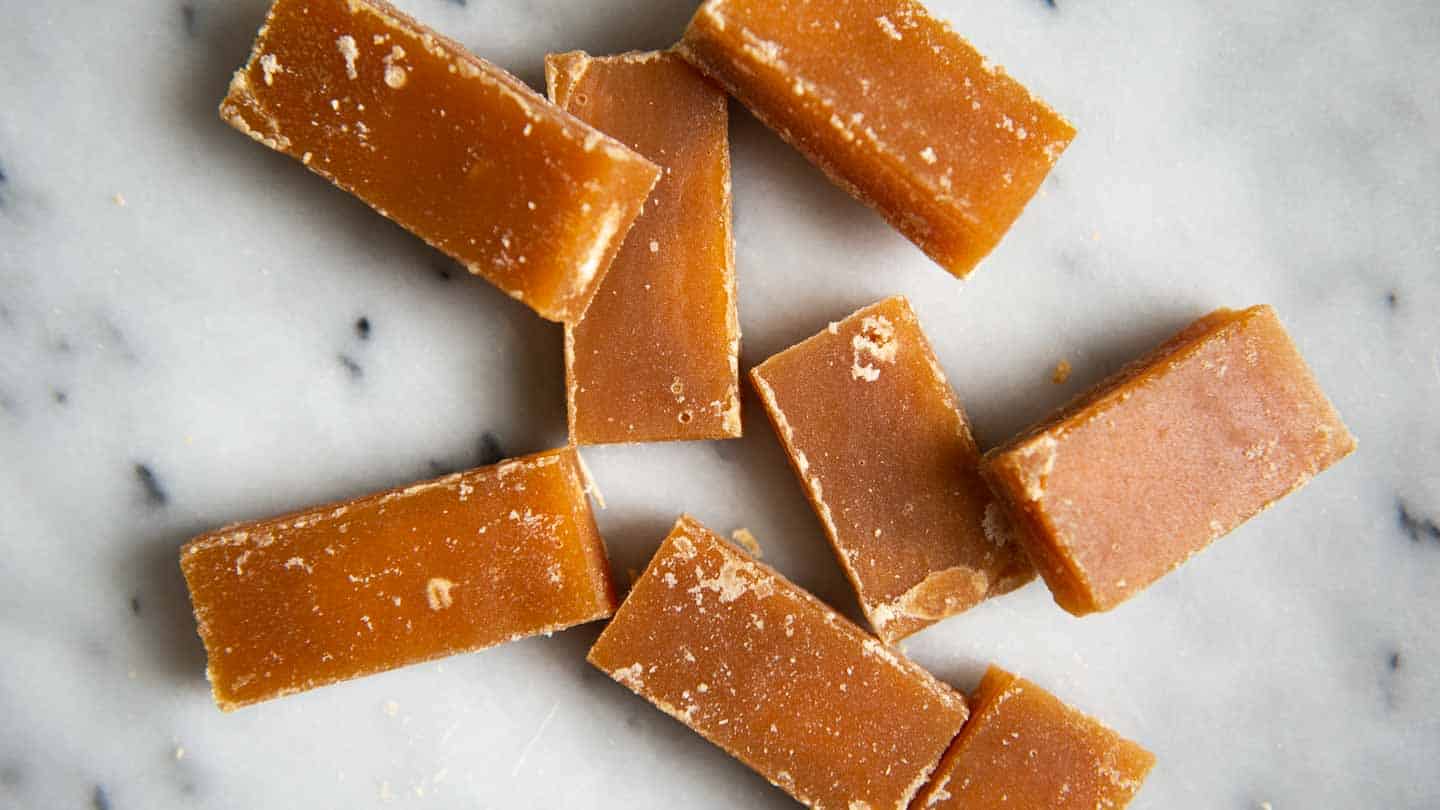
BROWN SUGAR SLABS
It is very common for Chinese recipes to use brown sugar slabs. They usually come in vacuum-sealed packages like you see in the photo above, left. Mama Lin tells me that the sweetness of brown sugar slabs are more “清甜,” which literally translates to “clear sweetness.” In other words, the sweetness of the brown sugar slabs is less malty. You can find brown sugar slabs in Asian supermarkets. If they are difficult to find, you can use dark brown sugar instead.
COCONUT MILK
In addition to water, my mom likes to use coconut milk for the batter because the coconut milk makes the nian gao rich and soft. Mama Lin uses canned full-fat coconut milk. However, canned lite coconut milk should also work. Don’t use drinking coconut milk, as there isn’t enough fat in it.
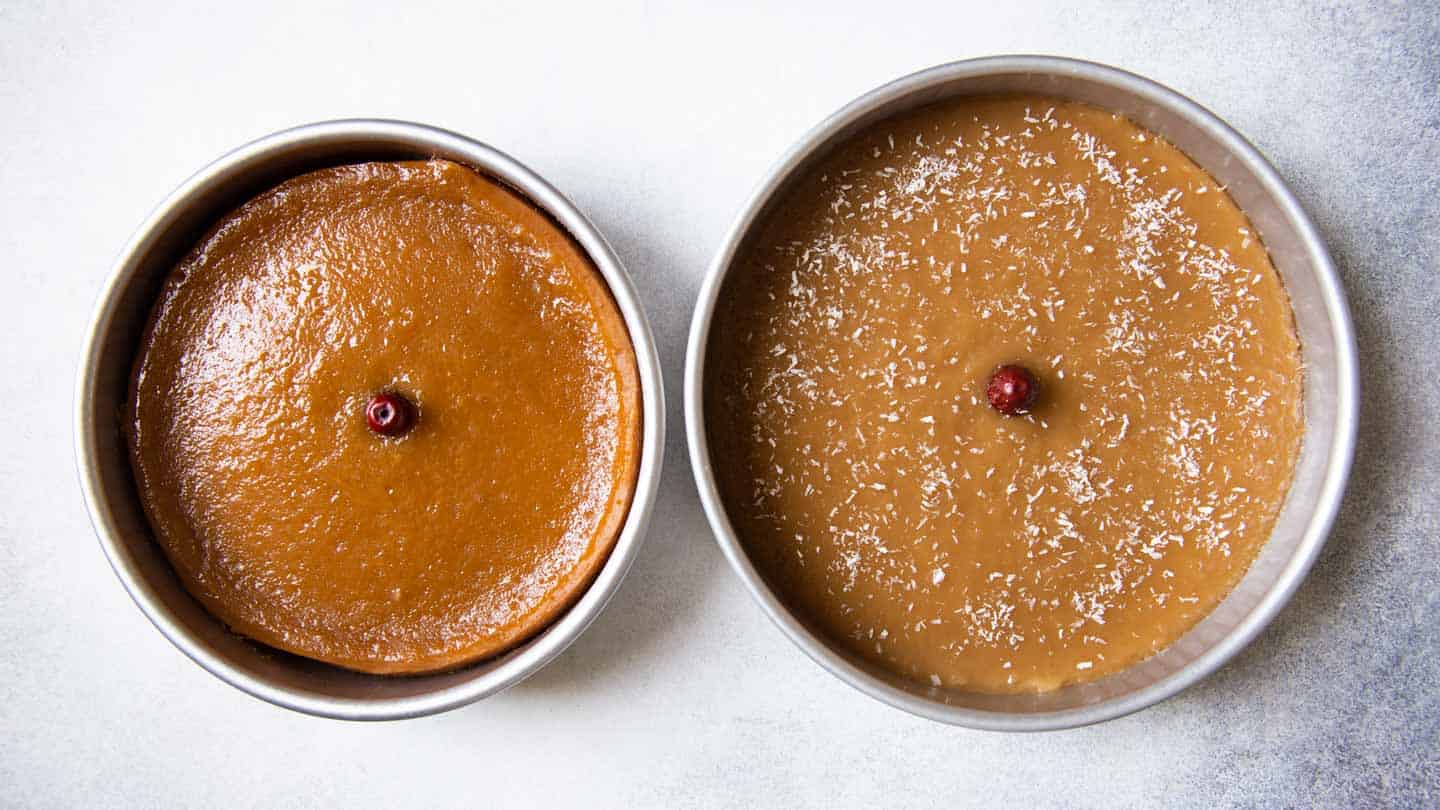
KANSUI (梘水/鹼水)
My mom likes to add a teaspoon of kansui in the batter to deepen the color of the nian gao. The photo below illustrates how kansui affects the color of the steamed cake. The one on the left was made with kansui and the one on the right was made without kansui. As you can see, the nian gao made with kansui has a richer golden color. I’ve also seen a recipe from The Woks of Life using molasses, and I think that might be a good way to add color to the nian gao without using kansui. I’d probably use 1 or 2 tablespoons of molasses.
HOW TO MAKE NIAN GAO
MAKE BATTER
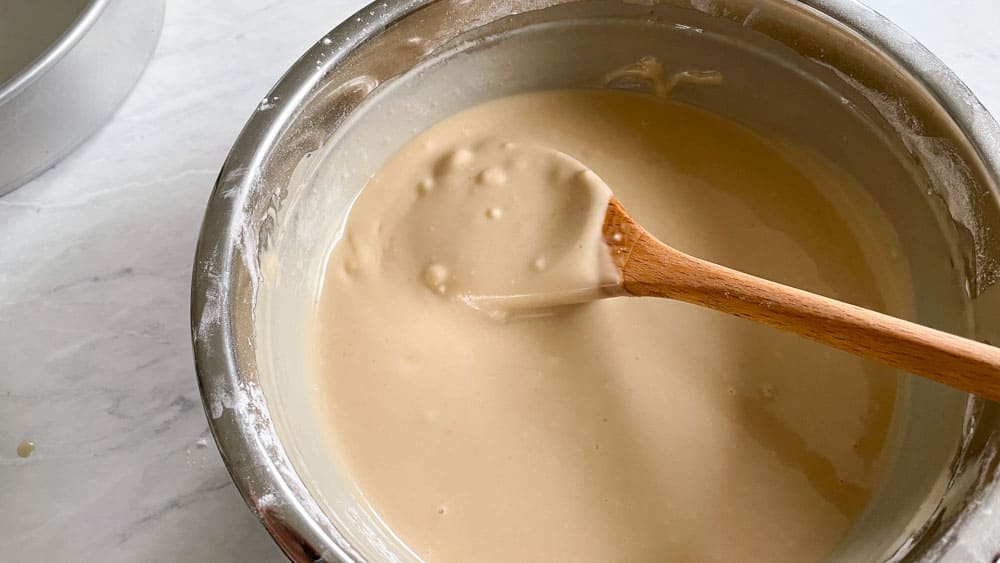
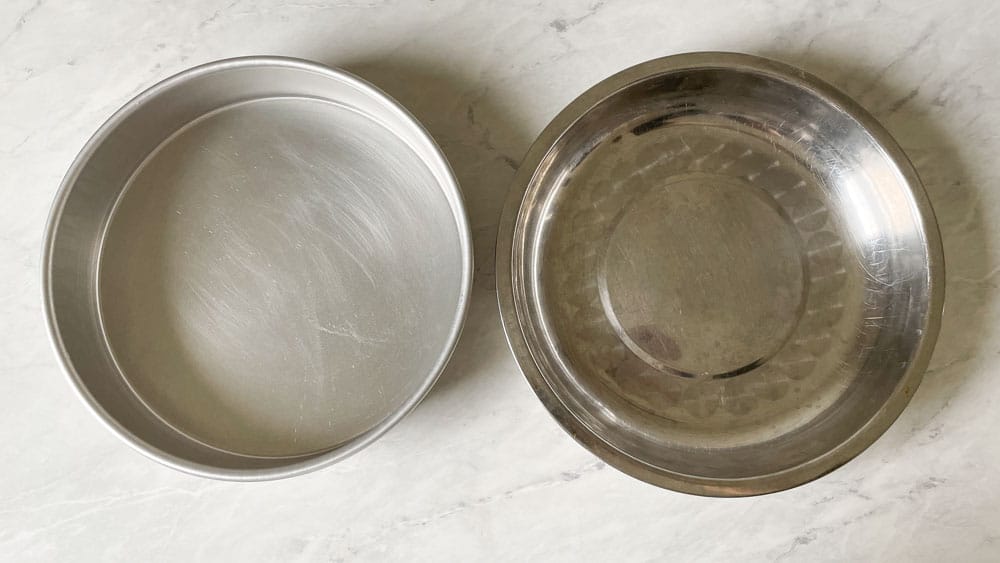
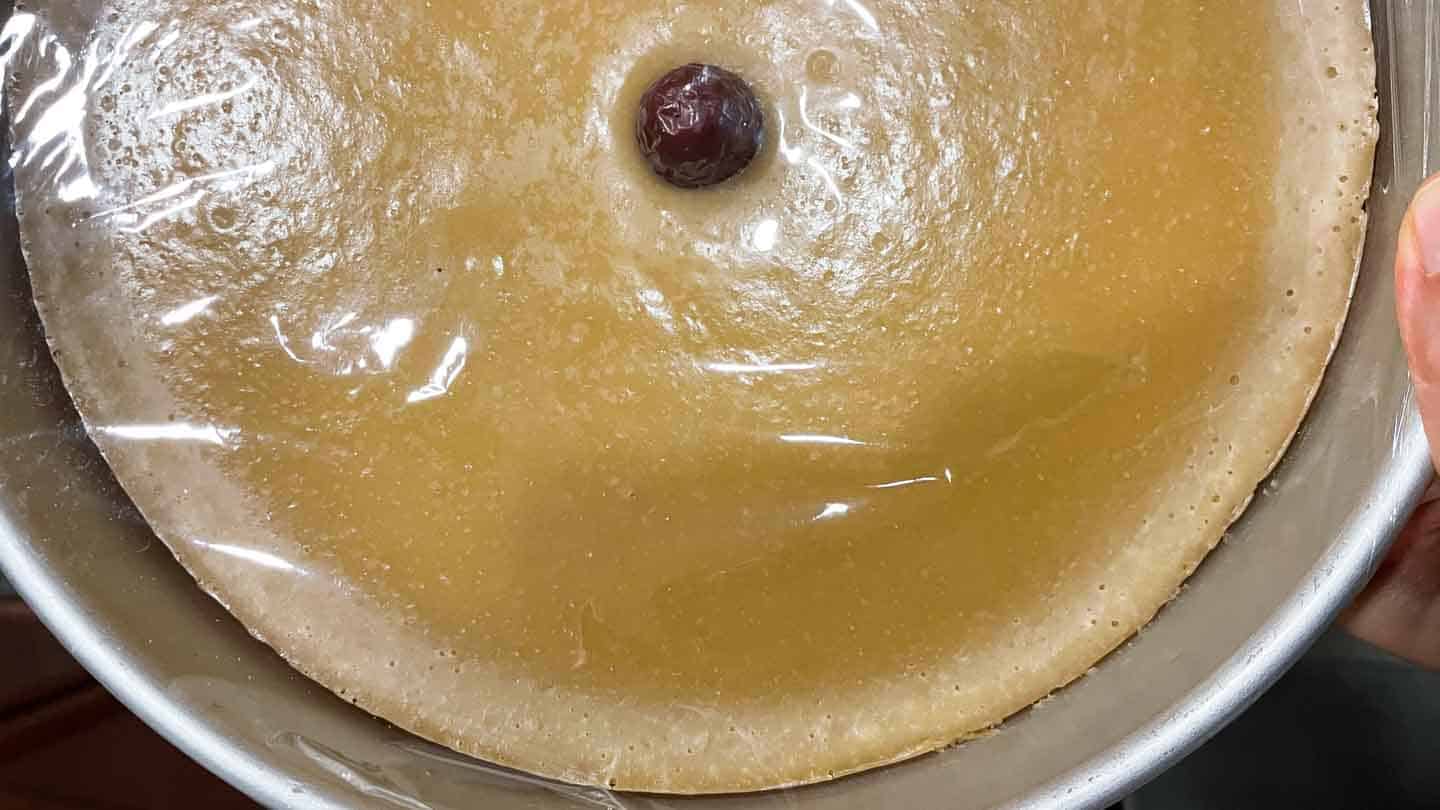
In a large bowl, whisk the glutinous rice flour, ground ginger, and salt together. Set the bowl aside. Next, snap the slabs of brown sugar into smaller pieces and place them into a saucepan. Add the water to the saucepan, cover it, and bring the water to boil. Keep the water boiling until the brown sugar slabs have completely dissolved. If you are using regular brown sugar, this should only take a few minutes. Once the sugar slabs have completely dissolved, turn off the heat. Pour the coconut milk, oil, and kansui into the saucepan and stir. Then, let the liquids cool for 5 to 10 minutes. Gradually stir the brown sugar liquid mixture into the bowl with the flours. I usually add about 1/3 of the hot liquid at a time and then stir the batter before adding more liquid. Continue stirring the batter for several minutes. The batter likely will be quite stiff at the beginning, but will loosen up after about a minute of stirring. Stir until you can only see small lumps in the batter (see photo above). Place a fine mesh strainer over another bowl and pour the batter through the mesh. This will help to get rid of the lumps in the batter. Lightly grease a 9-inch cake pan (or any 9-inch circular metal pan). My mom usually uses a round pan made of a very thin layer of stainless steel (see photo above, right). Those pans will cook the cake slightly faster because they’re made of a thinner layer of metal. I decided to use a regular cake pan for this because it holds more batter. I’ll explain why this is important below. Pour the batter into the greased pan. I like to hold onto the sides of the cake pan and tap it on the counter several times to get rid of any tiny air bubbles.
COVER PAN WITH FOIL
Then, cover the cake pan with foil. It’s not necessary to cover the pan with foil as my mom doesn’t usually bother to do that. However, the foil helps to ensure that the surface of the nian gao will look smooth once cooked. When you are steaming something inside a wok, condensation builds up underneath the cover of the wok lid. The condensation often drips down onto the nian gao, causing the surface to become uneven. This is particularly an issue if your wok lid is made of glass. The layer of foil will protect the cake from the condensation. But note that the foil also means that the cake needs a longer time to cook. If you decide to cover the cake pan with foil, make sure that there is about a 3/4-inch space between the top of the cake pan and the batter. The nian gao puffs up when it steams (then deflates when it cools). If you use a smaller cake pan, where the batter fills up 90% of the pan or more, the cake will touch the foil when it cooks, which will ruin the smoothness of the cake. A 9-inch cake pan like mine should be fine.
STEAM NIAN GAO
Place the steaming rack inside the wok. Then, fill the wok with water until there’s about a 1/2-inch gap between the water line and the top of the steaming rack. You do not want to fill the wok with too much water. If the water touches the bottom of the cake pan during the steaming process, you may run into the risk of overheating the cake, which will cause deep creases to form on the surface of the cake. However, the nian gao won’t cook properly with too little water. If you don’t use enough water, there won’t be enough steam generated inside the wok to cook the nian gao thoroughly. Cover the wok with a lid and bring the water to boil on high heat. Once the water has boiled, lower the cake onto the steaming rack and cover the wok with the lid again. Reduce the heat to medium. Steam the cake over medium heat for 50 minutes to 1 hour if you are using a thicker cake pan, about 45 to 50 minutes if you are using a thinner pan. Make sure to replenish the water inside the wok halfway through the steaming process because the water evaporates. Again, you want to make sure there’s sufficient steam inside the wok to cook the cake evenly. You should see wisps of steaming coming up along the sides of the wok (but not too much either).
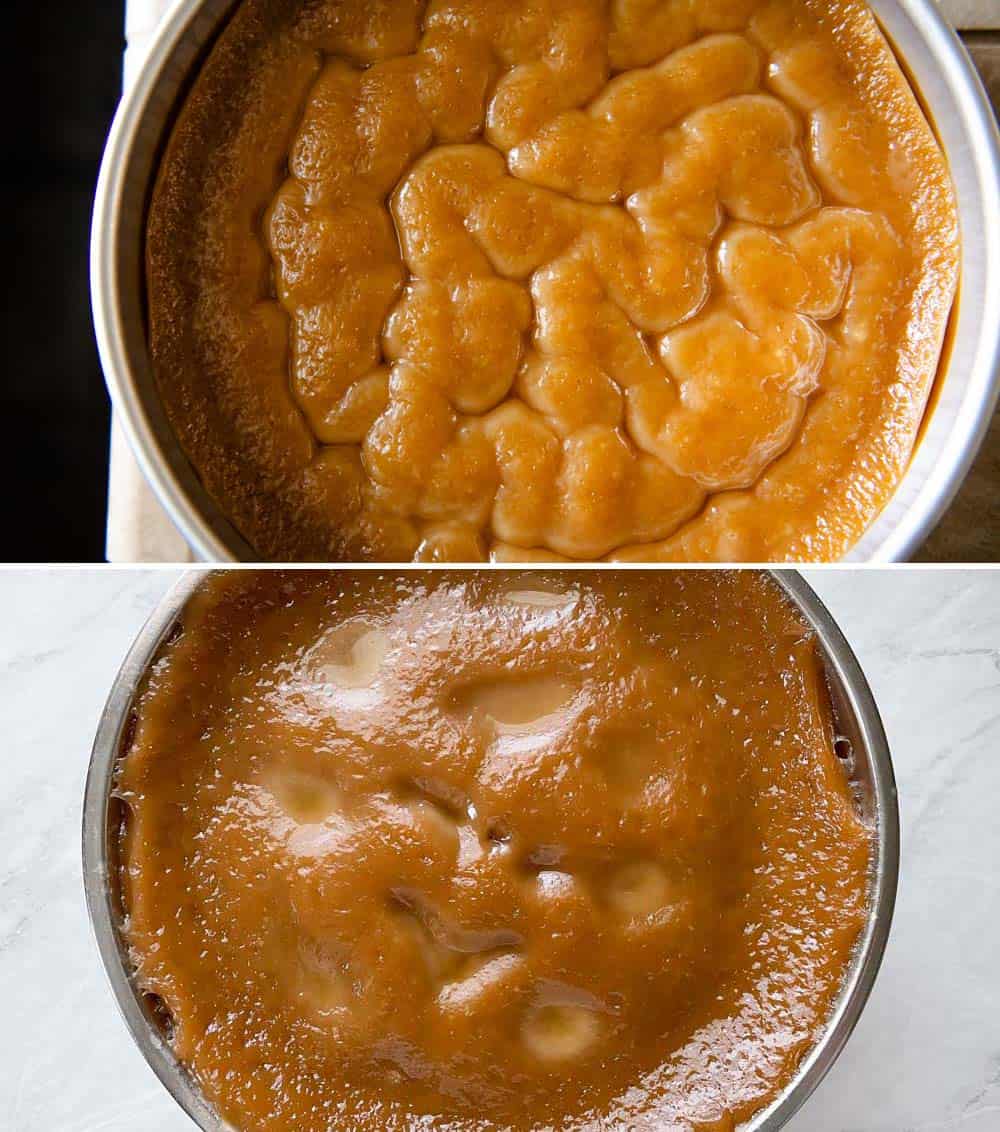
OVERCOOKING/UNDERCOOKING NIAN GAO
The trickiest part about developing this nian gao recipe was figuring out the correct amount of heat to put on the burner and the proper amount of water to fill inside the wok. After steaming the nian gao over 10 times over the course of several years, I have finally figured out how to cook the nian gao properly on my stove. First of all, you don’t want to fill the wok with too much water, or cook the cake on too high heat because you will overheat the nian gao and your cake will look like what you see in the photo above (top). The deep wrinkles on the cake will smooth out slightly overnight and the cake will still taste fine (see photo above, bottom). It just doesn’t look great. The first time I cooked the nian gao without Mama Lin’s supervision, I clearly overcooked the cake. I tried to hide my mistake by sprinkling shredded coconut over the cake. The next time I cooked the cake, I steamed the cake on medium-low and filled the wok with less water. This also ended in a disaster as I undercooked the nian gao. Even though I added kansui to the batter, the cake still looked very pale instead of deep golden brown color (see photo above). You can also tell there wasn’t sufficient steam generated in the wok because the edges of the nian gao are dried and cracked.
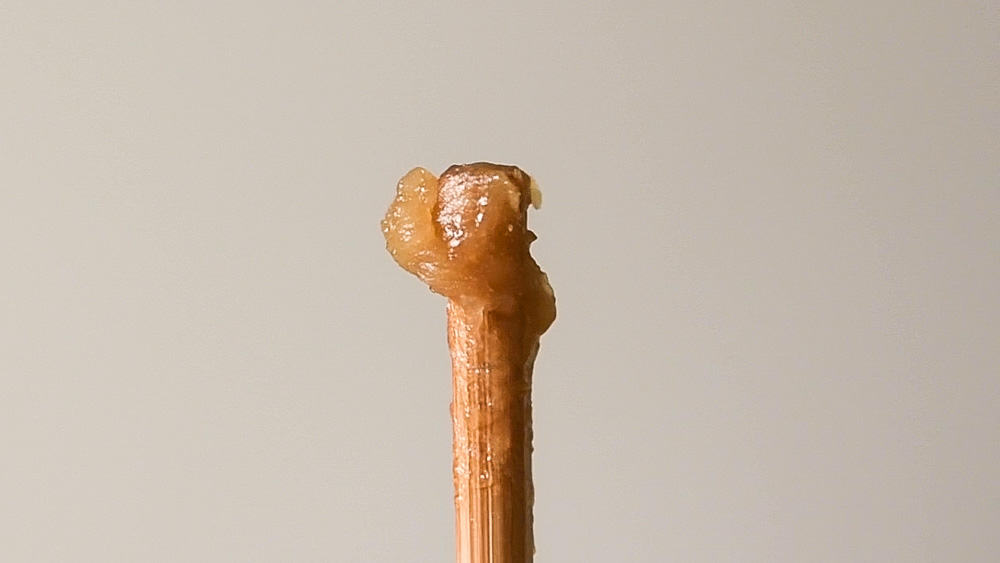
WHEN IS THE NIAN GAO FULLY COOKED?
If you insert a chopstick into the center of the nian gao and dig out some of the cake, the cake should look brown and slightly translucent. The toothpick test doesn’t work well for this cake because your cake can still be undercooked even if the toothpick comes out cleanly.
ALTERNATE STEAMING METHOD
I have seen some recipes (like the one in The Woks of Life) steam the nian gao by placing the cake pans inside bamboo steamer baskets. The only issue is that you’ll need a larger bamboo steamer (one that is at least 10-inches in diameter) to fit a 9-inch cake pan. I haven’t actually tested this cooking method, but I would imagine that the cooking time is similar. It will be difficult to cover the pan with foil and have it fit inside a small steamer basket, so I wouldn’t bother. Condensation doesn’t build up as much underneath bamboo lids because they’re porous and the steam escapes from the top and sides of the lid.
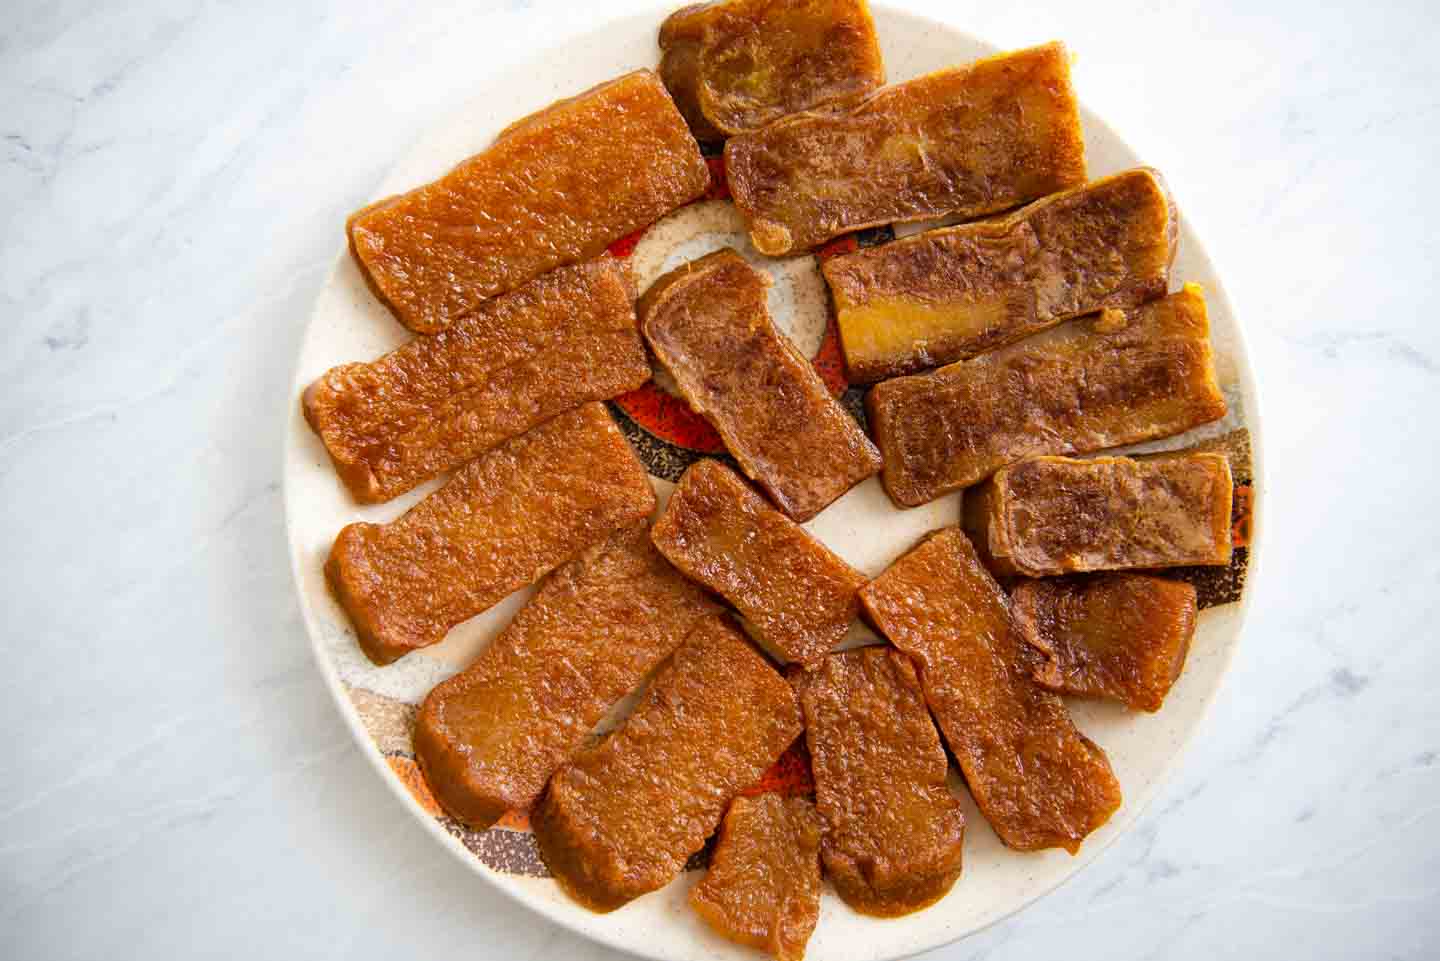
PAN FRY CAKE
Traditionally, families will put the nian gao out as decoration for several days before cutting it up to eat. In my opinion, the cake doesn’t taste that great at room temperature. However, pan frying makes a big difference. Slice the nian gao into 1/4 to 1/2-inch thick slices and pan fry them in oil for a few minutes, until the sides blister. The blistering gives the nian gao crunchy texture which is a great contrast to the soft and chewy center. Try to use a bamboo or wooden spatula to flip over the pieces of cake. I used metal tongs and they were annoying to use because the nian gao kept sticking to the tongs. Some people like to dip the cake in a beaten egg before pan frying to give the cake a savory flavor. If you want to try this, mix the egg with 1 tablespoon of water to thin out the egg. Because of the layer of egg, you can’t blister the sides of the nian gao as much. That’s why I prefer plain pan-fried nian gao. In the photo above, the slices of cake in the upper right portion of the plate were dipped in egg. OTHER LUNAR NEW YEAR DISHES
Gok Zai Savory Tang Yuan Spring Rolls (Pork & Vegetable)