The dough is versatile. Use it to make your favorite pizza creations, from Neapolitan to New York style pizza. This simple, straightforward recipe with step-by-step instructions is the only one you need to finally master your Ooni pizza game and impress friends, family, and curious neighbors.
What is Ooni pizza dough?
An Ooni pizza dough is a recipe designed for ovens that reach high temperatures of around 750°F or 400°C and higher. These temperatures are almost as high as those used in Italy by Neapolitan pizza makers. That’s why Ooni pizza ovens are game-changers! They cook the pizza in about 90 seconds and produce that perfect char on top that adds a ton of flavor. Funnily enough, this type of dough is the easiest to make because it only requires five ingredients: water, yeast, flour, salt, and patience. No sugar or oil is required. They make the pizza brown too fast and burn. Important: Making pizza isn’t easy! It takes practice and patience. This recipe is a good starting point, but to make the best pizza, you need to try again and again. As our British friends say, keep calm and carry on!
Flour
Use pizza flour. You should be able to find it in most supermarkets. Our favorite is Caputo Pizzeria, Caputo 00, and Caputo Nuvola. King Arthur 00 Pizza Flour is also a good option. You can substitute all-purpose flour and bread flour for pizza flour, but working the dough will be a little harder. It’s like driving in snow with summer tires; you can do it, but we wouldn’t recommend it.
Yeast
We recommend active dry yeast or instant dry yeast. Brands that we use and trust (not sponsored) are Caputo dry yeast, Red Start active dry yeast, Red Star saf instant, and Dr. Oetker instant yeast. They are reliable, stable, and always work. You can substitute fresh yeast, but that can get messy if you don’t know what you are doing. For fresh yeast, you’ll need three times the amount compared to dry yeast.
Water
Plain tap water is OK as long as it’s drinkable. If not, then use still bottled water. Water should not be cold or warm. It’s best if it is around 25°C or 77°F.
Salt
We recommend fine sea salt or kosher salt. Important: Since Ooni ovens reach high temperatures, we don’t recommend adding oil or sugar to the dough. They accelerate cooking and make the pizza brown too fast. Why? One should always stay cold, and that’s the one you use to slide the pizza into the oven. The second pizza peel will get warm as it goes in the oven to rotate the pizza and take it out. If you use a warm pizza peel, it won’t be easy to slide your second pizza into the oven. Tip: Perforated pizza peels are easier to work with. DIGITAL SCALE: While you can use measuring cups and spoons, we recommend using a digital scale because it’s simply easier and more precise. Ideally, you have two scales—a regular digital scale for larger quantities like water and flour. And a precision scale for smaller amounts, like yeast, salt, and sugar. Both are available for a few bucks online. LASER THERMOMETER: You need that to measure the temperature of the oven.
1. Measuring the ingredients
This recipe makes three 265 grams / 9.3 ounces pizzas. Start by measuring 3 ⅓ cups or 500 grams of pizza flour, 1 ¼ cups or 300 grams of water, ¾ teaspoons or 2 grams of yeast, 1 ½ teaspoons or 10 grams of salt. You can use cup measurements or a scale with grams measurements. Tip: Using a scale is easier and more precise, and it makes fewer things dirty, meaning there’s less cleanup afterward. Put an empty container on the scale, press “TARE” to zero the scale, and start measuring. For yeast, you might need a precision scale.
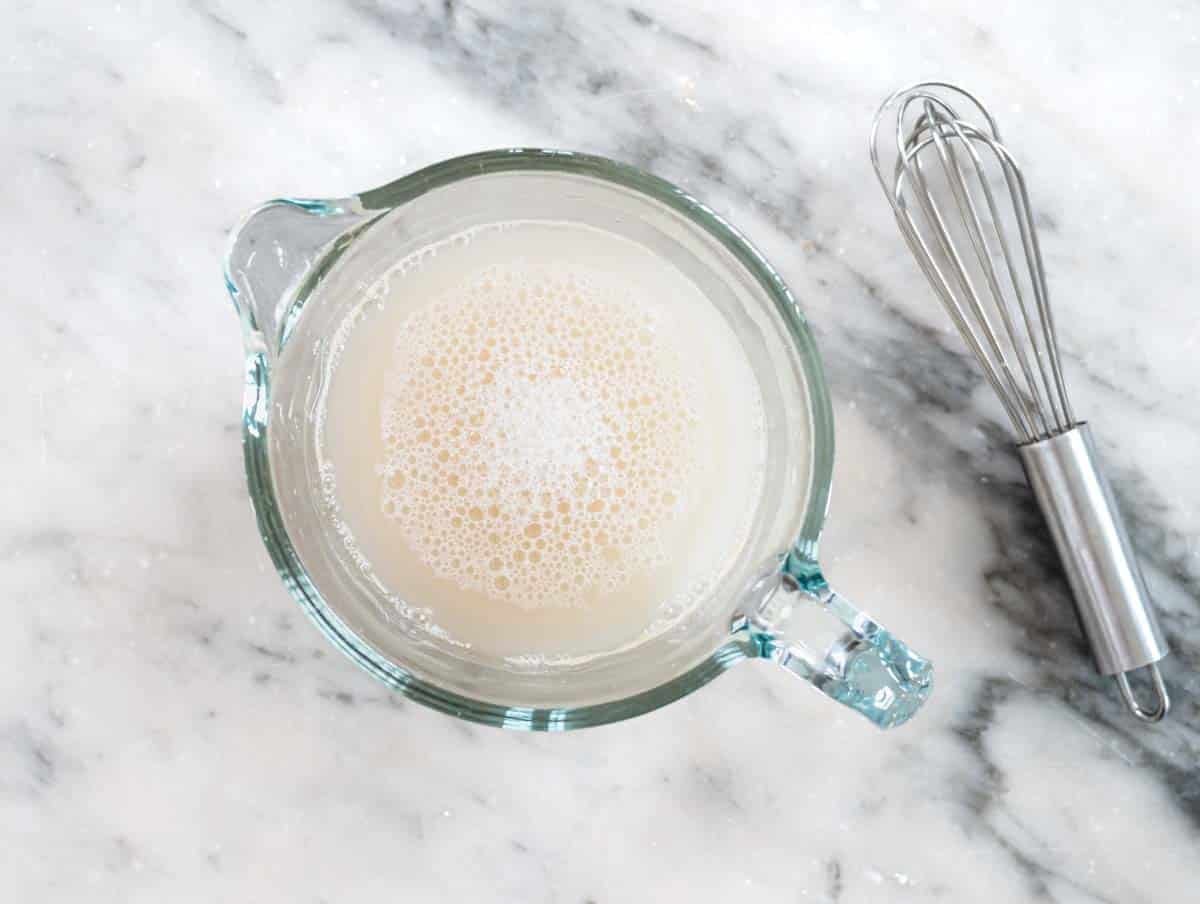
2. Activating the yeast
To a small container, add lukewarm water and dry yeast. Whisk fast until the yeast is dissolved. Tip: If the yeast doesn’t dissolve, it’s dead. Start over with new yeast. Lukewarm means slightly warm, best if at 25°C or 77°F.
3. Making the dough
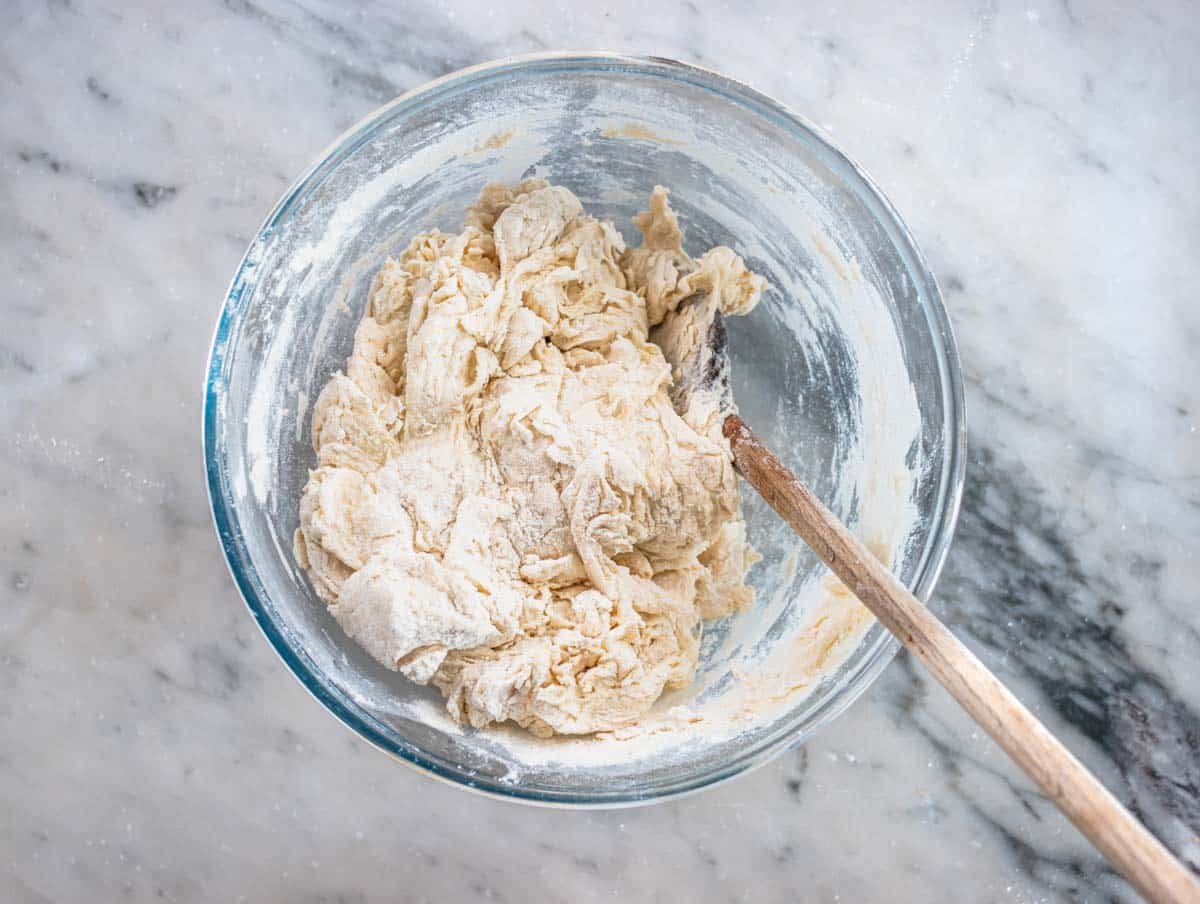
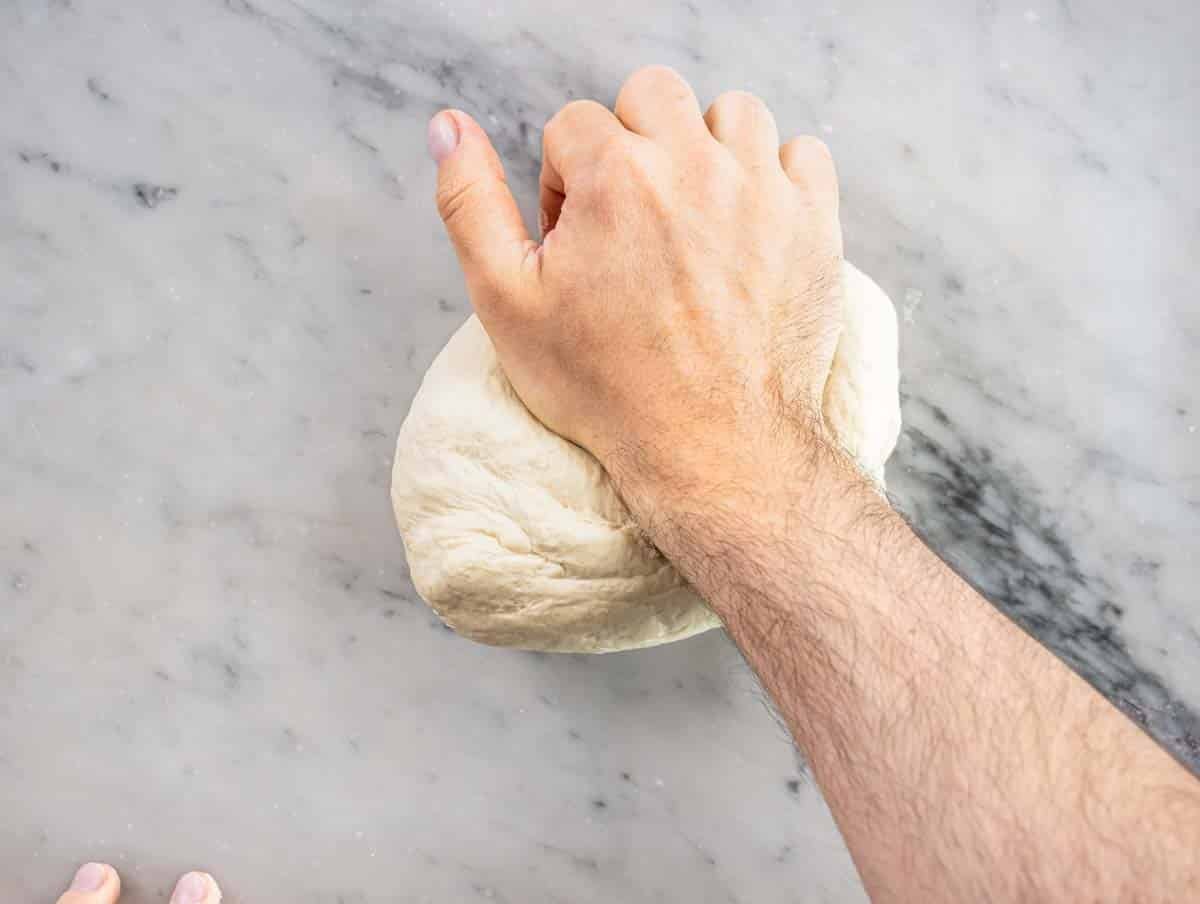
MIXING BY HAND
Add flour and salt to a large mixing bowl and stir them with a wooden spoon. Add all the water and mix with the spoon until the dough comes together—about 1 minute. Transfer the dough to a clean worktop and knead for 3 minutes. Kneading means to press the dough down vigorously with your hand’s heel while pushing it away from you and sliding it forward on the worktop. Then, use the other hand to slide the dough back to its initial position, turning it 45 degrees and giving it a round shape. As a rule of thumb, repeat this movement of pushing forward and bringing back for about 3 minutes or until the dough is smooth. Tip: It’s best to avoid wooden worktops when making pizza. Marble, granite, and stainless steel are best because they keep the dough cool and don’t make it stick. MIXING WITH A STANDING MIXER You can use a kitchen aid or other standing mixer with a dough hook attachment. Add flour and salt to the mixer bowl, and start the mixer at the second lowest speed (it’s on 1 for our Kitchen Aid artisan). Add the water-yeast mixture slowly but continuously and let the machine work for 1 minute or until a dough forms. Stop the mixer and remove the dough from the hook with your hands. Press the dough to the bottom of the bowl to pick up any loose flour. Start the machine again, on the second lowest speed, and let it run for 3 more minutes. Tip: The dough is ready when it clears the bowl. Transfer the dough to a clean worktop and knead it by hand for 1 minute.
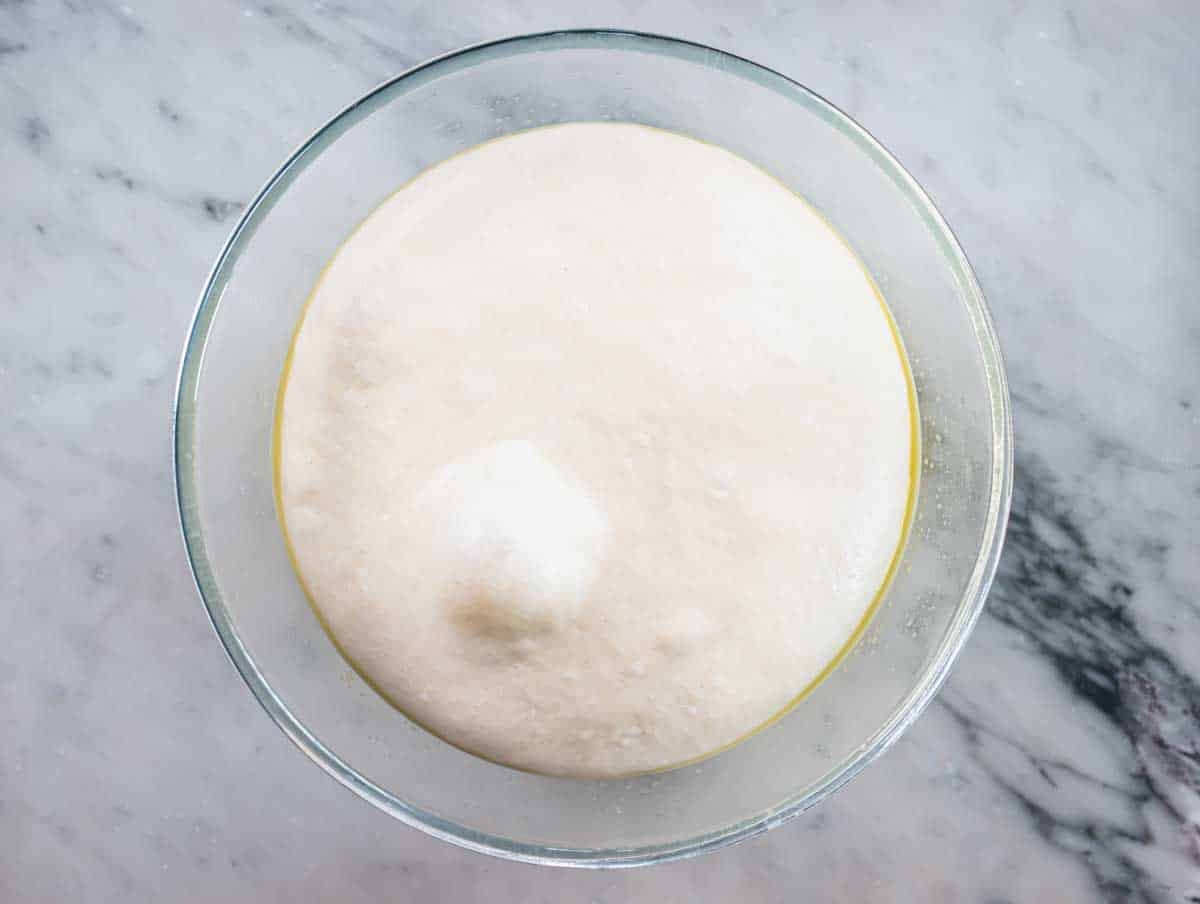
4. Folding the dough
Cover the dough with a bowl flipped upside down and let it rest for 15 minutes. Tip: This resting time is essential to strengthen the gluten network and relax. Push down the dough slightly and stretch it a bit to form a square (1). Now fold it from right to center (2), left to center (3), top to center (4), and bottom to center (5). Do this one to two more times, then shape the dough into a smooth ball by turning it against the worktop. Brush the dough with a thin layer of olive oil to prevent it from drying out, then cover with a damp cloth, a large enough plate turned upside down, or plastic wrap. Tip: Leave enough space between the dough and the cover. Set aside in a warm, draft-free kitchen corner for about 4 to 6 hours or until it doubles in volume. Tip: The ideal proofing temperature is around 80°F or 27°C. For the best and most consistent results, we recommend putting the dough in your kitchen oven turned off, but with the light on. The gentle heat of the light will generate enough warmth to prove the dough to perfection in 4 to 6 hours.Tip: Yeasts work faster in warm climates. If your room temperature is above 86°F or 30°C, you should reduce the yeast in half or shorten the proofing time. In colder climates, yeasts take longer to work. If room temperature is below 68°F or 20°C, we recommend using the oven tip above.Tip: There are many nuances and techniques when proofing a dough, and we can’t possibly explain them all in a blog post. In general, if the dough has doubled, it is done proofing, and you should move to the next step.
6. Making the toppings
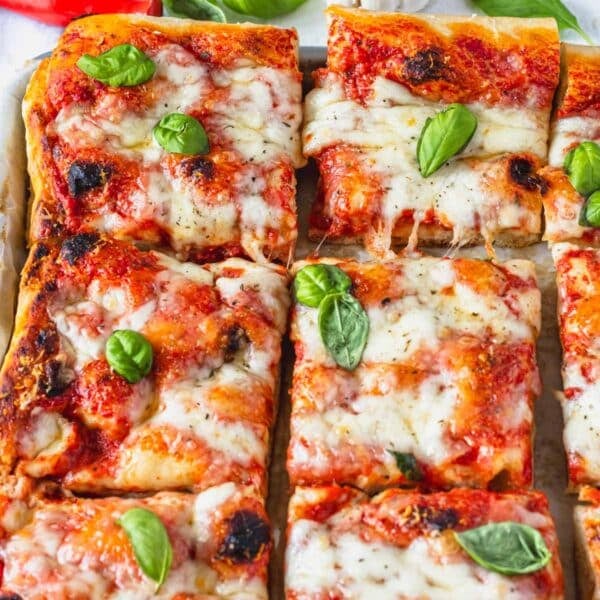
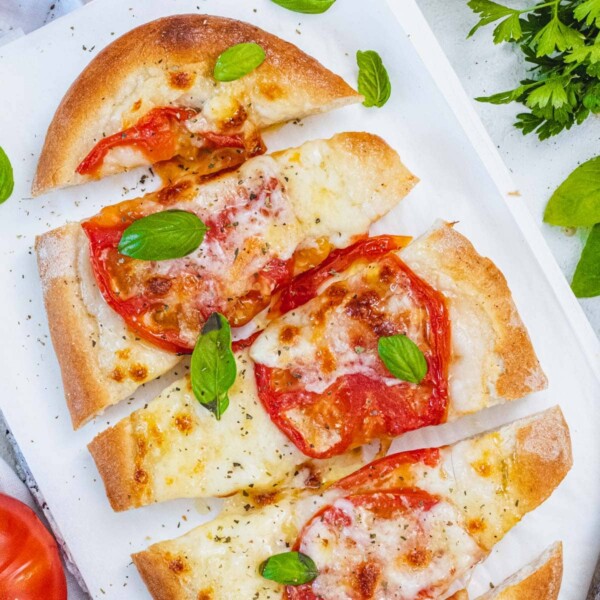
We are making Margherita here because it’s a classic, and everyone likes it. Ideally, prepare the ingredients a few hours before baking the pizza and put them in the fridge. The toppings should be at room temperature when you put them on the pizza, so take them out of the fridge at least 1 hour before baking. For three margherita pizzas, you’ll need the following: Add the San Marzano tomatoes to a bowl and blend with an immersion blender or crush with your hands. I like it blended. Season with 3/4 teaspoon of salt and a tablespoon of olive oil. Chop the mozzarella into sticks and put it to drain in a sift over a bowl. Put the sauce and mozzarella in the fridge. Remove them from the fridge one hour before baking the pizza.
7. Balling the dough
After proofing, transfer the dough to a clean worktop. To do so, we put the bowl upside down and wait for the dough to fall. Cut it into 3 pieces, each 9.3 ounces or 265 grams. There’s no need to use flour. Tip: This is the size of a standard Neapolitan pizza served in Italy, and it is enough to feed one person. Stretch gently, and fold each piece on itself towards the center, turning every piece 45 degrees as you fold it. Do this several times until you have a tight ball that’s smooth on the surface. Make sure to pinch the seams together to make a ball. Smoothen the ball by rolling it on the worktop. You want a smooth ball that’s well-sealed.
8. Resting and preheating the Ooni
Guys, we are almost there, I promise! We now need to let the dough balls relax so we can shape them easily. During this time, we can preheat the oven and remove the prepared toppings from the fridge. Then, line a baking sheet with parchment paper and sprinkle it with flour. Arrange the balls on the tray with enough distance from each other for them to grow in diameter by about 25%. Cover with a damp kitchen cloth or plastic wrap and set aside in a warm kitchen corner for 30 to 60 minutes. Alternatively, and probably easier, you can put the dough balls in individual airtight containers. Brush the containers with olive oil, add the dough balls, close them, and let them proof for 30 to 60 minutes.
9. Stretching the dough for Neapolitan style
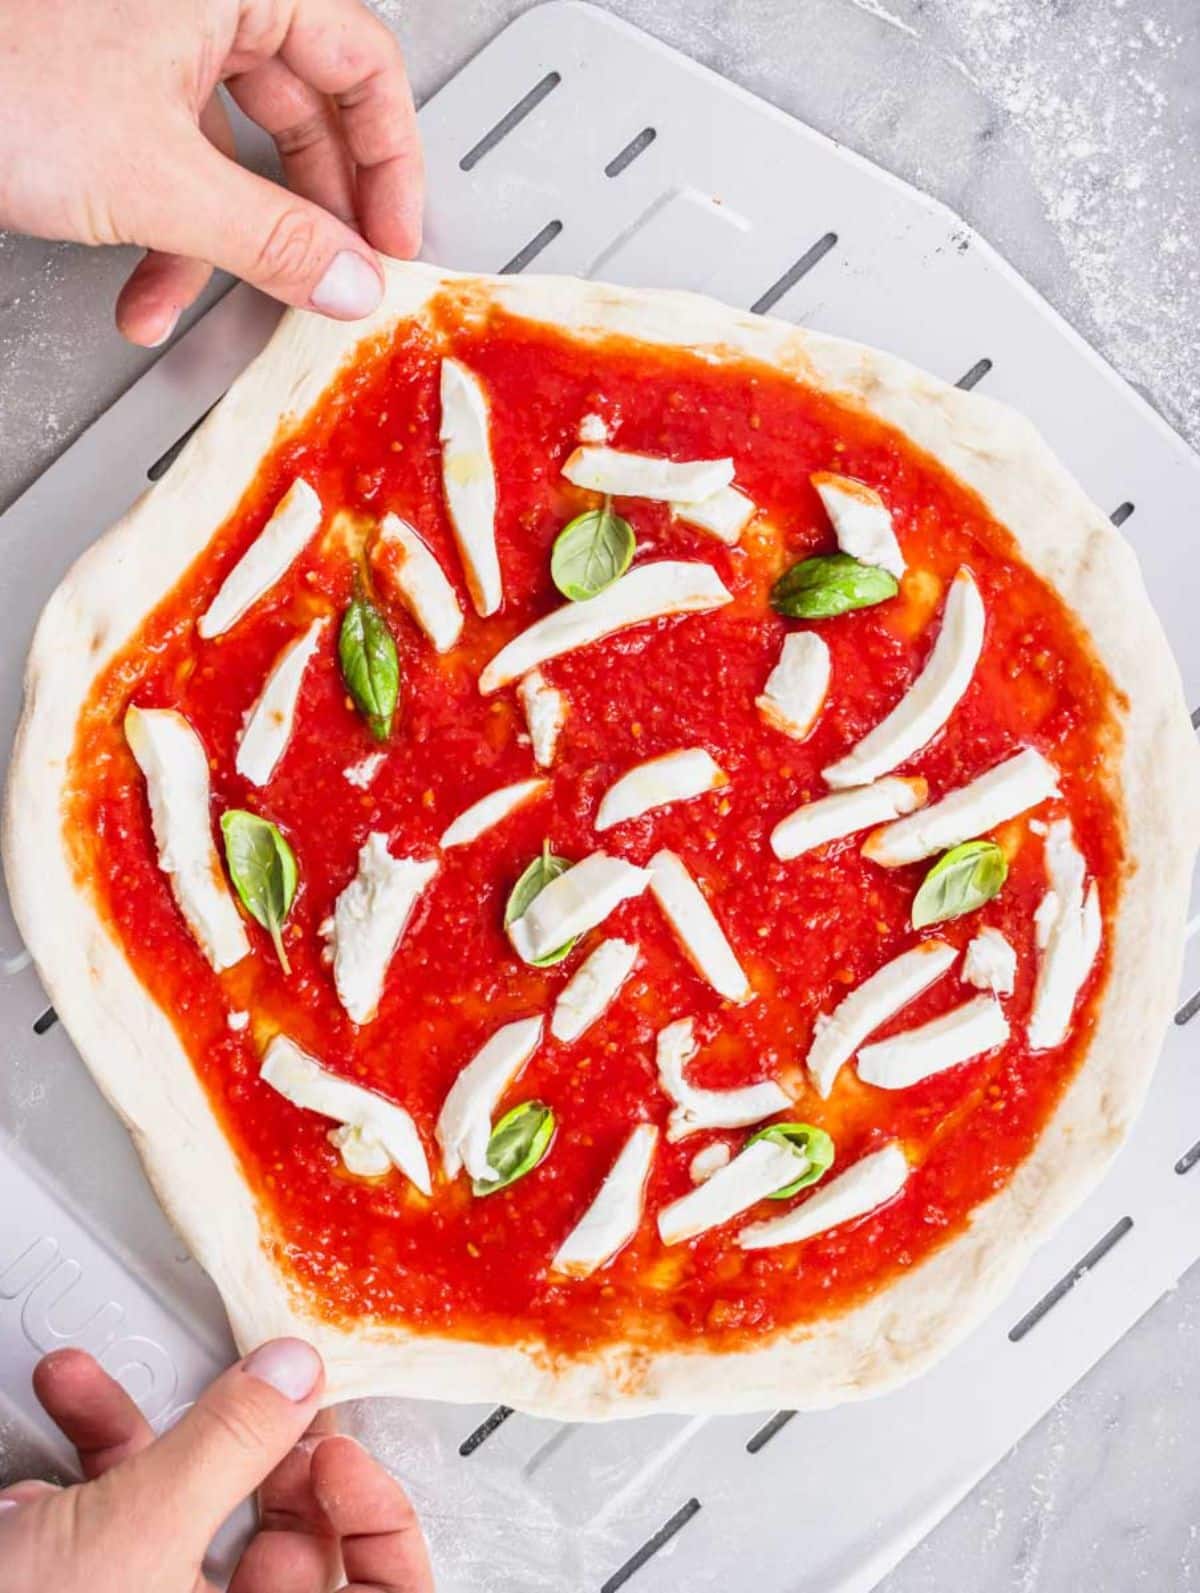
Tip: You are ready to stretch only when all your toppings (sauces, cheese, veggies) are ready and the Ooni has reached a temperature of at least 750°F or 400°C. Dust your worktop generously with flour. Next, put your pizza peel next to where you are working and dust it with two pinches of flour. Carefully uncover the one dough ball you are about to work. Keep the others covered. Lift the ball from the baking tray with a flat spatula and gently turn it upside down on the floured worktop. If the dough is in an airtight container, turn the container upside down and let the dough fall gently on your floured countertop. The dough is very soft at this point; be very gentle. You want to preserve the round shape and all the bubbles inside. Sprinkle the dough with a generous dusting of flour. Gently turn the dough over so that it’s right side up again. Now extend your fingers and put your hands together, the index fingers touching. Start flattening the disc with your fingertips flat. Press down from almost the center of the disc, leaving about 3/4 inch or 2 cm on the edges. Avoid touching the rim and avoid touching the center too much. Press down on the second circle in the picture and push/slide away from the center to stretch the dough a little, gently. Rotate the dough slightly and repeat until you have a circle of about 10 inches or 25 cm in diameter. Now, bring the dough over your knuckles. Again, try not to touch the rim and the center much. Work swiftly but gently. Pull your hands away from each other slowly while gently stretching the dough and rotating it. Extend it to a 12 to 13 inches or 30 to 33 cm disc. Put the stretched Ooni pizza dough on your lightly floured pizza peel. Tip: The pizza doesn’t have to be fully stretched at this stage; it’s OK if it pulls back a little. We’ll give it a final stretch when the topping is on. Before adding the toppings, rock the pizza peel back and forth to ensure the pizza slides easily. If it doesn’t, remove it from the peel, dust the peel with flour, and put the dough back on. Top with a couple of tablespoons of tomato sauce, spreading it with the back of a spoon. Add a few basil leaves, top with 3.5 ounces/100 grams of mozzarella, and finish with grated parmesan cheese (optional) and a drizzle of extra virgin olive oil. You need to work fast so the pizza doesn’t stick to the peel. Tip: Don’t add too much topping. Especially on your first pizza. Now pull the edges of the pie gently to widen it a little and reach a full size. The weight of the toppings will help keep the pizza in place. Tip: The rule of thumb here is to put a lot less topping than you think—especially wet ingredients like tomato sauce and mozzarella.If you put too much, they will 100% tear the dough, fall on the pizza stone, and you’ll have to order takeout. So don’t be greedy. I warned you.
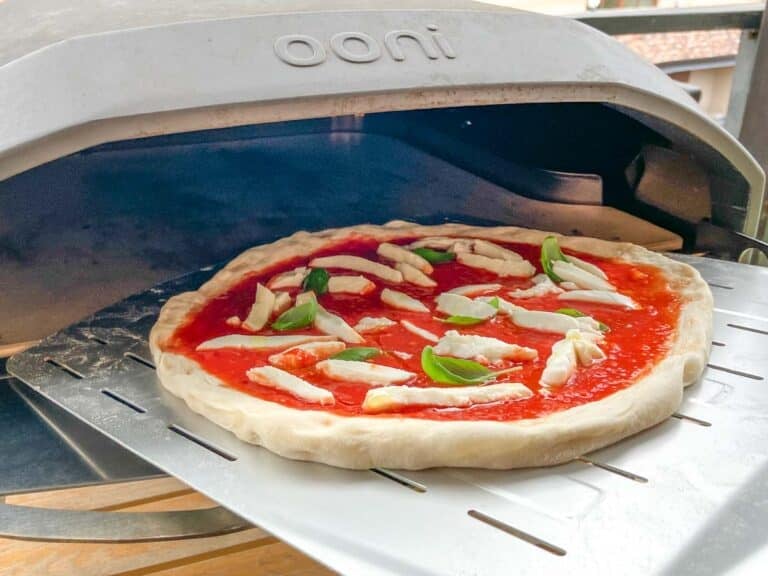
11. Cooking the pizza
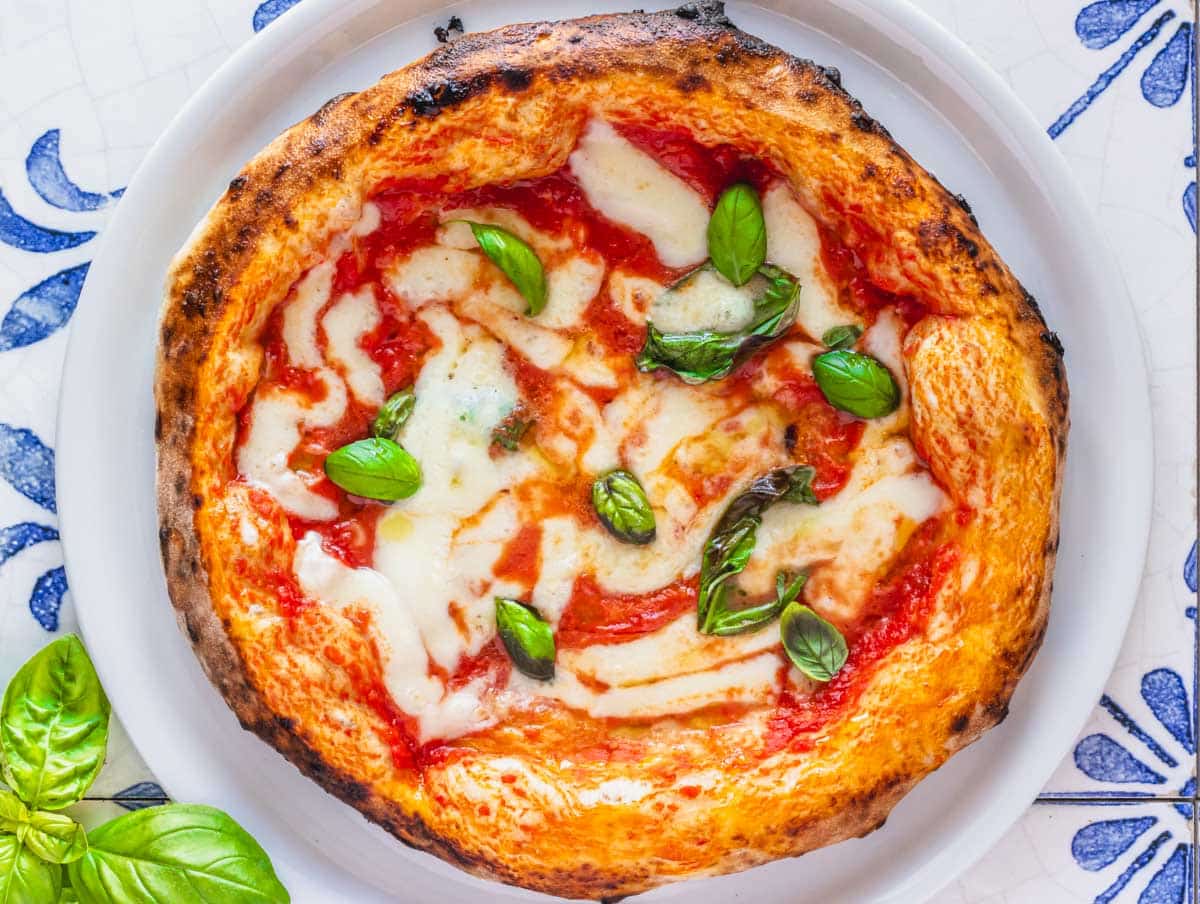
Note: I’m showing Neapolitan-style cooking, which is 90 to 120 seconds at high temperature. If you like crispier pizza, lower the temperature of the Ooni to 550°F or 290°C and cook the pizza for 3 to 4 minutes on a low flame, rotating it often. Put the pizza in the center of the pizza stone of the Ooni oven. To do that, go inside the oven with the pizza peel, touch the stone at a 15-degree angle, and swiftly pull back the peel under the pizza. After 60 seconds, rotate the pizza to ensure it cooks evenly on all sides. Use the second pizza peel to do that so the first one doesn’t get warm. If you see the pizza cooking too fast, lower the oven’s flame. This depends on the wind and temperature outside, so keep an eye on the crust. The pizza should cook for 90 seconds to 2 minutes, depending on the oven temperature. Cornicione means “frame” in Italian, and it should beautifully frame the other ingredients—with a mouthwatering caramelized brown color and some charred spots for extra flavor. You can finish the pizza with a drizzle of extra virgin olive oil on the rim and fresh basil leaves. Cut the pizza with scissors into six wedges. Fold the wedge in half and enjoy!
Pizza flour: 3 1/3 cups | 500 grams Water: 1 1/4 cups | 300 grams Yeast: 2 teaspoons | 7 grams Salt: 2 teaspoons | 10 grams Sugar: 2 teaspoons | 10 grams
Add the sugar to the yeast and the water. Then from there the process is the same as our our main Ooni pizza dough recipe. Proofing time is about 1 to 2 hours, or until the dough doubles in volume. To speed things up, put the dough to proof in your oven, turned off but with the light on so that the mild heat generated from the light helps the dough raise. Note: Keep in mind that pizza with less yeast and more time to mature is tastier, lighter, and easier to digest.
Toppings
New York Style Pizza
Final considerations
More pizza & bread ideas
Focaccia bread Focaccia pizza Flatbread pizza Pita bread (turns out incredible in the Ooni) Naan bread
Looking for something to eat with this? Check out our compilation of 25 sides dishes to eat with pizza. We showed you Neapolitan style, which is our favorite to make in an Ooni oven because I feel like the guys that designed the Ooni had Neapolitan pizza in mind. It’s perfect for it! The high temperature an Ooni oven can reach makes a pizza as delicious as one of the best pizzerias.
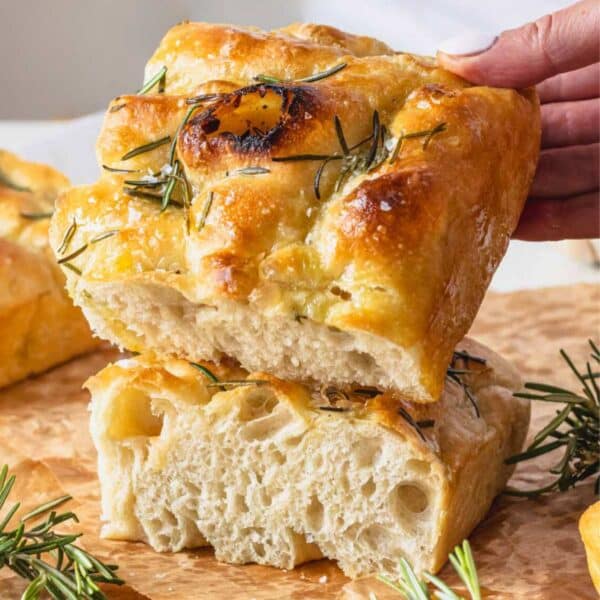
Pizza bianca with rosemary and olive oil
If you’ve never baked with an Ooni oven before, our recommendation is to start with this pizza. It’s the easiest to slide off the pizza peel. It’s also deliciously crunchy and chewy and excellent to get the evening going as a starter, while your guests wait for the actual pizza. Cut it into wedges and serve it with olives, cheese, cold cuts, hummus, and other spreads and dips. To make it, flatten the pizza with your hands for a soft and chewy pizza or with a rolling pin for a crunchy pizza. Pierce with a fork all over, then top with a drizzle of extra virgin olive oil, rosemary needles (fresh or dry), and a generous pinch of sea salt or salt flakes. Bake for 90 – 120 seconds at around 660°F or 350°C. Rotate it often to cook on all sides. Cut 4 dough balls of 150 grams or 5.2 ounces each. You’ll probably have some leftover dough. Flatten the dough all the way to the edges by tapping it with your hands first, then stretching it on your knuckles like we showed you before. You don’t need a thick rim for New York Style. Then, apply marinara sauce and dry, grated mozzarella cheese on top. Dried oregano is optional. The oven temperature for New York Style should be around 550°F or 300°C, and the baking time should be around 3 to 5 minutes in an Ooni oven.
Roman Style Pizza
Roman-style pizza, also called “pizza scrocchiarella” or the crunchy one, is the most popular pizza type in Italy, outside of Naples. You can make it with this same dough recipe. Cut smaller dough balls of about 130 grams or 4.5 ounces each. You’ll have leftover dough, which you can use to make a smaller pizza or pita bread. Flatten each dough ball with a rolling pin. Yep, that’s how Roman pizza is flattened. It should be very thin, all the way, with no puffy rim. You can top it with whatever you want but don’t put too much topping because it won’t get crunchy if you do. Here, we baked it with marinara pizza sauce and added grilled veggies on top one minute before it was done baking. To cook this pizza, the Ooni oven should be at 520°F or 270°C. The bake time is about 4 minutes. Rotate the pizza often and cook on a low flame.
Storage & Make Ahead
If you want to keep it longer than 24 hours you need to use a flour with more protein (12.5% and up) and a higher W value of about 300 and up. You could also add some honey or diastatic malt to the dough – about 2 teaspoons should be enough. Remove from the fridge, let it reach room temperature (about 1 to 2 hours), and proceed as per our instructions above. Freezer: You can freeze the dough after the first bulk proofing. Shape the dough into balls and freeze in individual freezer bags for up to 3 months. Thaw at room temperature, then proceed with the recipe. It takes practice and patience to get to know the dough, the oven, the flour, and how a few simple ingredients react with time and heat to make this magical food. So, take your time with this recipe. Read it multiple times and be prepared to make mistakes. We believe in you; you can totally do this 💪❤️🍕
Focaccia
Focaccia Pizza
Flatbread Pizza
Pita Bread
Since you’ve gotten so far down the page…here’s a tip if you happen to travel to Berlin, Germany. It’s where our favorite pizzeria is –> The Grain – It truly is a slice of heaven.