Unfortunately, they’re rarely seen outside of France except at some specialty bakeries such as Dominique Ansel in Soho. And can I say they’re absolute perfection with tea or coffee? It inspired me to add masala chai into the mix! I know some French person is probably rolling in their grave with my addition, so let me preface this and say these ARE NOT authentic canelés for several reasons, i.e. the mold, seasoning, and flavor. Most cookbooks and blogs that I referenced mentioned that these pastries take some skill and technique to perfect, but that they’re easy enough to make with some attention. Like all good things that take forever, the reward is high at the end! Intrigued, I took about a week compiling information, tips, and trialing recipes to get it right. Buckle up, this is going to be a fairly long post. Stick with me, I promise it will give you all the information you need to perfect canelés on your first try (fingers crossed!).
Canelé Molds
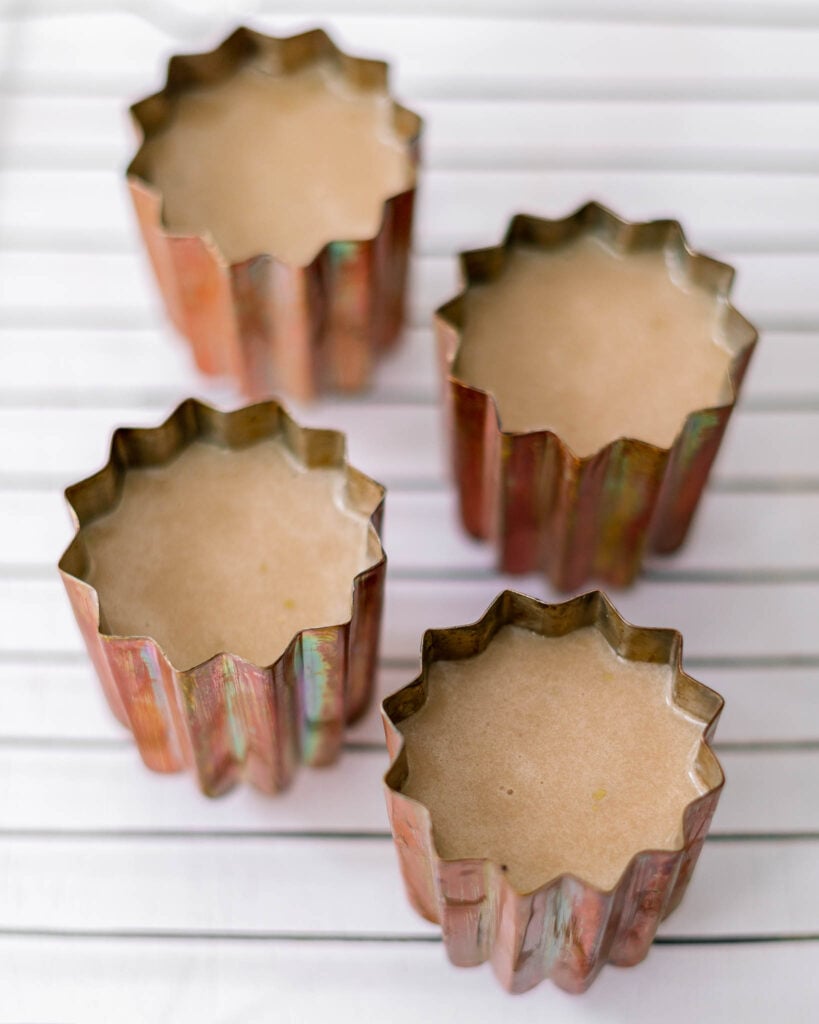
The first thing you’ll need for the signature look is ridged, fluted molds. After reading a ton about canelé molds, I came to the conclusion that getting copper molds were the move. The copper’s ability to conduct heat gives canelés that trademark crunchy exterior while keeping the inside custardy. Will I ever use them again? TBD. I don’t regret spending $29 on 4 molds. The copper did wash off a bit during seasoning and baking because the butter bubbles down the sides. You can splurge and get the ones that are $30 each from Bordeaux, but I genuinely don’t see why unless you’re an enthusiast or you own a bakery. While I didn’t test the silicon molds, most people said they just couldn’t achieve the same texture with them. If you want to try and use the baking molds you have, check out this website. Scroll about ⅔ of the way down, and they actually tested different molds you can use to bake canelés.
Seasoning Copper Canelé Molds
If you’re planning on using copper molds, YOU MUST SEASON THEM. My first time around wasn’t done right and the canelés took half an hour to detach from the sides. The first batch was edible, but ultimately trash. It was an absolute nightmare. Over time, the seasoning will become stronger. Be sure to gently wipe the molds with a paper towel after use to clean them. Do not scrub or scratch, otherwise the seasoning will be damaged.
☕ Let’s Talk About Chai
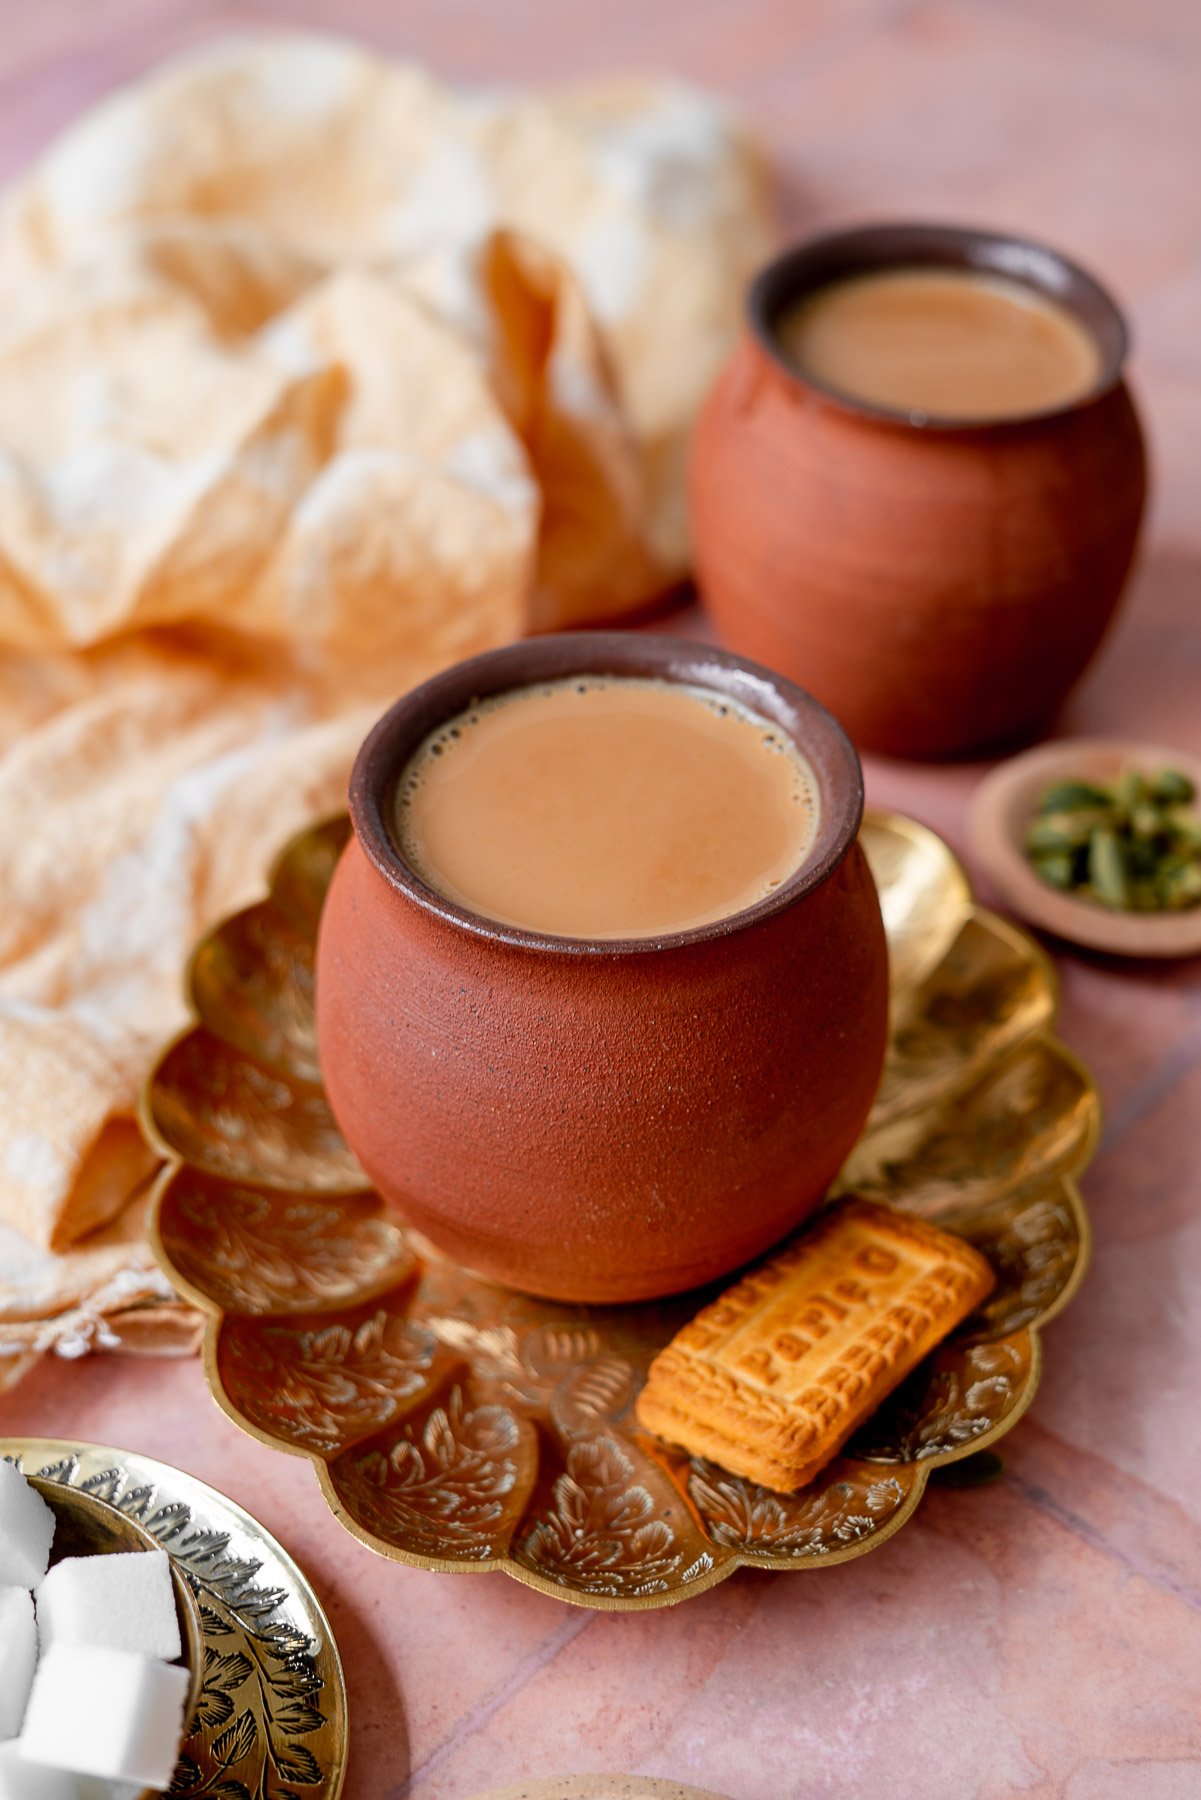
Chai means tea. Masala is a mixture of ground spices. Thanks to Oprah’s chai tea latte at Starbucks, chai became widely popularized in the U.S. as some watered-down cinnamon heavy tea. People everywhere began saying “chai tea”… “chai tea”, meaning “tea tea”… I cringe every time I hear it. Don’t be this person. Chai typically refers to black tea with milk, the drink of choice for people on the Indian subcontinent. It’s a huge part of our culture whether we’re en route somewhere, cozying up at home, or bonding over chai with family and friends.
Masala Chai
Masala chai is black tea boiled with whole milk and aromatic spices - the most common being cardamom, black pepper, cloves, cinnamon, and ginger. Hence, chai masala is the spices used to make masala chai. If a recipe says “chai spice glaze,” I’d expect for there to be cardamom, cloves, etc to make the glaze aromatic and flavorful. If it says “chai glaze,” I’d expect for the recipe to use black tea leaves to make a glaze. This recipe is called Masala Chai Canelés, which means you’ll be making masala chai and using it to flavor canelés! For this recipe, I ask you to use a masala chai mix to simplify the ingredients. You can buy from quality brands like Madhu Chocolate, One Stripe Chai Co., Kolkata Chai Co., or concentrates like Dona Chai. You can also make your own masala chai without using water. If making your own masala chai, use a minimum of 2 black tea bags and add about 10ml of milk to account for any that evaporates and allow a longer cooling period. Note: We’re using cardamom powder in addition to what’s in the masala chai. We add it at two different points because the first addition is to allow the flavor to mingle with the batter for a few days, and the second addition is for the fresh fragrance it lends.
How to make the Batter
Amazingly enough, all the ingredients for canelés are pantry items! The only thing here is that the batter needs to rest for a minimum of 12 hours and a maximum of 4 days, so plan ahead. I’d recommend 24 hours for the flavors to develop. If you’re not eating it immediately, you can even bake a few a day to maintain the crispy exterior. Step 1. In a sauce pan, bring the milk, butter, and masala chai mix to a simmer. Continue to simmer until the butter has melted and the masala chai has fully infused. If you’re making your own masala chai, add 10ml of milk to account for any that boils off. Step 2. Allow the milk to cool to about 125°F, measuring with a thermometer or when you can touch it without burning yourself. Pour the milk through a fine mesh strainer to remove any tea leaves. Step 3. While the milk is cooling, whisk together the egg and egg yolks in a large bowl until the mixture is homogenous. Do not whisk past this point. In a separate bowl, whisk together the sugar, sifted all purpose flour, half the cardamom powder, and salt. Step 4. Once the milk has cooled, continuously whisk the eggs with one hand and begin slowly pouring the milk down the side of the bowl with the eggs. This brings up the temperature of the eggs without cooking them. Continue tempering the eggs until all the milk has been whisked in and the custard has formed. Step 5. Slowly whisk in the dry ingredients, making sure to remove all lumps but not overmixing to aerate. Step 6. Strain the batter into a pitcher, preferably with a spout. Cover and refrigerate.
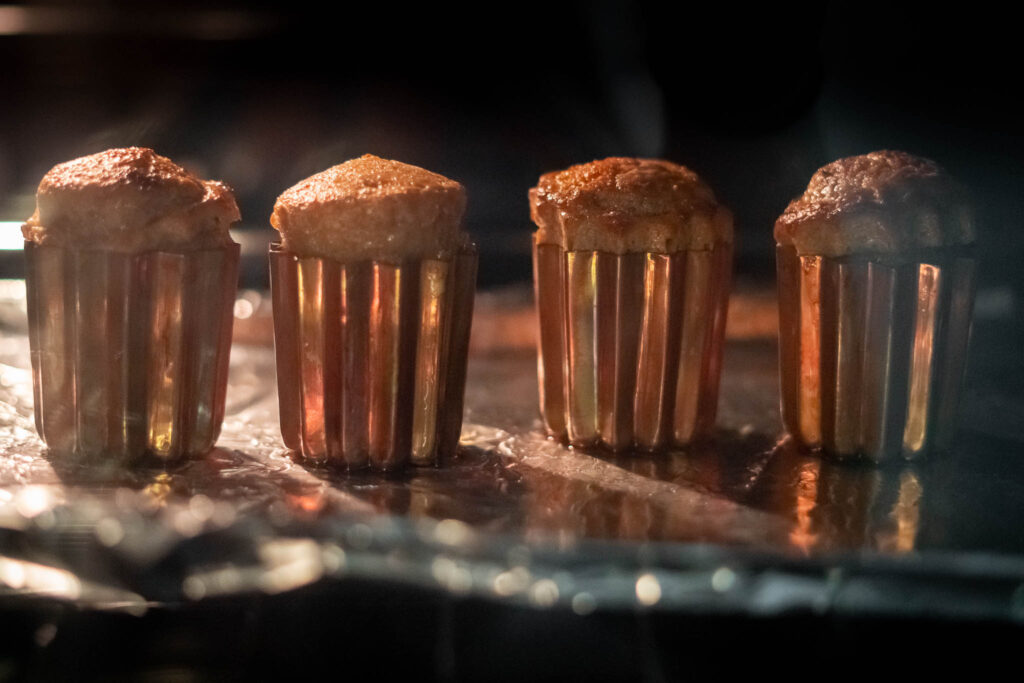
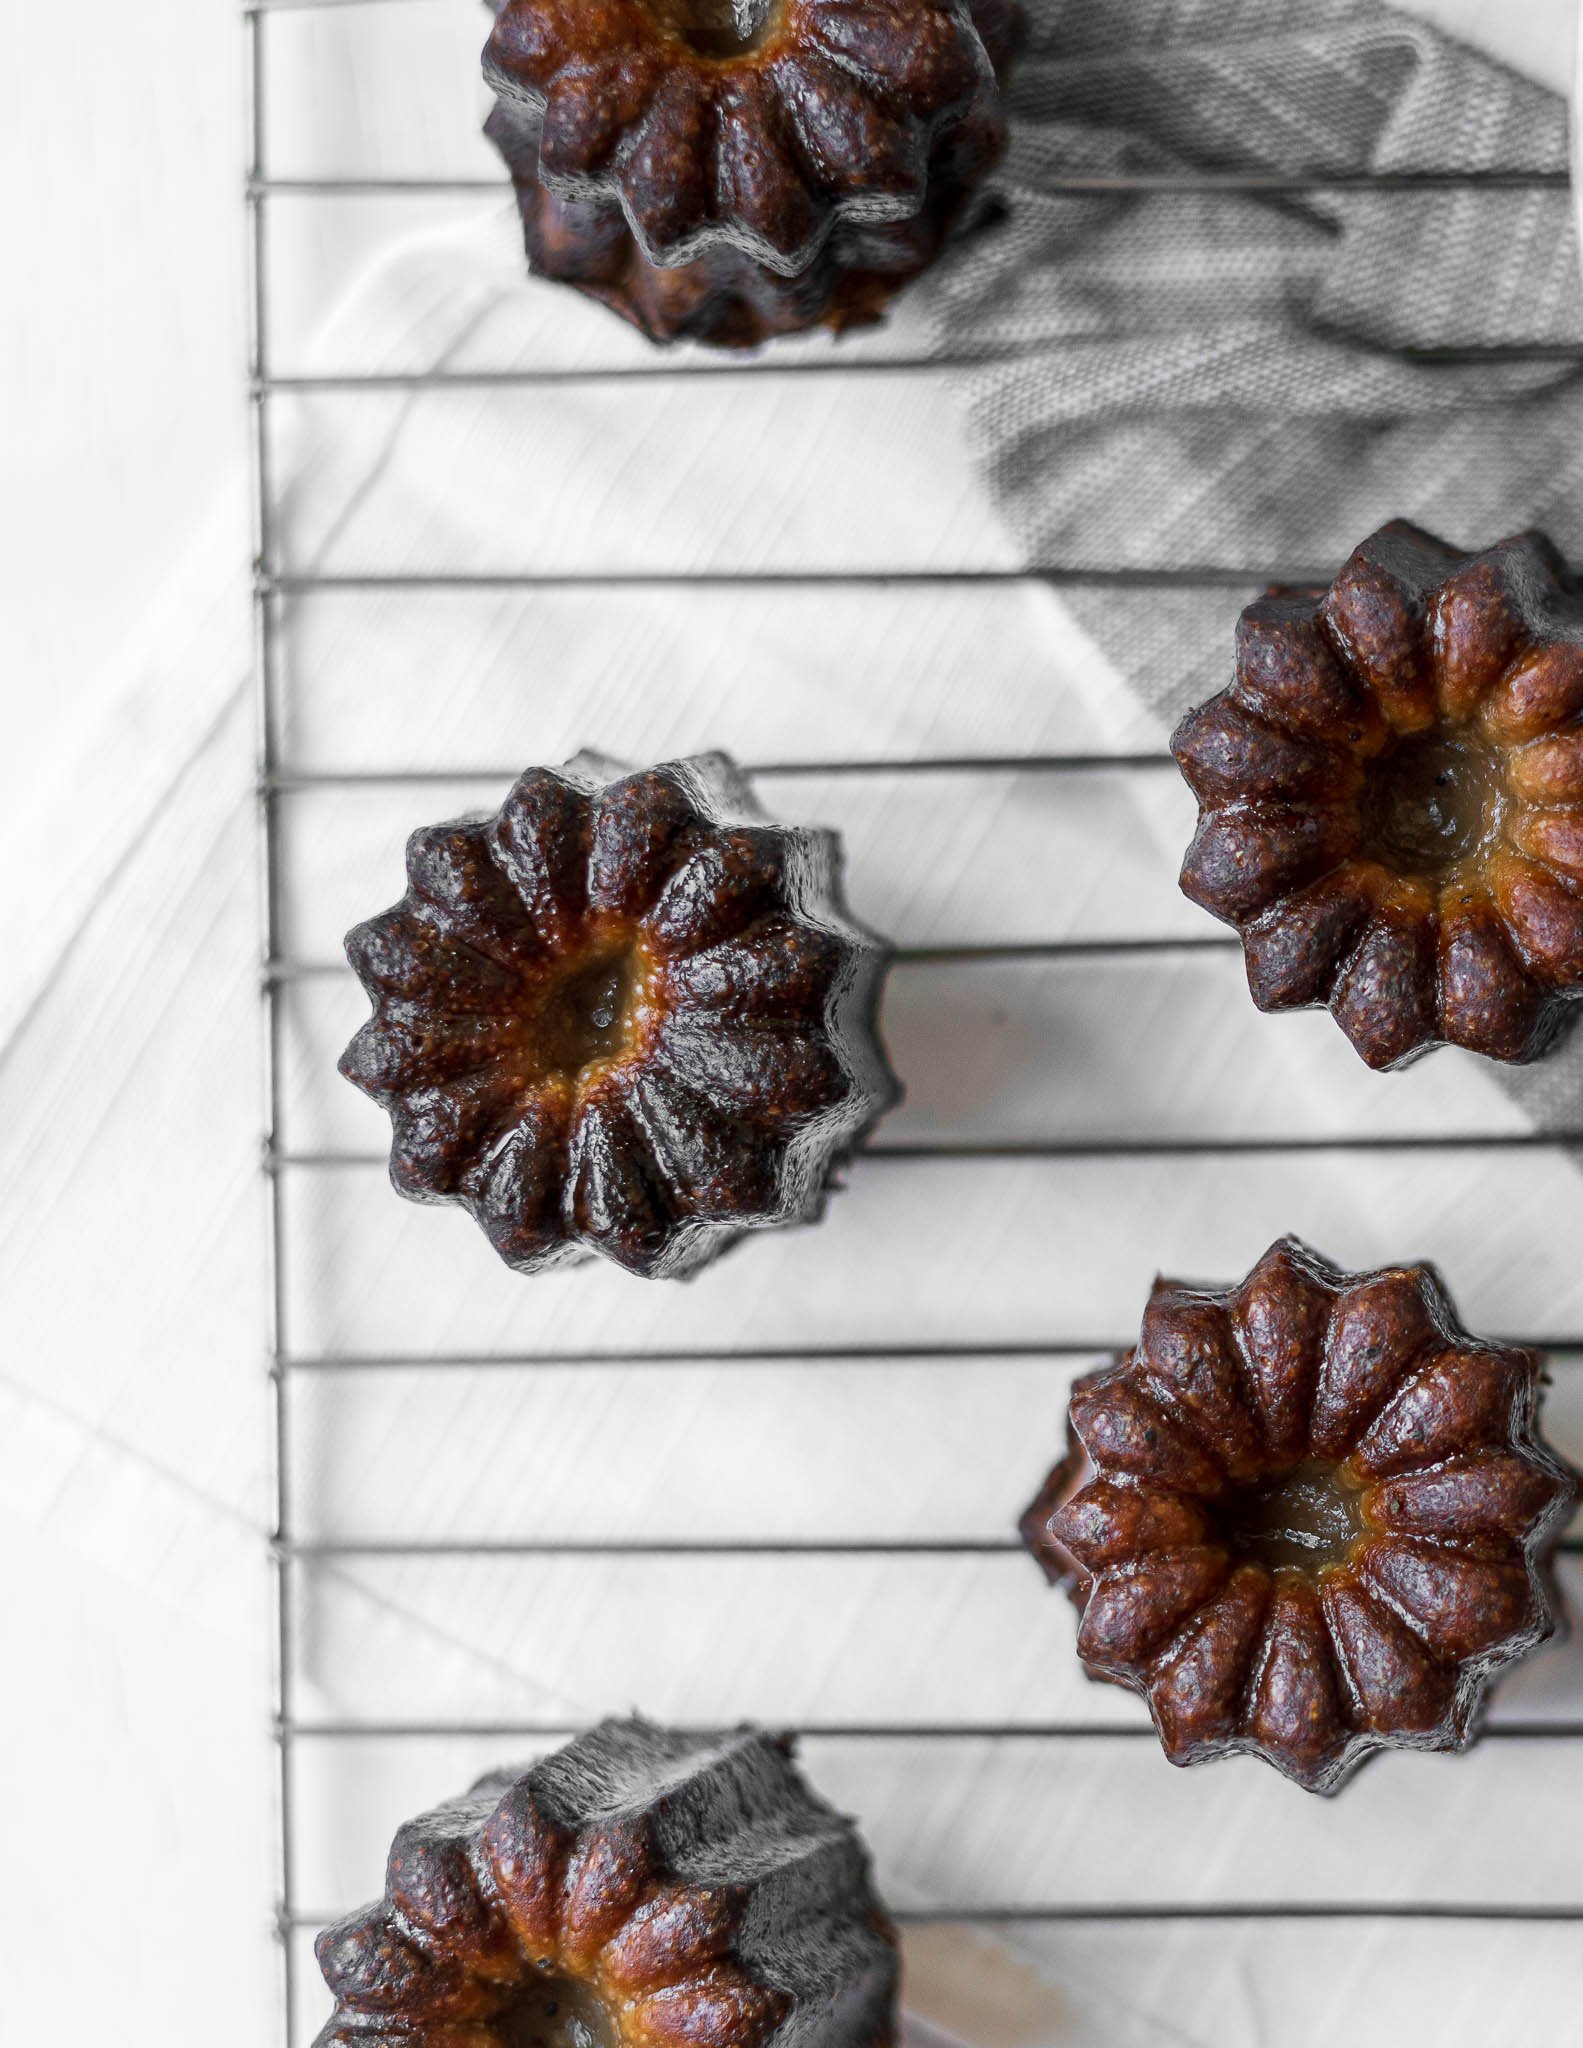
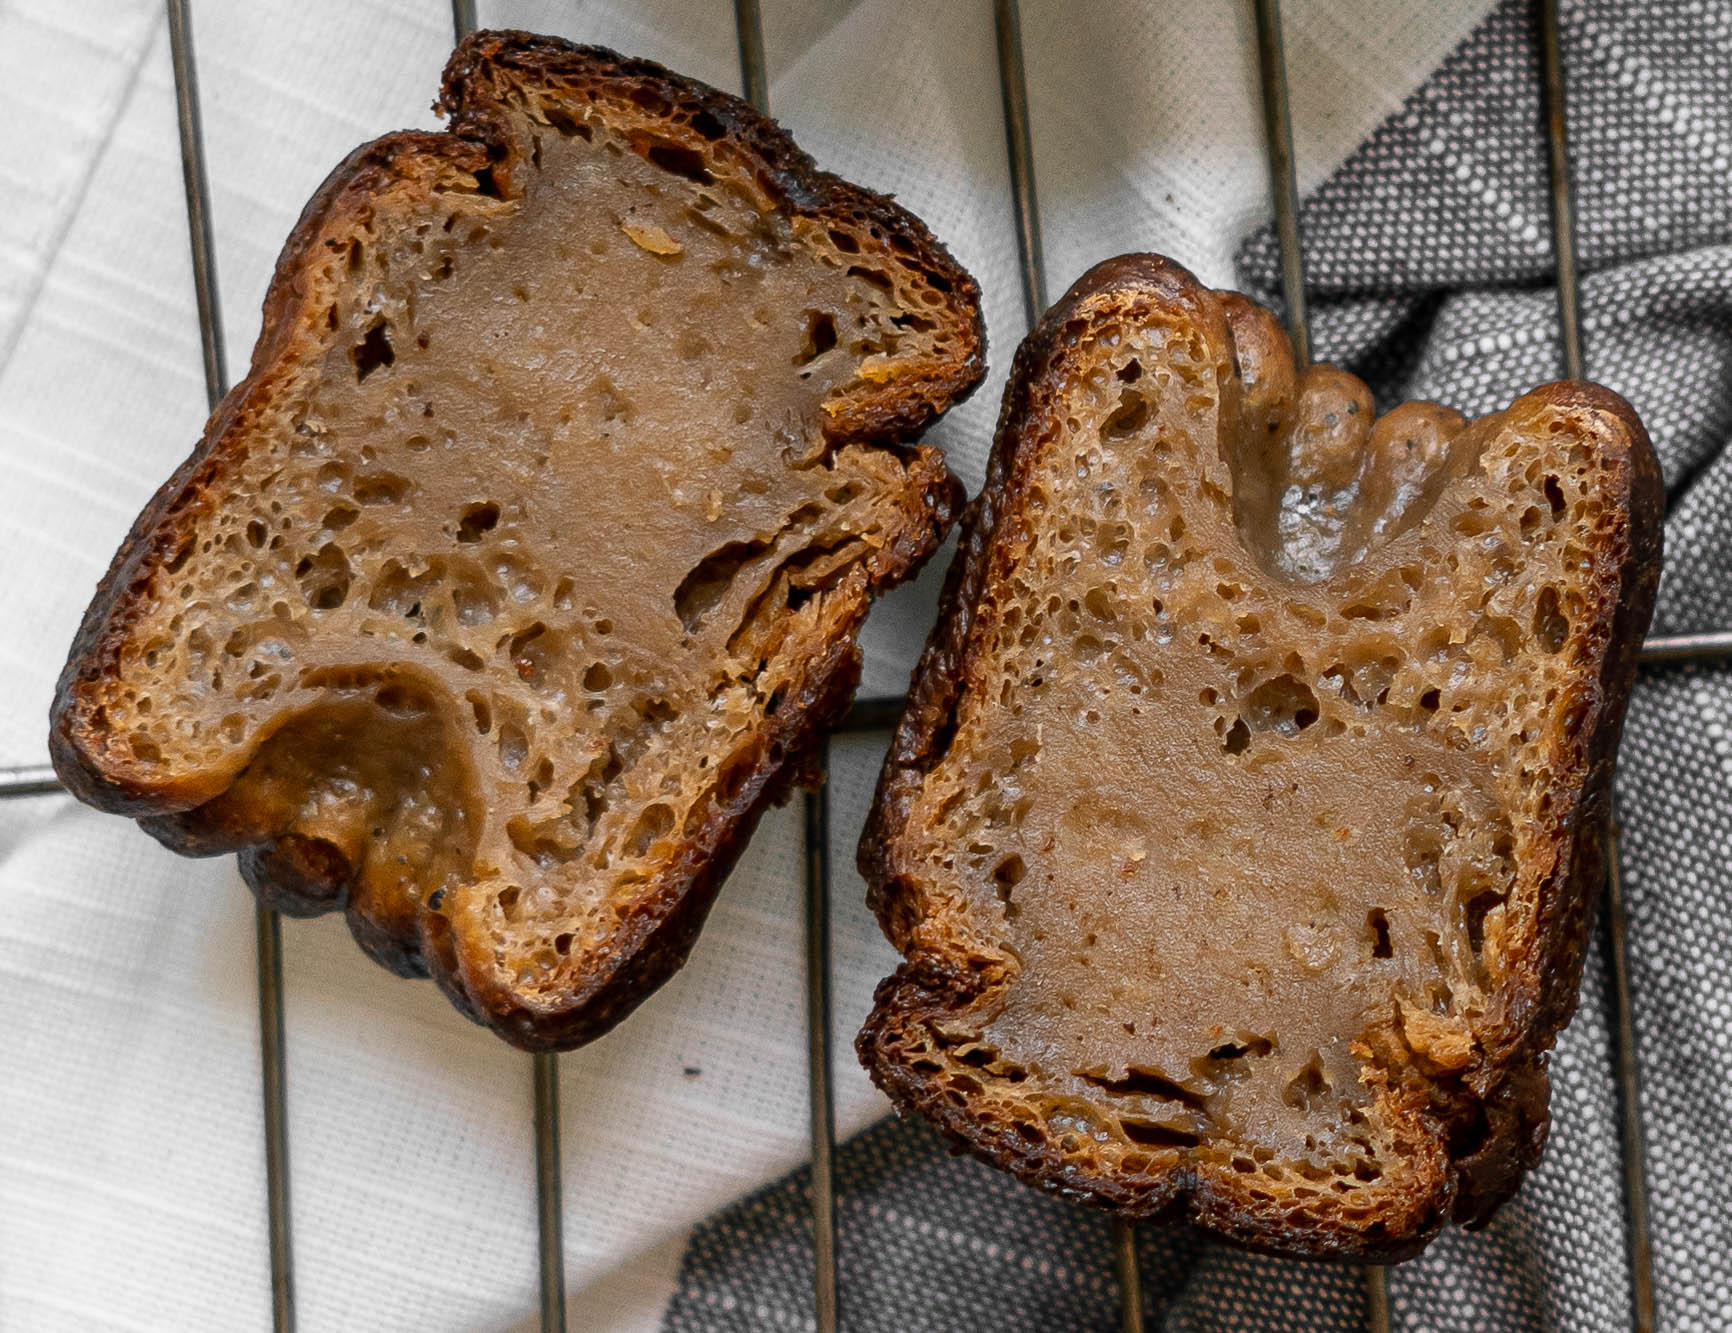
Baking the Canelés
The canelés should be removed from their molds as soon as possible. Removing them should reveal a gorgeous dark, thick crust all around the pastry. Use hot hands or oven mitts to handle the molds. They should slip out of their molds when flipped upside down. Cool them on racks for at least 30 minutes. This allows them to set and the exterior to properly harden as the moisture evaporates. Preheat the oven to 550°F. Brush the molds with melted butter before use. Pour the batter ⅘th of the way up the mold. Place the molds on top of a baking sheet outfitted with aluminum foil. Bake at 550°F for 10 minutes. If you only bought four molds like me, all you need to do between batches is allow the molds to cool and wipe them clean. Brush with butter, replace the aluminum foil on the baking tray, and then reheat the oven to 550°F.
Troubleshooting Canelés
My first few batches had a few issues - so I’ll go over them here to help troubleshoot.
How to Store
Honestly, I haven’t found a way to maintain a crunchy crispy canelé. I tried air frying and baking in the oven and it’s not even remotely as satisfying. If anyone has, let me know in the comments! Canelés are best enjoyed fresh within 3-5 hours of baking and served with tea or coffee. If you must store canelés, store them in an airtight container on a countertop. Enjoy them as spongey cakes the next day.
More Chai Related Recipes to try
Chai ConcentrateMasala ChaiChai LiqueurChai White RussianChai SpiceChai SyrupChai Hot ChocolateChai Spice Chocolate Chip Cookies
Recipe
Thinking about making this recipe? Enter your email and I’ll send it straight to your inbox to save for later. Plus, get new recipe inspiration from me every week! By submitting this form, you consent to receive emails from Masala and Chai. I’d love to know what you thought of this recipe! Don’t forget to leave a comment and ⭐️ star rating below!