Oooooh you’re going to LOVE this recipe! If you’re a fan of fries (and like, who isn’t??), you’re going to be blown away by these chickpea fries because they’re SO. DANG. GOOD. My friends and I are obsessed. This recipe is inspired by the chickpea fries at Peacefoods Cafe, a vegan restaurant and bakery in Manhattan. If you’re familiar with French cuisine, then this may be reminiscent of chickpea panisse from southern France which are fried chickpea flour fritters. My version of Chickpea Fries are packed with classic Indian spices, such as coriander, turmeric, chili powder, aamchur, cardamom etc. But even if you don’t have all the spices on hand, you can use whatever you have in your pantry and they’ll still be the best fries you’ve ever eaten. Guaranteed.
Why this Recipe Works
These fries are made of besan, or chickpea flour, making them a gluten-free and vegan option for those with dietary restrictions. But I swear, all my friends LOVE them so much. They can be fried or baked and they’ll be the same level of delicious crispy satisfaction. I took them as a snack for the plane and I was shocked to see they stayed crispy even in a Ziploc bag several hours later. They make a great side for burgers, sandwiches, hot dogs, and more for an outdoor party! They can be prepped well ahead and popped into the oven or fried fresh before serving.
What is Besan?
Besan, also known as gram flour or chickpea flour, is made from ground chickpeas. It’s a staple ingredient in the Indian subcontinent to make high protein vegan and vegetarian cuisine. Thanks to the rise in interest in gluten-free cooking and baking, chickpea flour is much easier to find in grocery stores. You’ll want to look for unroasted finely milled chickpea flour.
Boondi, sev, and bhujia for snacksChila, kadhi, and pakora for savory dishesSoan papdi and ladoo for dessert
You can also make chickpea flour yourself, using dried chickpeas and processing them through a high speed blender or grain mill. This makes chickpea flour inexpensive and accessible.
Ingredients - Notes and Substitutions
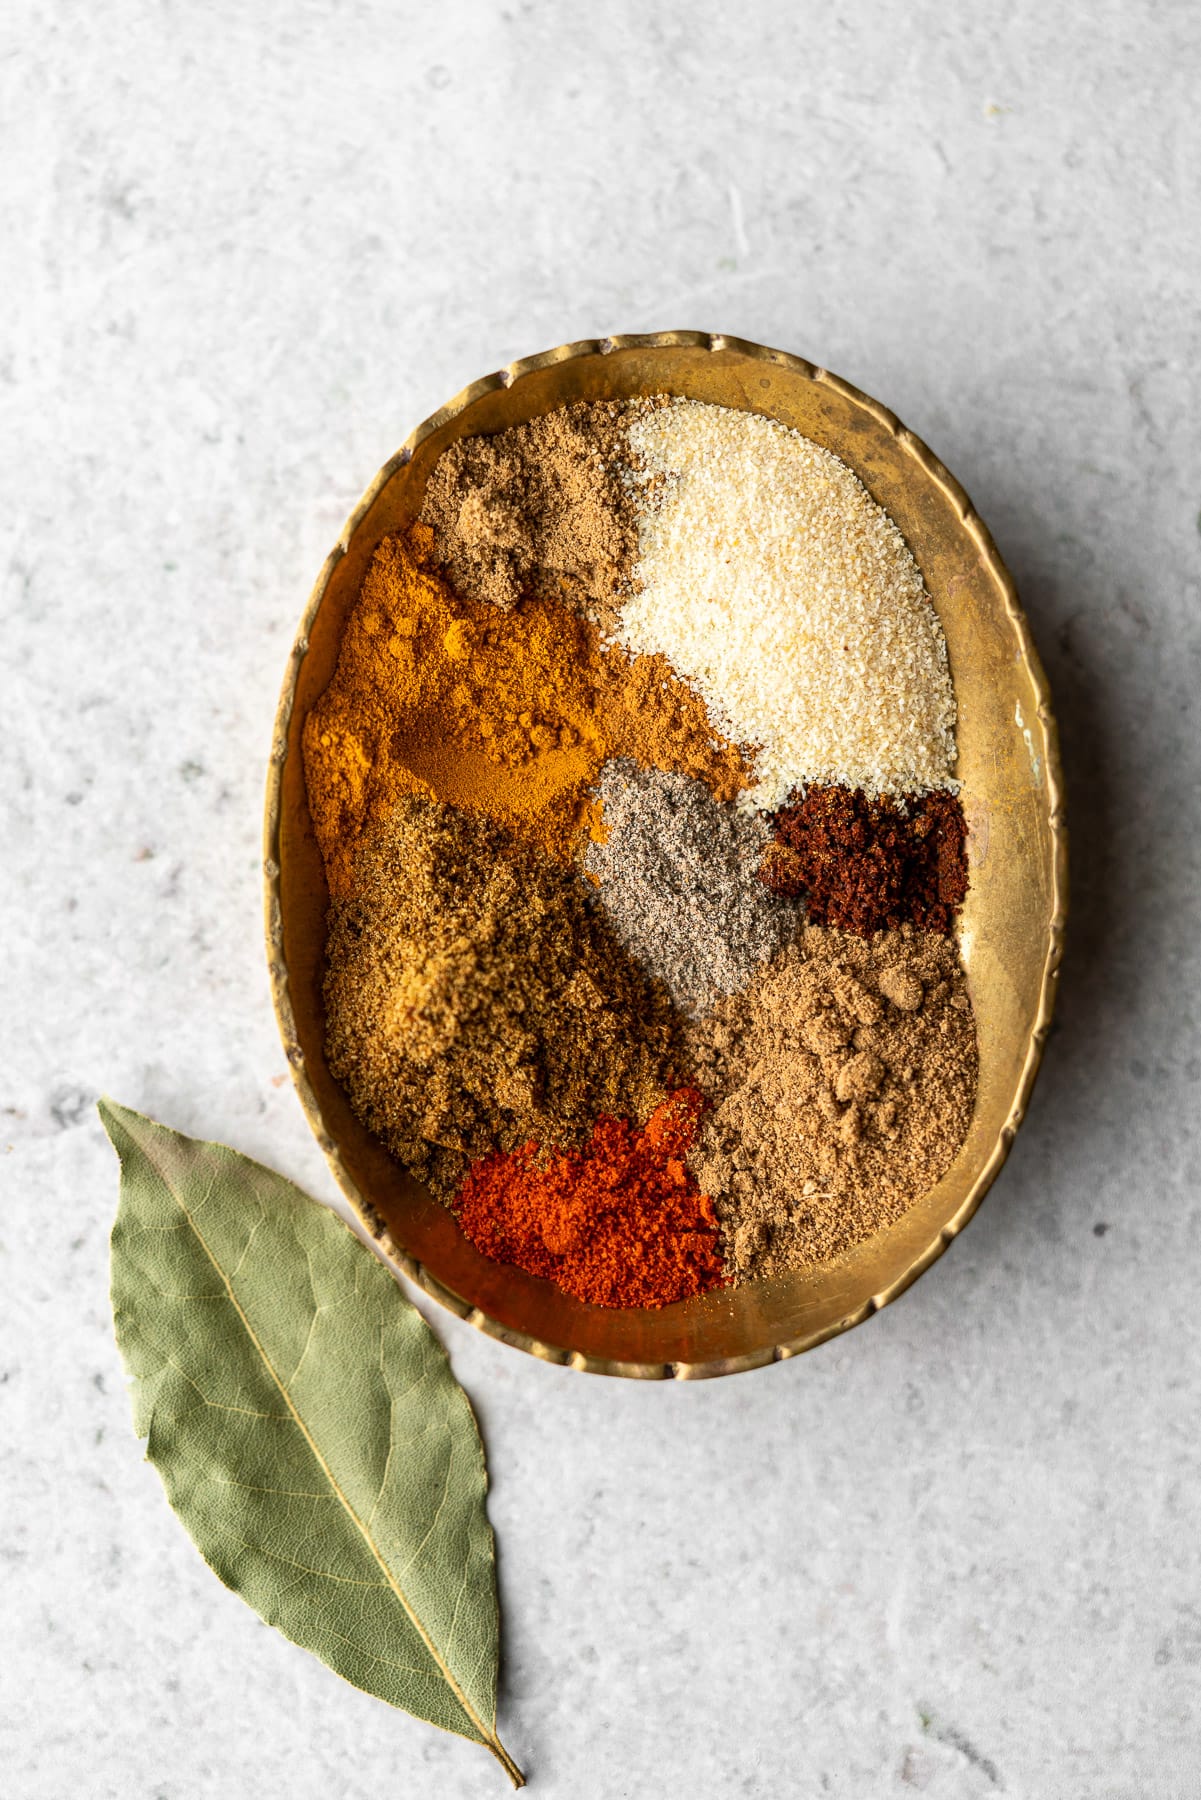
I’m not going to lie to you, the blend of spices that I use might be intense if you’re not a seasoned Indian cook. You may not have everything in your spice drawer, and that’s okay. If you do, great! If you don’t, you should still make this recipe with what you do have. Common spices you can easily find are coriander, turmeric, cumin, chili powder, cinnamon, clove, cardamom, bay leaves, and onion powder. The two Indian specialty items are:
Aamchur - Also known as mango powder. It’s made from dried mangoes and has a sour taste. Substitute with a ¼ teaspoon of lemon juice.Fenugreek leaves - Also know as methi. Fenugreek is an herb that’s bitter with a slightly sweet aftertaste. The seeds are even used to make maple extract. Use dried or fresh fenugreek leaves. Substitute with celery leaves or cilantro.
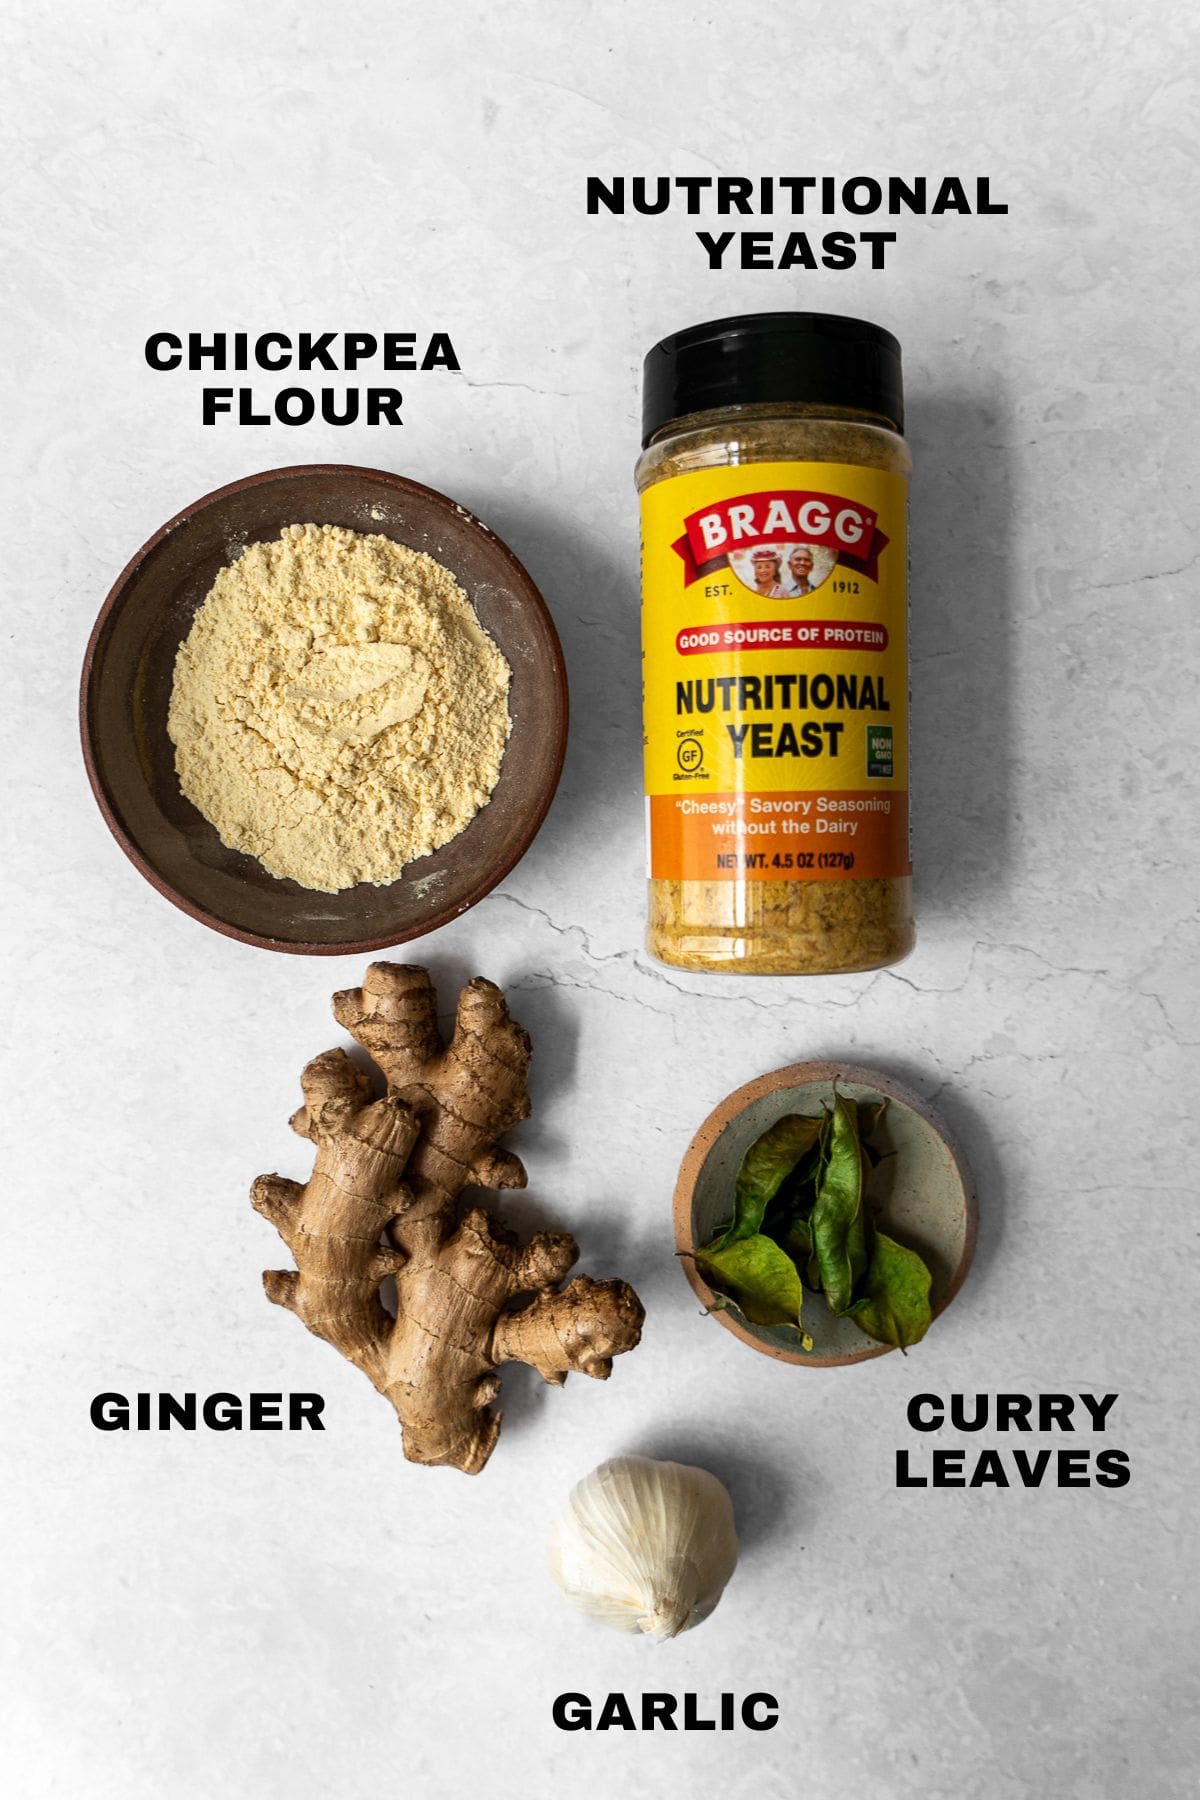
The other ingredients you’ll need are:
Ginger garlic paste - Ginger garlic paste is very common to Indian cuisine. Substitute it with finely minced garlic and ginger in a 1-to-1 ratio or try this homemade ginger garlic paste recipe.Nutritional yeast - Commonly used in vegan cooking to add protein, minerals, and vitamins. It has a slightly savory cheesy flavor. Substitute with shredded parmesan cheese for a non-vegan option, but add it in when the chickpea flour batter has thickened.Chickpea flour - Or known as besan. It’s made from ground chickpeas.Curry leaves (optional) - Fry up the curry leaves, an herb, until crispy and it’ll add another layer of delicious flavor.
How to make Chickpea Fries
There are four main steps to making the crispiest, most flavorful chickpea fries! Honestly, you’ll see in the process shots that you really have to trust the process throughout - because it’s not pretty at all. The end result though?? Absolutely phenomenal.
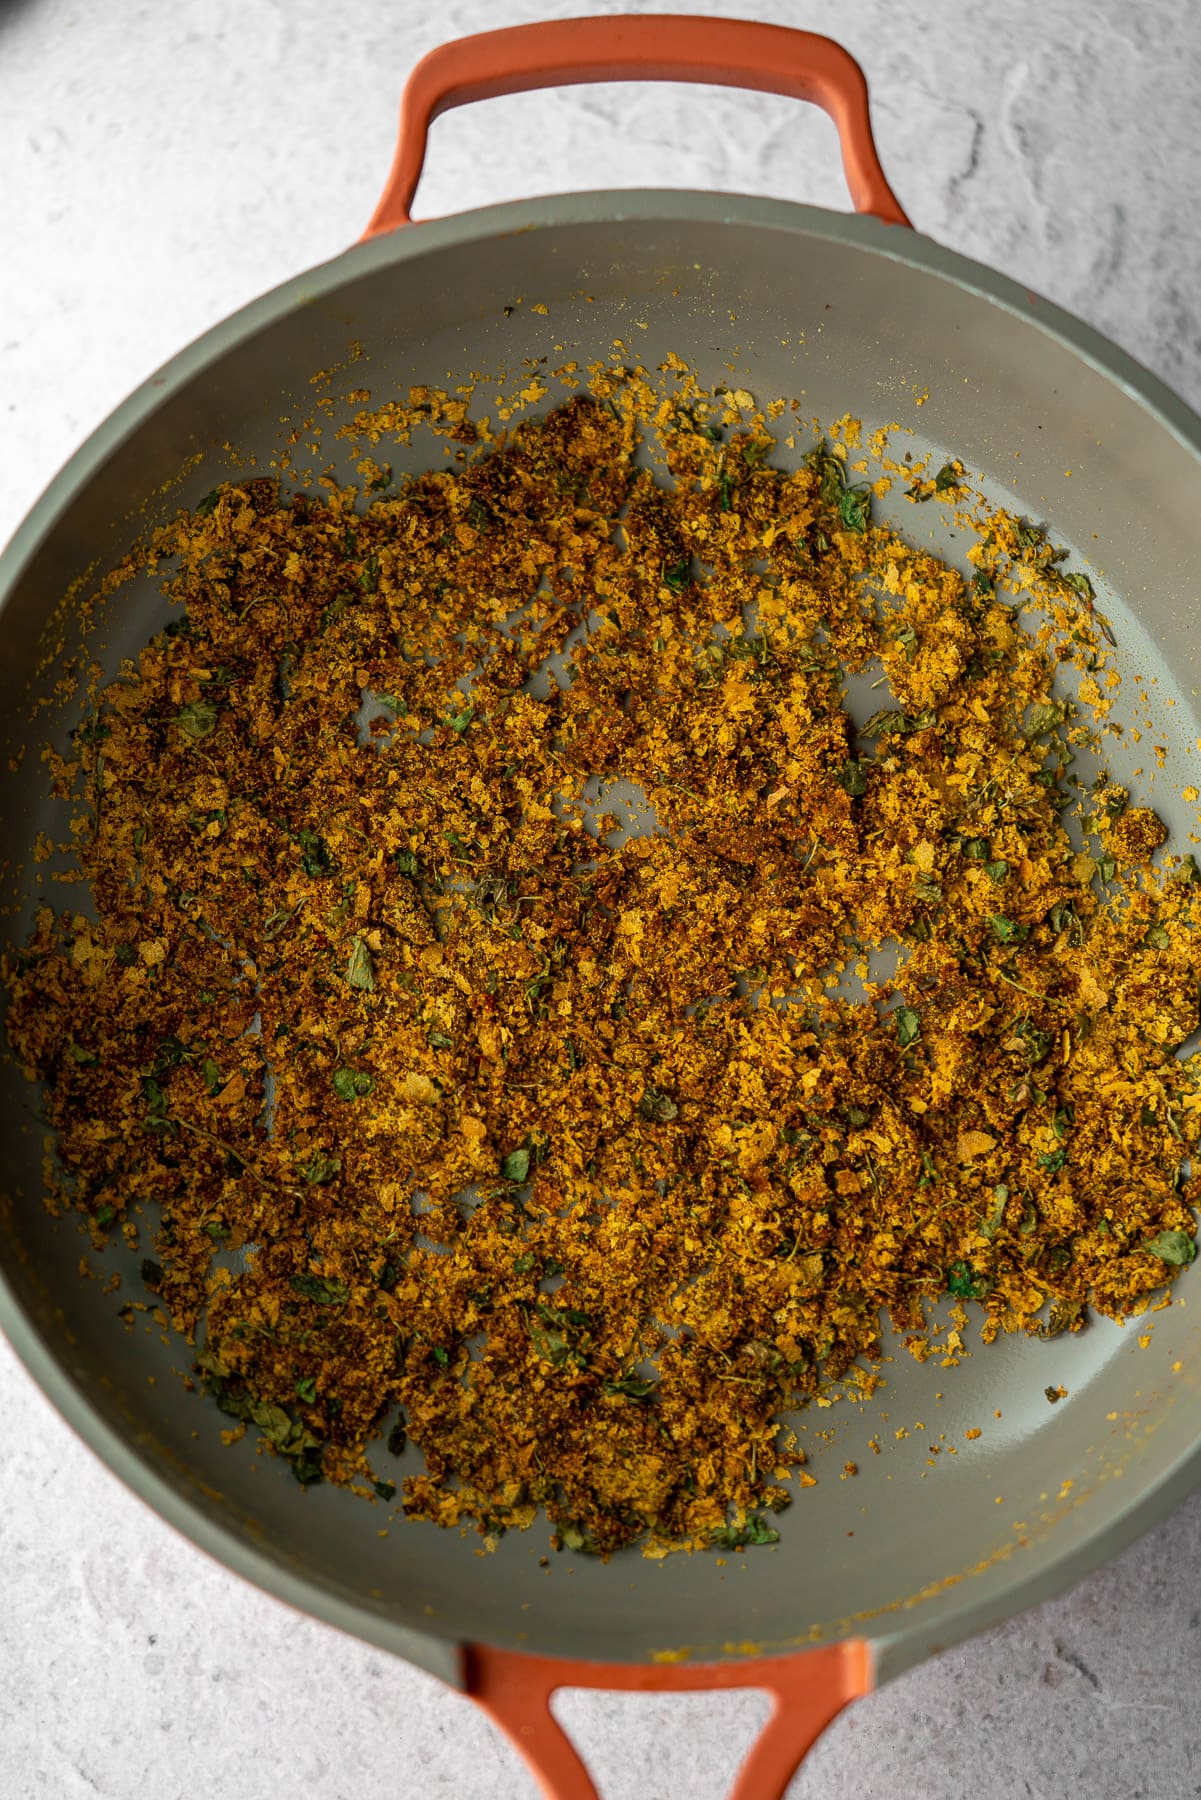
1. Bloom the Spices
First things first, let’s bloom our spices! Blooming our spices essentially “activates” them using a cooking fat, like ghee or oil. This process is commonly referred to as tadka, or tempering spices. This only requires about a minute until they’re fragrant for maximum flavor. Start by heating the fat in a pan, in this case it’s olive oil, and sautéing the ginger garlic paste for a minute until fragrant. Then add in ALL the ground spices - coriander, turmeric, cumin, chili powder, cinnamon, clove, cardamom, the bay leaf, onion powder, aamchur - into the oil and sauté them for about a minute, or until fragrant. Pro Tip: Again, if you don’t have all these spices then it’s completely fine. Work with whatever you have, it’ll still be delicious! They may be a bit clumpy if you don’t have enough fat, so try your best to expose them to the heat. In the last few seconds, add the kasuri methi (fenugreek leaves) and nutritional yeast. Give it a good mix so everything is well combined. Your spice mix is ready to go!
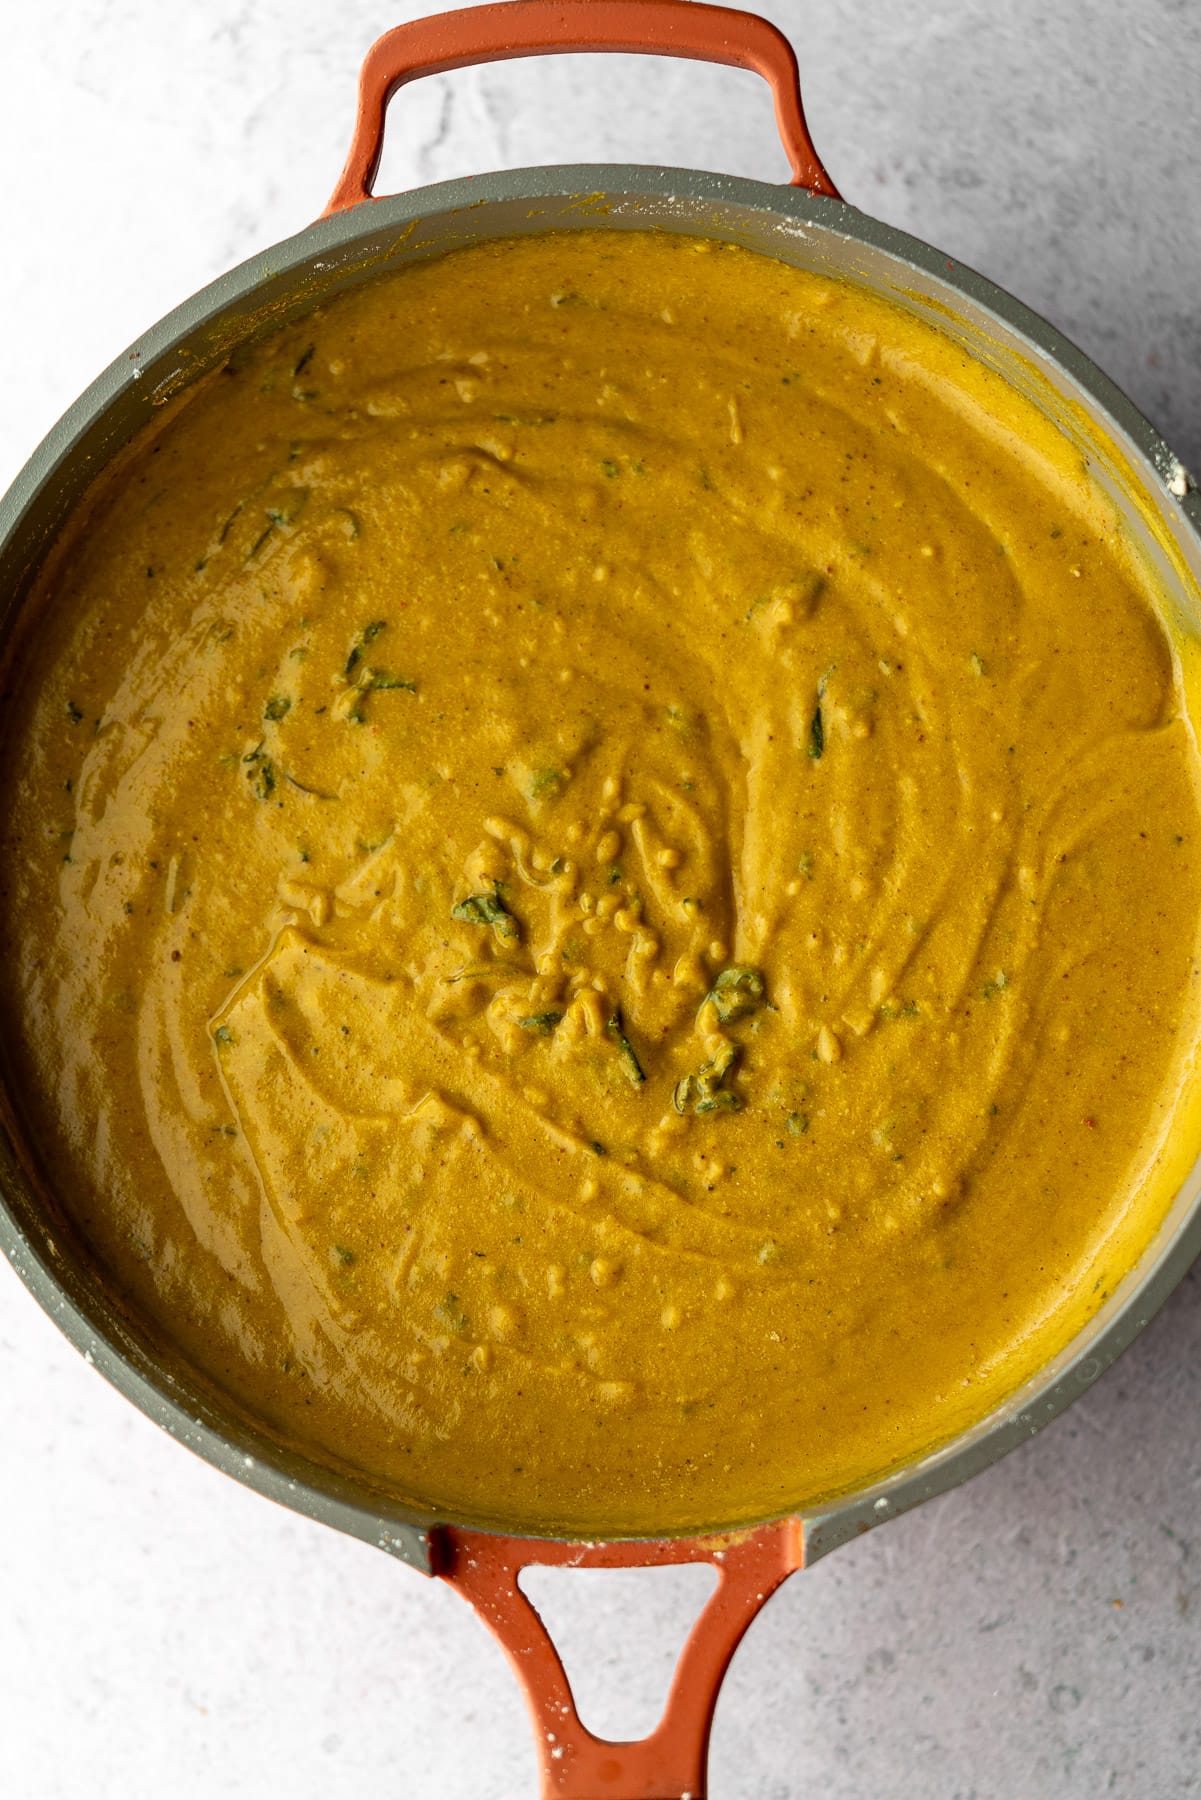
2. Cook Down the Chickpea Flour
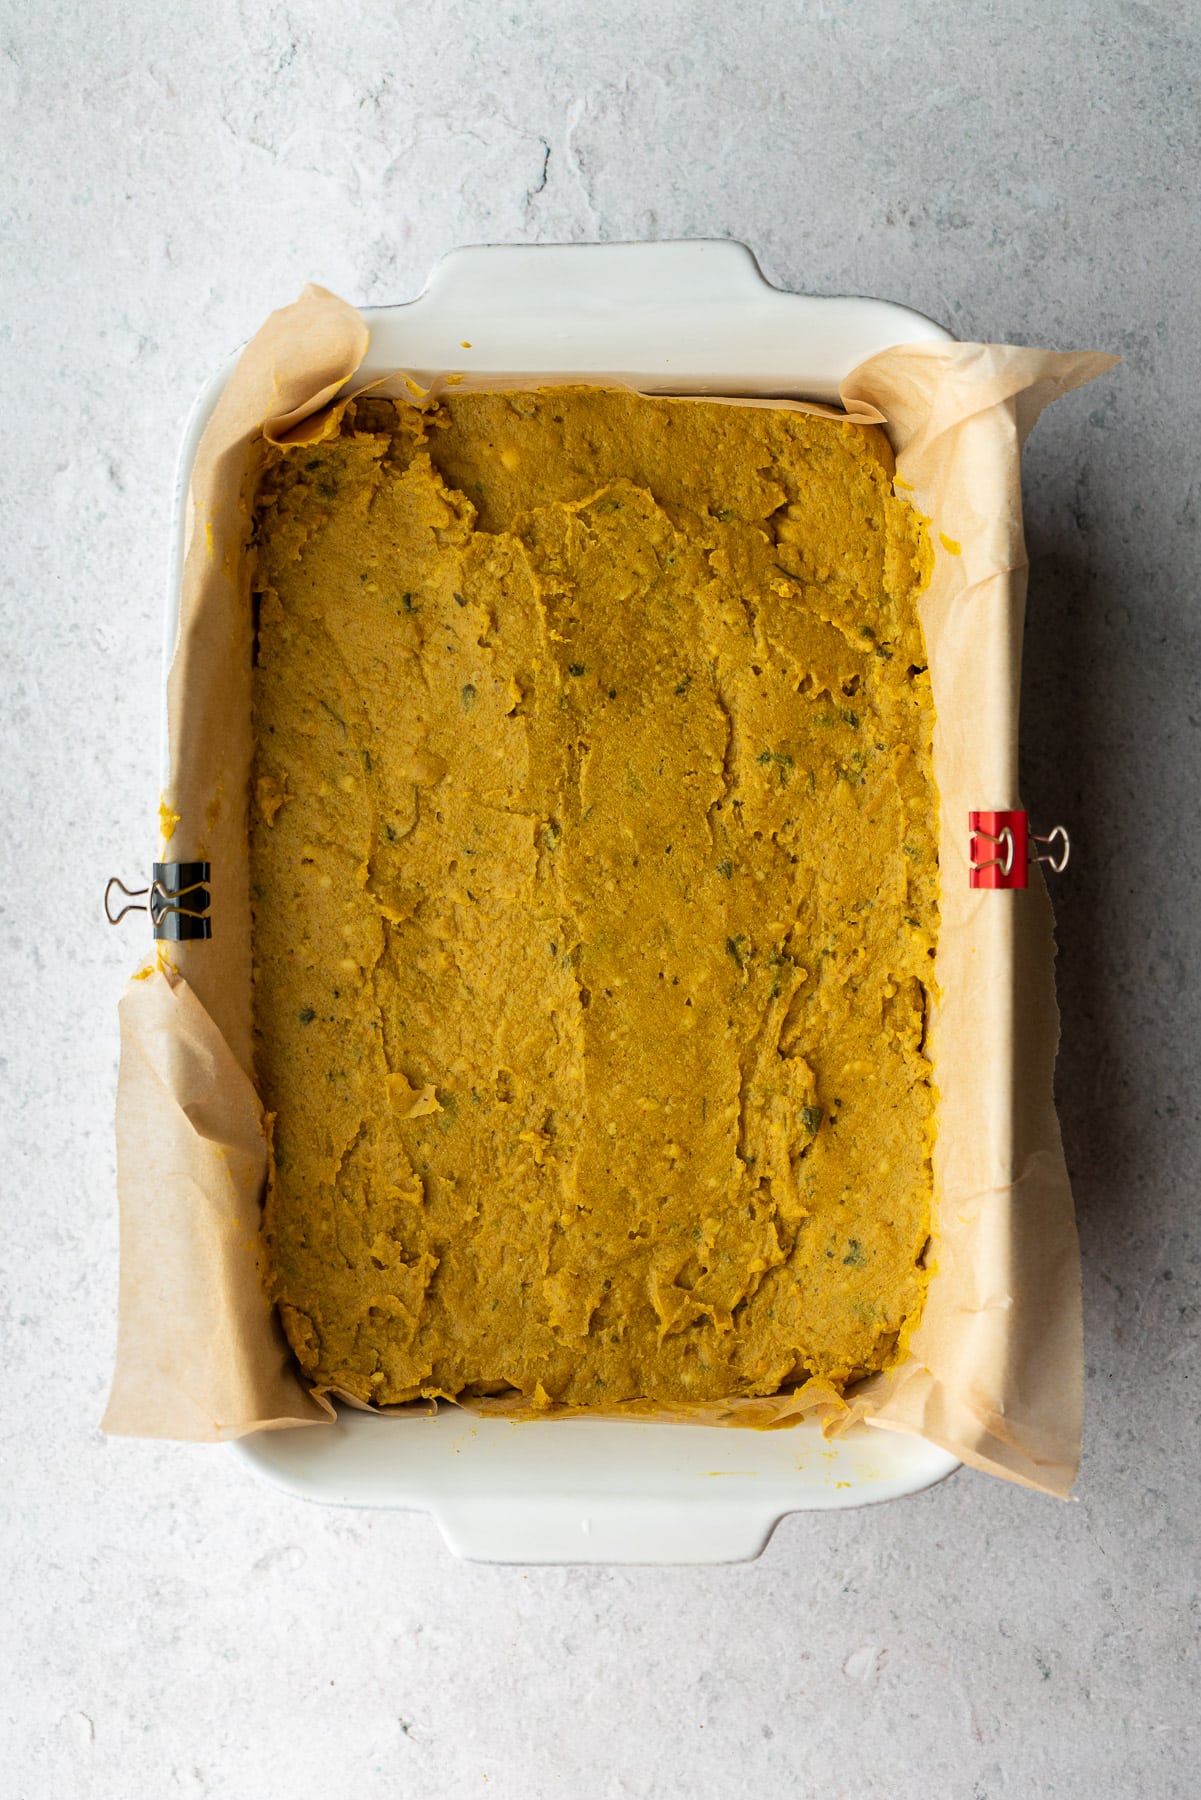
As soon as your spice mix is combined, pour in about half of the water and half of the besan. Give it a whisk until the water hydrates the chickpea flour and you get most of the clumps out. Then add the rest of the water and chickpea flour. Add salt and pepper to taste. You’ll want the batter to be as smooth as you can get it, but small chunks of chickpea flour are completely fine. Continue to stir the chickpea fry batter on low heat and scrape down the sides in intervals so it doesn’t burn. It should be ready when it reduces by about half, and thickens significantly. This process will take around 10-15 minutes. While the batter thickens, prepare a 15 x 9 baker for thick fries or a half sheet (18 x 13) for thinner fries with parchment paper. Allow some overhang on two sides for easily lifting the set batter for cutting the fries. I like to use two binder clips on either side to keep the parchment paper in place. Pro Tip: It’s important to allow the time for the chickpea batter to thicken otherwise it will not set in the fridge. The fries will completely fall apart when baking or frying them, and you will be cursing me for this recipe! Please, be patient!
3. Chill and Cut into Fries
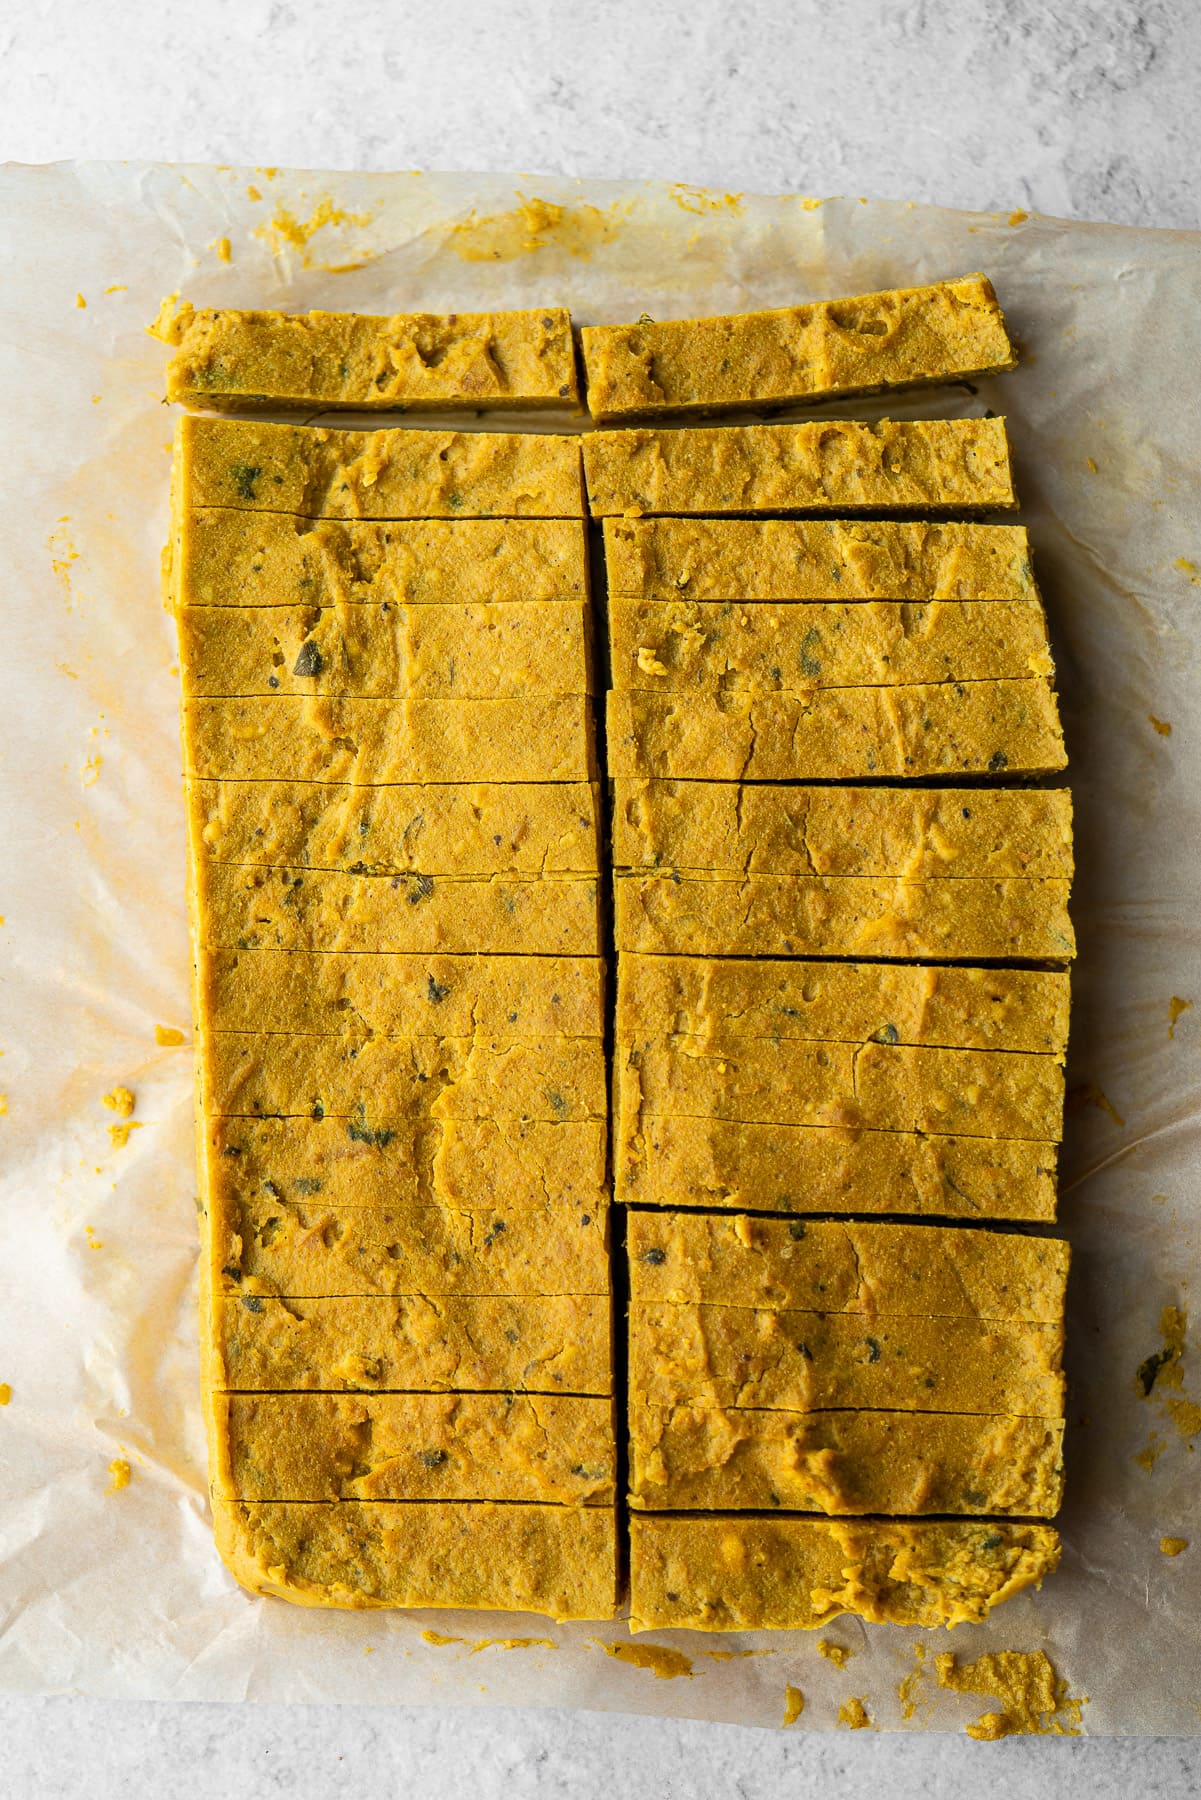
Once the chickpea fry batter has thickened, remove it from heat. Use a rubber spatula to scoop all of it into a baker or half sheet. Spread it to all four sides, and level it as best as possible. Cover the baker and transfer it to the freezer and flash freeze it for 15 minutes or the refrigerator for a minimum of an hour. The batter should completely set and solidify. If it hasn’t completely set, the fries will fall apart while baking or frying. At this point, you’ll also want to think about if you’re going to bake or fry the chickpea fries. In the last 5 or so minutes of the setting time, preheat the oven to 400°F or prepare your fryer with neutral oil for deep frying. Once the fries have set, gently lift it out of the baker using the parchment paper overhangs and set it on a flat surface. Pro Tip: If you find that it’s cracking easily, then it’s not completely set. I like to trim off any ends that are uneven. Use a large chef’s knife to cut it vertically down the center. Then, cut the fries horizontally into 14-15 pieces on each side. They’ll be around 1-inch wide and 4.5-inches long.
4. Bake or Fry the Fries
To bake the fries - Preheat the oven to 400°F. Lay the cut chickpea fries in an even layer on a half sheet, leaving space in between each one. Brush with olive oil and bake for 30 minutes, or until crispy and golden brown. I do not use parchment paper, because I found that it collected pools of oil that made the fries soggy on the bottom side down. The bake time may be shorter or longer, depending on the size of the fries so be sure to keep an eye on them. If you find that some sides are not browning, give them a toss halfway through the bake time. To deep fry - Add two cups of neutral oil to your frying vehicle and heat to 300°F. Fry the chickpea fries in batches of 6-8 fries, until golden brown and crispy. Drain the fries on paper towels.
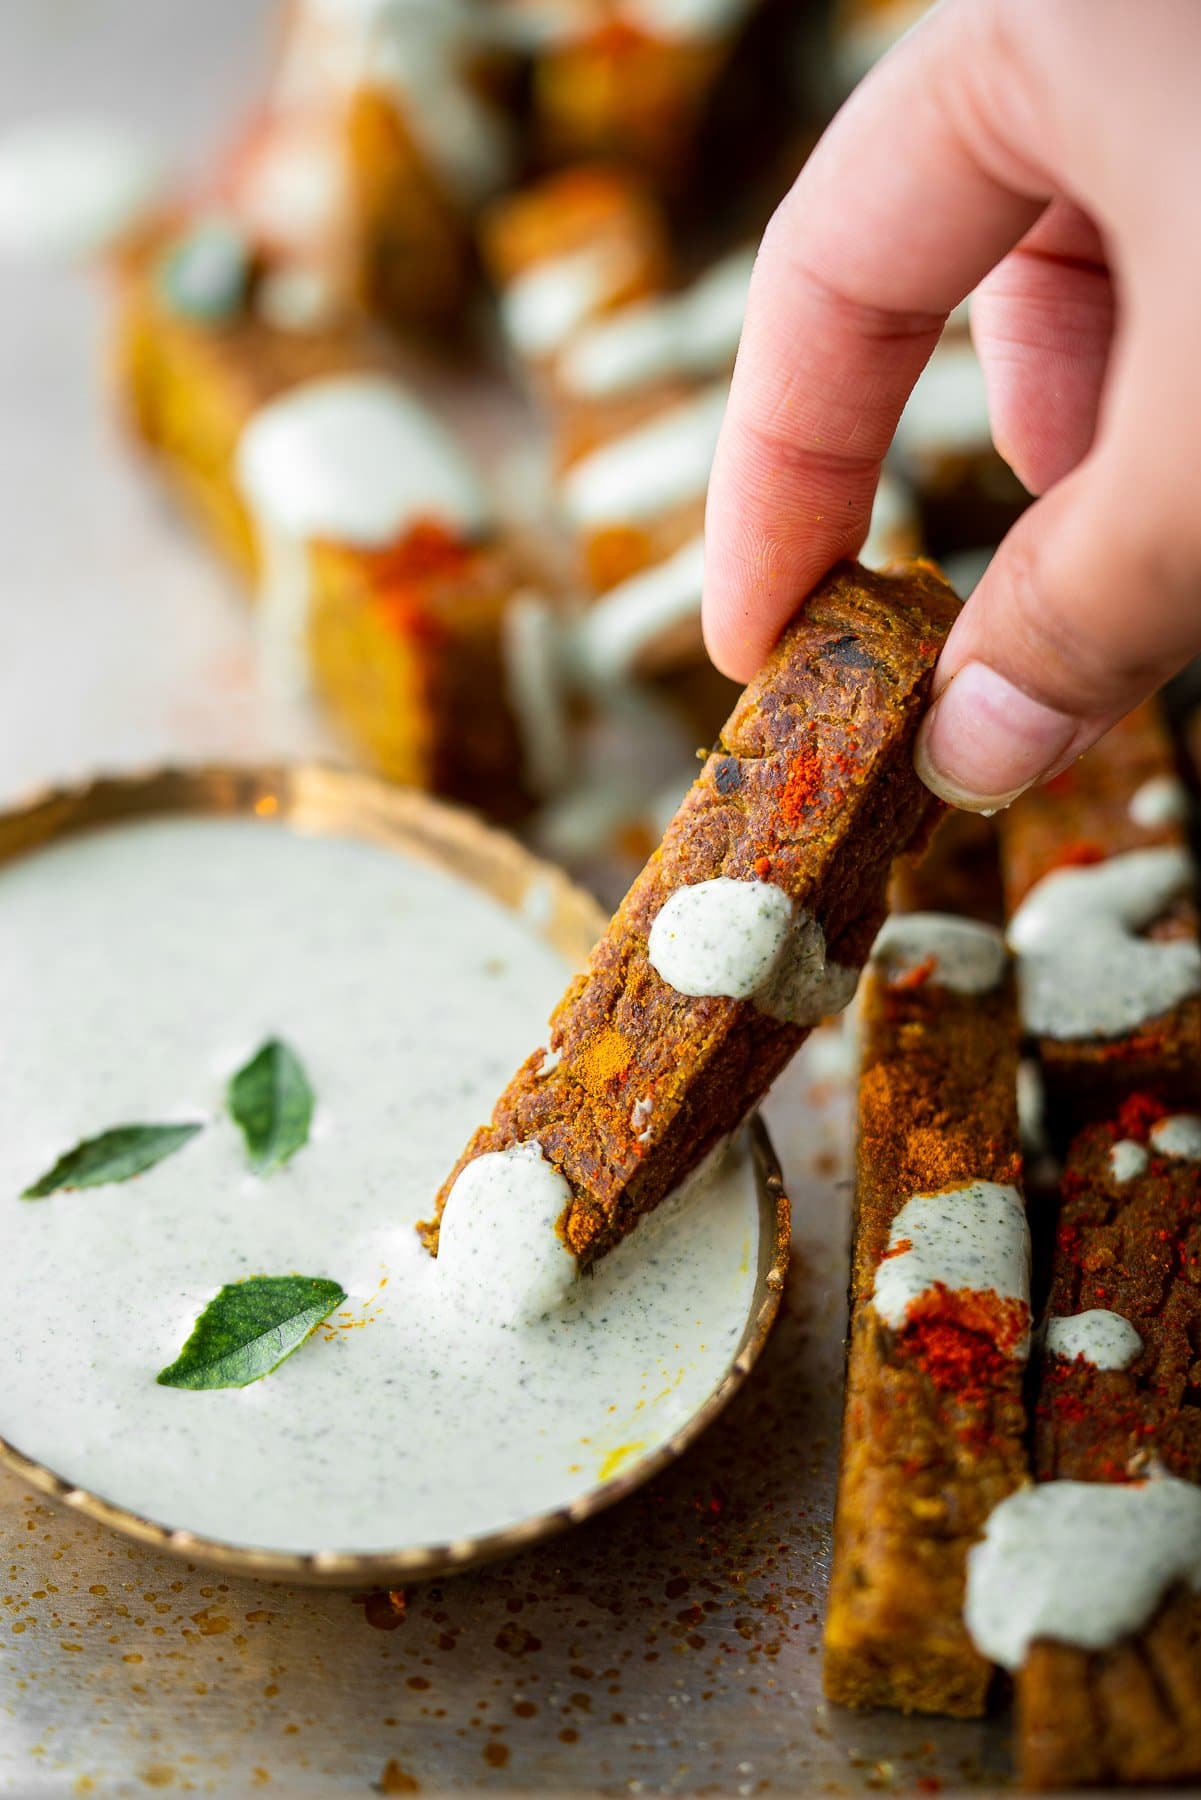
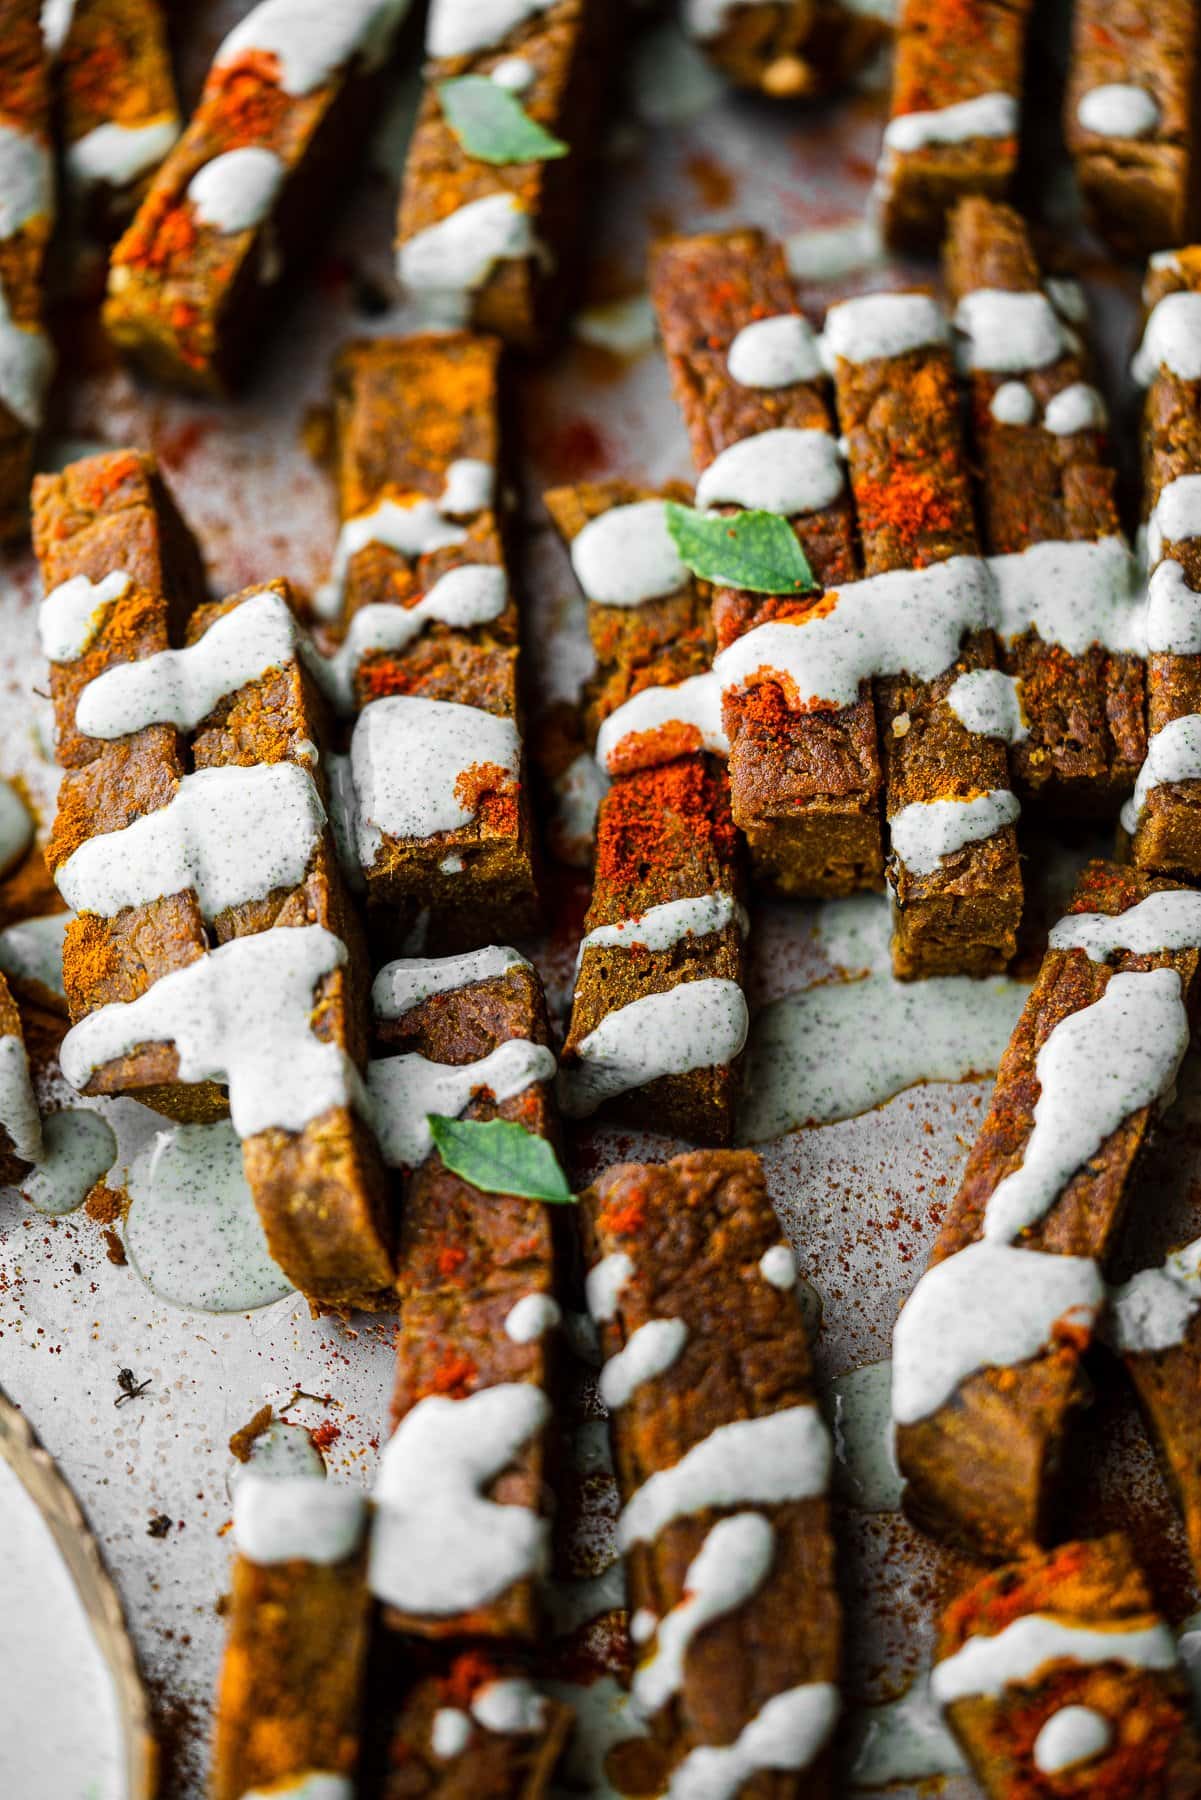
How to Serve
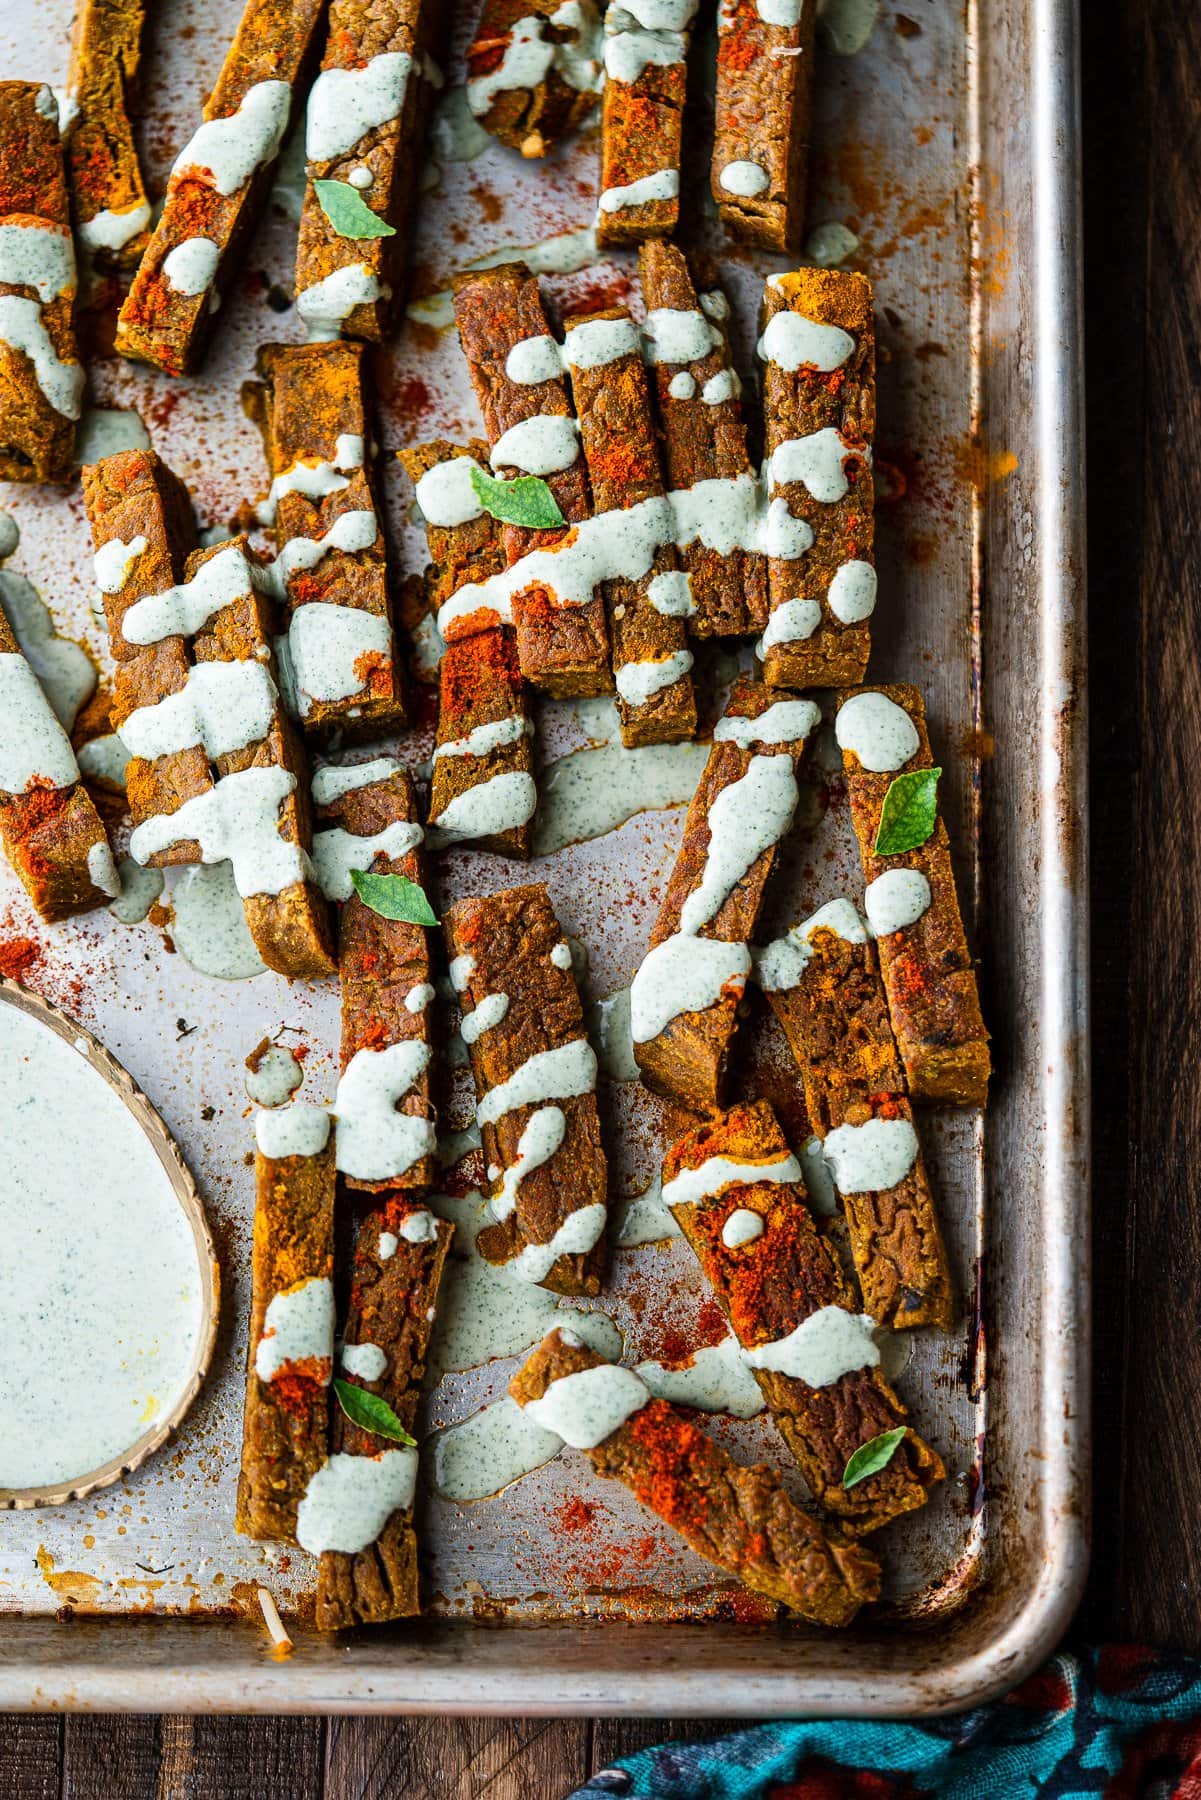
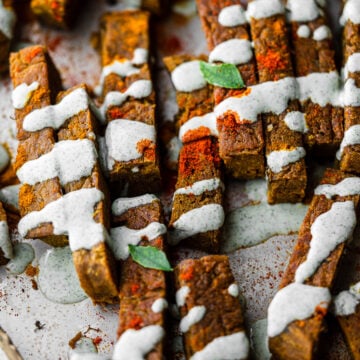
The chickpea fries are best while served hot! I especially love to fry up some curry leaves until they’re crispy to serve them with. As for a dipping sauce, I make my own Curry Leaf Ranch and hit the fries with an extra sprinkle of chili powder and turmeric. I highly recommended something herby like cilantro-mint chutney or a creamy sauce like ranch to serve the fries with.
Storage and Reheat Instructions
These fries are absolutely wonderful for making ahead for parties as a side!! To store the chickpea fries, keep them in an airtight container in the refrigerator for up to five days. To freeze the chickpea fries, flash freeze them in an even layer on a half sheet for about an hour. Then transfer them to a freezer bag. They can be kept for up to six months. To reheat the chickpea fries, simply pop them into the oven at 325°F for 7-10 minutes, or until heated through and crispy on the outside again.
More Side Dishes to try
Recipe
I’d love to know what you thought of this recipe! Don’t forget to leave a comment and ⭐️ star rating below! Thinking about making this recipe? Enter your email and I’ll send it straight to your inbox to save for later. Plus, get new recipe inspiration from me every week! By submitting this form, you consent to receive emails from Masala and Chai.