10 Things You Should Know Before Using Your Instant Pot
If you’re a visual learner, here’s a quick 3-minute video sharing everything you need to know. I hope it’s helpful to see these tips in action!
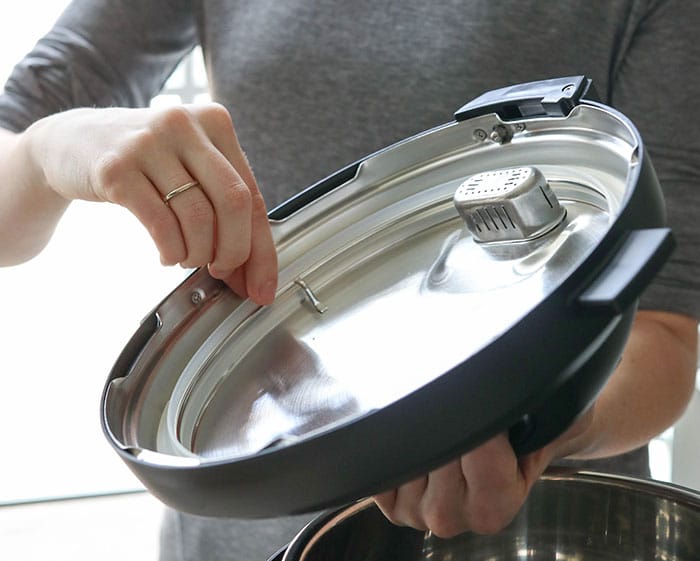
1. Always Check the Sealing Ring
The lid of your Instant Pot has a silicone sealing ring inside, and this is responsible for sealing the lid and locking-in the steam pressure. This silicone ring should be properly seated along the metal ring that is in the lid, but because it’s exposed to heat during the cooking cycle it can sometimes move out of place or get stuck.
It’s important to check the silicone ring every time you use your Instant Pot, to make sure it’s properly placed and has a little wiggle room to expand. I usually grab it with my fingers and wiggle it all around the lid to make sure it’s not stuck anywhere.
2. How to Cook on Manual
When you use a manual setting, you are in charge of selecting the cook time, and the pressure in some models, rather than relying on one of the preset buttons like “rice” or “stew.” Older models of Instant Pot have a Manual button and newer models have a Pressure Cook button, but both buttons do the exact same thing. To cook on manual, all you have to do is press the Manual or Pressure Cook button (depending on the model you have) and then use the + or – buttons to set the cook time. The Instant Pot automatically cooks on high pressure, but some models have a separate Pressure button that allows you to cook at low pressure if you’d like to. (I personally never use anything other than the default high pressure setting.) Make sure you secure the lid and move the steam release valve to Sealing, to ensure the pot will come to pressure. It’s also important that you follow a trusted Instant Pot recipe, so that you have sufficient liquid in the pot and that your ingredients are layered properly.
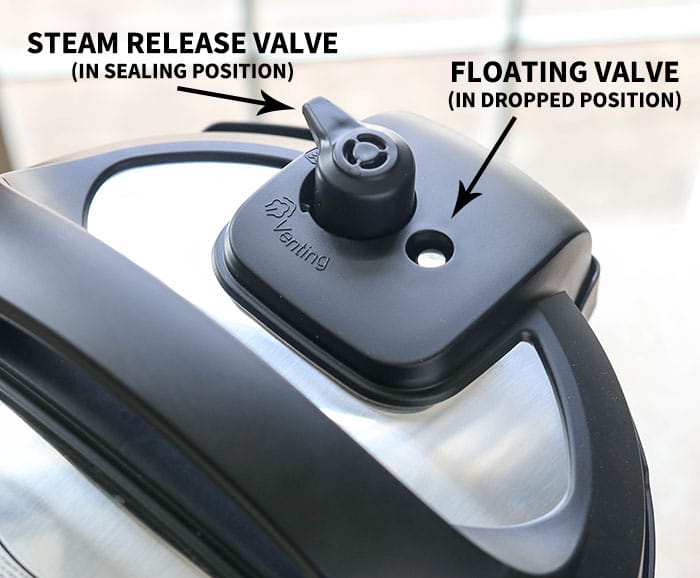
3. How to Know the Instant Pot is Pressurized
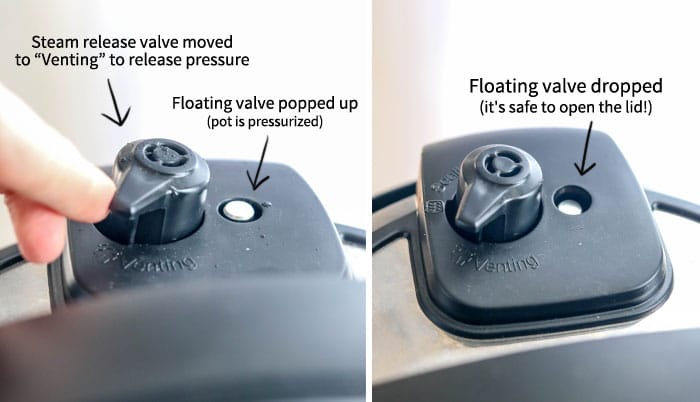
When you start a pressure cooking cycle, the Instant Pot will not start counting down right away. First, the pot needs to pressurize, which can take 10 minutes or more, depending on how much food is inside. The more full the pot, the longer it will take to come to pressure. So, don’t be alarmed if your Instant Pot screen simply says “On” for a while. You’ll know that the pot is pressurized when the floating valve in the lid pops up. Shortly after that happens, the count-down for your cooking cycle will begin.
4. How to Quickly Release the Pressure
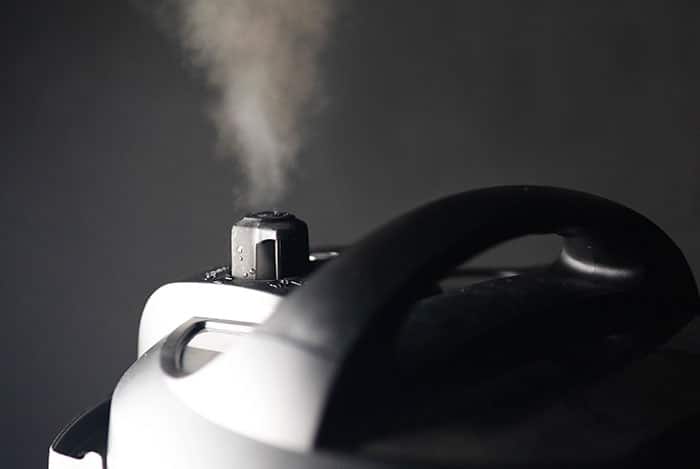
If a recipe calls for a “quick release,” that means you’ll need to move the steam release valve from the Sealing position to the Venting position as soon as the Instant Pot beeps, signaling that the cooking cycle is complete. (The screen will read LO:OO when the cooking cycle is over.)
Make sure that you don’t place your hand directly over the vent, as steam will shoot out the top of the steam release valve. Instead, keep your hand to the side of the valve or use a spoon to turn the vent, if you’re on the extra-cautious side. I always use my hand and have never had an issue. (Keep in mind that I wrote a book on the subject, so I’ve literally used my Instant Pot thousands of times!)
5. How to Naturally Release the Pressure
If a recipe calls for a natural release, you’ll do nothing when the cooking cycle is complete. For most recipes, it will take 10-15 minutes for the pressure to naturally leave the pot. I like it when recipes tell you exactly how long to wait for the natural release. In all of my recipes in The Fresh & Healthy Instant Pot Cookbook, I tell you exactly how long to wait and when that time has passed you can move the steam release valve from Sealing to Venting to release any remaining pressure. That way you’re not waiting around for an extra 30 minutes or more to eat your dinner!
6. How to Safely Remove the Lid
Are you worried about your Instant Pot exploding? That was my biggest fear when I got started, too. Luckily, the Instant Pot is loaded with safety features to help prevent that from happening, but the best thing you can do is learn how to use it properly to avoid any user errors. It’s NOT safe to remove the lid from your Instant Pot until all of the pressure has been released from the pot. You’ll know it’s safe to remove the lid when the floating valve in the lid drops. This means all of the pressure is gone, and the Instant Pot lid will easily twist off.
Never ever try to force the lid off the pot if it doesn’t twist easily. As a safety precaution, the Instant Pot locks the lid while the pot is still pressurized, so don’t try to fight it.
7. Always Deglaze the Pot (to avoid a Burn error)
If use the Sauté function on your Instant Pot before pressure cooking something, it’s essential that you deglaze the bottom of the pot. This simply means that you add a splash of water to the pot and use a wooden spoon to scrape off anything that might be stuck to the bottom. Onions, dried spices, and ground meat are common ingredients that will stick to the bottom of your pan, so it’s important that you get every little bit un-stuck to avoid getting the dreaded “burn” error during your pressure cooking cycle. Once you become familiar with your Instant Pot, making dinner can be as easy as adding your ingredients to the pot, pressing a button, and walking away. I love how the process is totally hands-off! Check out my earlier post, 6 ways I use my Instant Pot, to see how I use it on a real-life, regular basis.
8. How to Cook for Zero Minutes
Yes, there really is a zero minute cooking cycle on the Instant Pot. This short cycle is most commonly used to cook non-starchy vegetables, like broccoli, cauliflower and zucchini. If you cook them for even one full minute, then turn to mush!
Cooking for 0 minutes is the same as cooking anything else on Manual. Press the Manual or Pressure Cook button, then use the – button to lower the cooking time to zero minutes. The Instant Pot will still take several minutes to come to pressure (up to 10 minutes), and then as soon as the cooking cycle beeps to signal that it’s complete, you’ll quickly release the pressure right away so that the vegetables don’t over-cook. It will take 2 to 3 minutes for the pressure to release, so the food will be in your Instant Pot for at least 12 to 15 minutes in total, giving it plenty of time to cook.
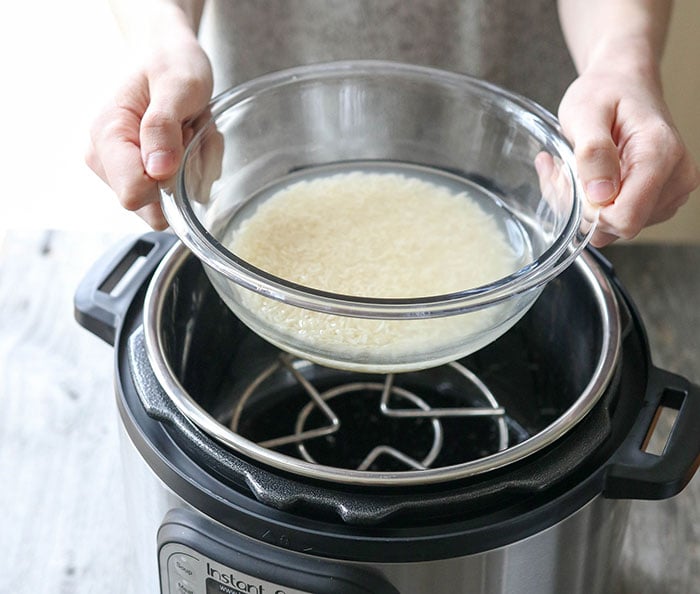
9. How to Cook Pot-in-Pot
One of my favorite perks of the Instant Pot is that you can cook two dishes at the same time! It’s called pot-in-pot cooking, where one dish cooks on the bottom of the pot, and then a separate bowl of food can cook on top of that. You can see an example of this with my Chipotle Burrito Bowls. In this case, the spiced black beans cook on the bottom while a bowl of brown rice cooks on top, both from scratch in a 30-minute cooking cycle.
I’ve dedicated an entire blog post to pot-in-pot cooking, so you can get a better idea of which ingredients can be cooked together at the same time. There are also several recipes in my cookbook that teach you how to cook rice, cauliflower “rice,” and cauliflower mashed “potatoes” at the same time as your main entree.
10. Your Food Won’t Always Be Ready in an “Instant”
I think the most deceiving thing about the Instant Pot is the name. Just because you use your Instant Pot to cook a meal, doesn’t mean it will be ready significantly faster than it would if you were to cook it on the stove. For example, Instant Pot steel cut oats cook in just a 4 minute cooking cycle, but you still have to wait about 8 to 10 minutes for the pot to come to pressure, and another 15 to 20 minutes for the pressure to release. That means it takes closer to 30 minutes for your oatmeal to be done. The real advantage to cooking with your Instant Pot is that the process is almost completely hands-off, so it feels like you have more time on your hands. Instead of standing by the stove, watching to make sure nothing burns or boils over, you have your hands free to finish other tasks around your house. It makes you the ultimate multi-tasker, which is why so many people have fallen in love with it. As an added bonus, cooking with your Instant Pot preserves more nutrients when compared to other methods of cooking! This is possibly due to the fact that it rarely reaches a temperature higher than 250ºF inside the pot, or that it cooks food faster, giving it less of an opportunity to lose nutrients.
Easy Instant Pot Recipes for Beginners
To get yourself comfortable with using the Instant Pot, I recommend starting with something very simple. Here are a few good “beginner” recipes to try:
Instant Pot Hard Boiled Eggs Instant Pot Brown Rice Instant Pot Quinoa (1-minute method) Instant Pot Spaghetti Squash (the biggest time saver!) Instant Pot Applesauce Instant Pot Chicken Breasts
For more recipes with step-by-step instructions, and a photo for every recipe, be sure to check out The Fresh & Healthy Instant Pot Cookbook. All of the recipes have a tested gluten-free option, as well as a vegan option, and they are refined sugar-free as well! – Reader Feedback: Do you have any other questions about the Instant Pot? I’m happy to answer them in the comments below!