Thank you to Bob’s Red Mill for sponsoring this post! Pineapple buns (菠蘿包, bolo bao in Cantonese) are one of my favorite pastries from Chinese bakeries. Said to have originated from Shanghai, pineapple buns gained popularity in Hong Kong & Chinatowns throughout the world. Although the pastry does not contain any pineapple, the name comes from the way that the topping looks when it’s baked. I have been eating pineapple buns since my childhood, and I’m so excited to finally figure out a recipe to make them at home. This recipe uses ingredients that you can easily find in any supermarket. I have tested this recipe probably 10 times and have provided a lot of tips and tricks below that you’ll need to make delicious pineapple buns.
HOW TO MAKE PINEAPPLE BUNS
MAKE THE DOUGH
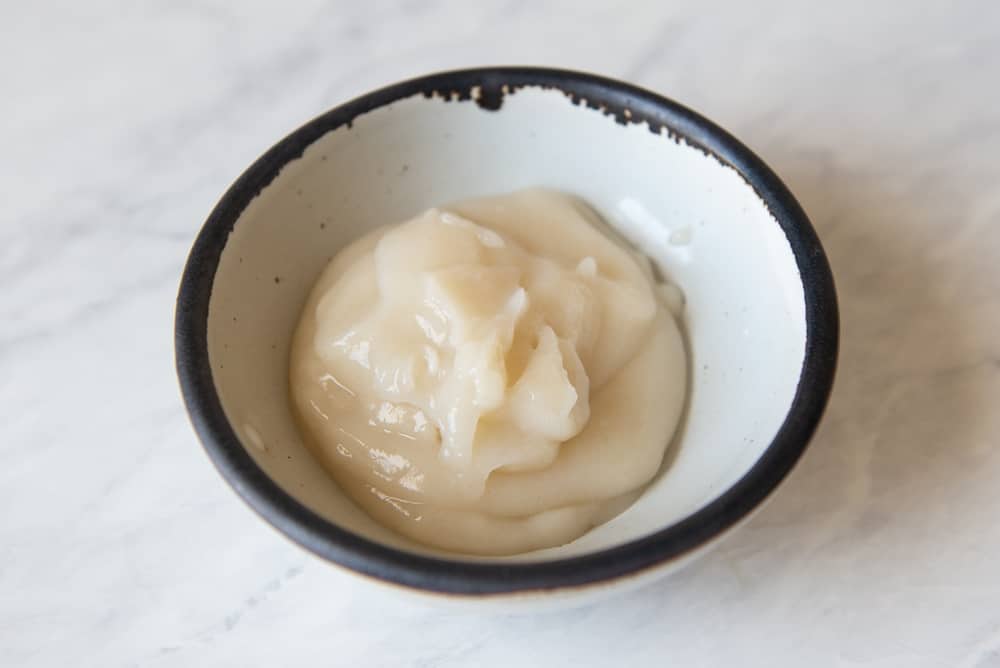
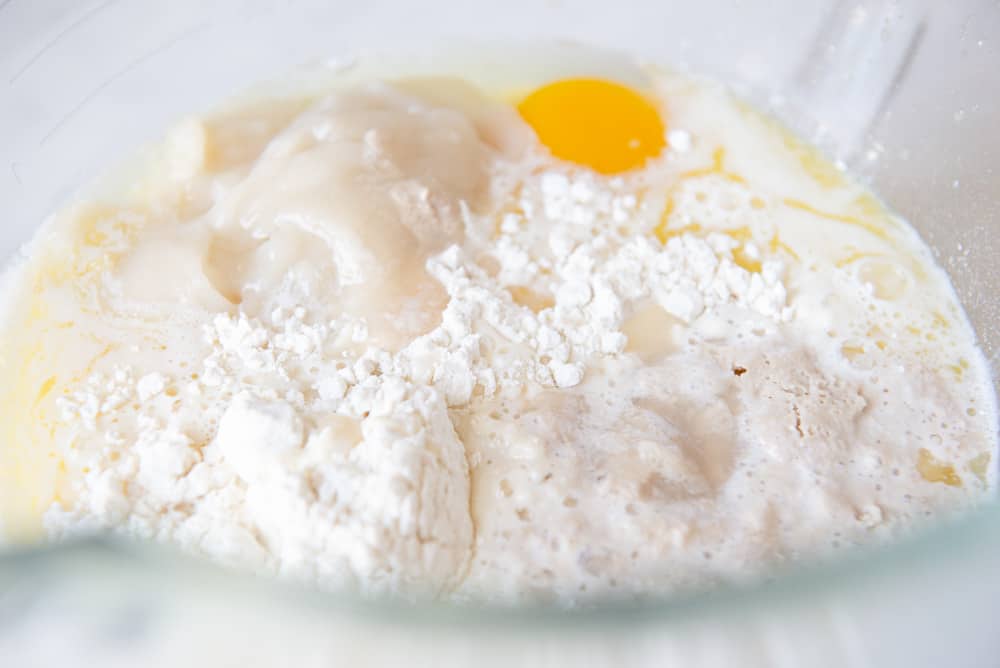
I wanted the buns to have that characteristic soft texture that I find in pastries from Chinatown bakeries. Therefore, I adapted my milk bread recipe to use as the base for these pineapple buns. One important key to making the bread soft is to add tangzhong into the dough. Tangzhong (湯種) is a Chinese technique of heating flour and water into a paste that is then added to the bread dough. This will give the bread a lighter, more feathery texture. To make the tangzhong, mix 2 tablespoons of Bob’s Red Mill Organic All-Purpose Flour with 1/3 cup of water. You can either heat this mixture in the microwave or in a saucepan until it forms a thick paste (see photo above). Once cooled, combine the tangzhong with the other ingredients for the dough.
ACTIVATE THE YEAST
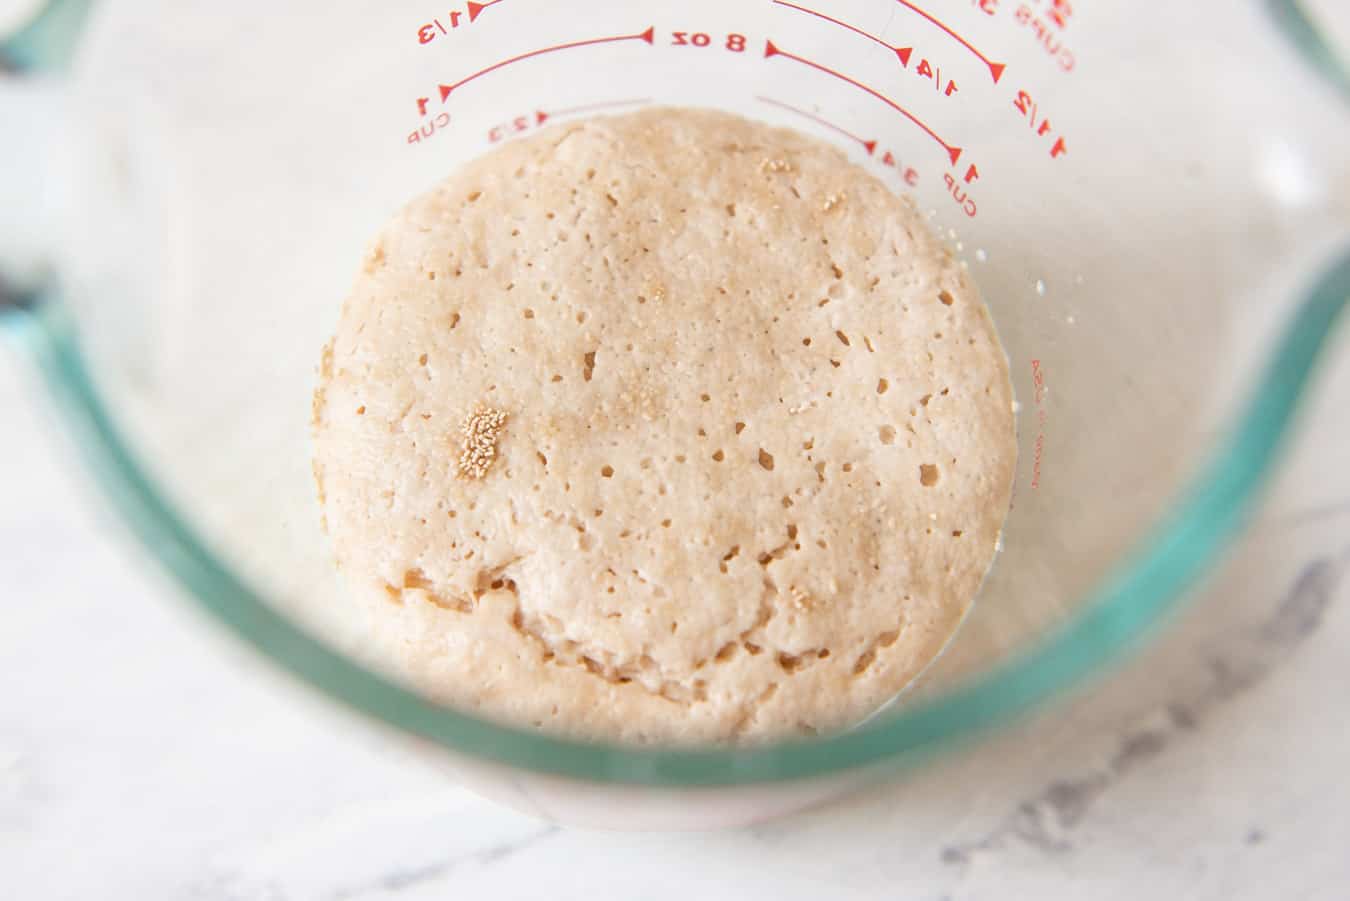
I use active dry yeast to give the bread its lift and a bit of flavor. To activate the yeast, heat up 1/2 cup + 2 tablespoons milk in the microwave on high for 40 to 45 seconds. Then, add 1 1/2 tablespoons of sugar into the heated milk and check the temperature. It should be somewhere around 110ºF to 120ºF. Once you confirm that the milk is at the right temperature, stir in the yeast. You don’t want the milk to be too hot because it can kill the activity in the yeast. After about 5 to 8 minutes, the yeast should foam up, like you see in the photo above. If the milk still looks flat, it can mean that the yeast is out of date or the milk was too hot.
KNEAD THE DOUGH
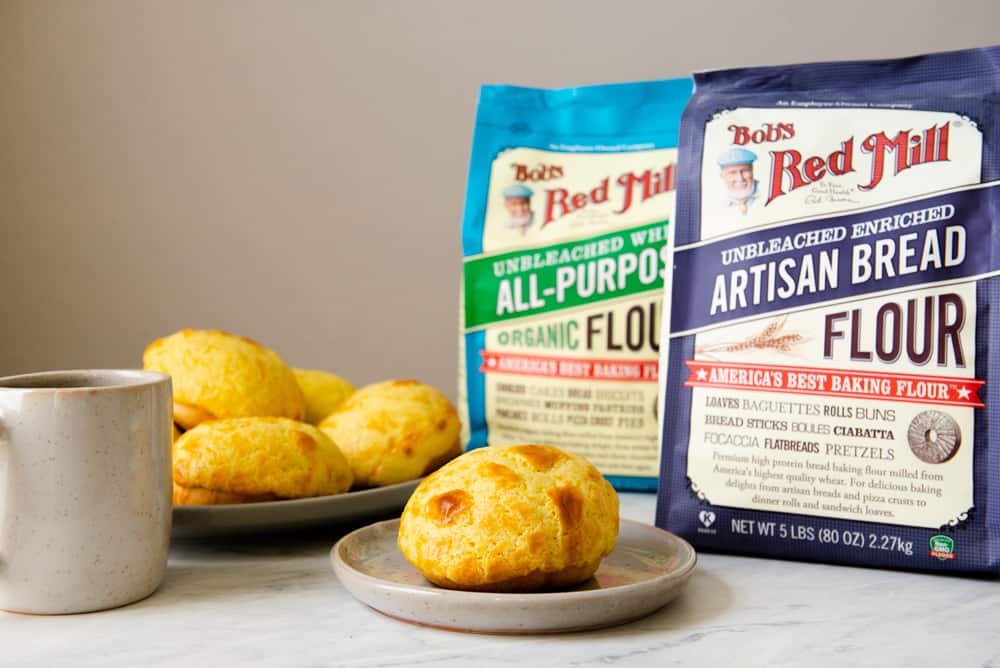
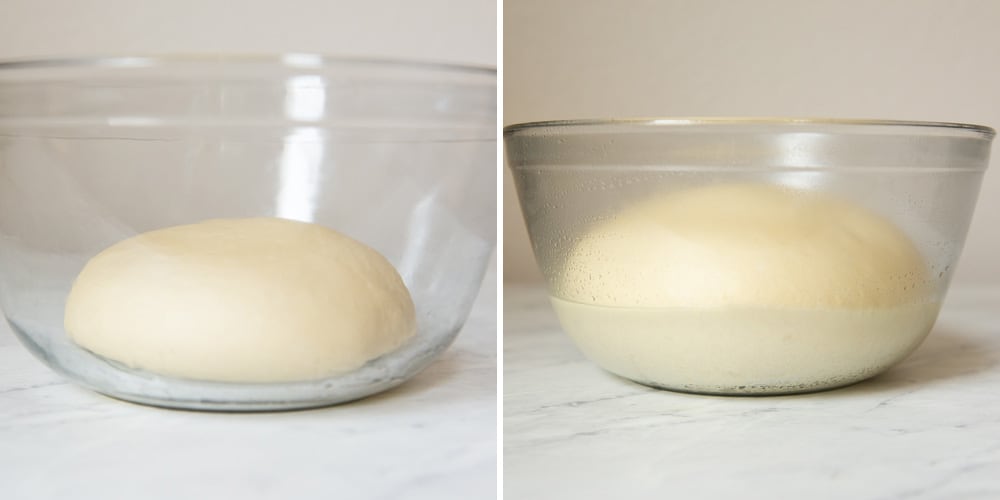
While the tangzhong is cooling, and the yeast is activating, gather all the other ingredients for the dough. Unlike my milk bread recipe, I am using Bob’s Red Mill Artisan Bread Flour to give the bun more structure to hold up the topping. I absolutely love Bob’s Red Mill bread flour because it is easy to find and makes great tasting bread. Plus, the dough that I make with the flour is always a dream to work with. Because of the amount of liquid in this dough, I highly recommend using a stand mixer to mix the dough. Mix the dough on low for 10 minutes in the stand mixer. Although you can crank up the mixing speed, the mixer will shake quite vigorously. The large amount of dough combined with the speed of the mixer will cause the bowl to clatter against the mixer constantly. To make things easier on the mixer, I prefer mixing the dough at a low speed. Once you have kneaded the dough for 10 minutes, turn the dough over a work surface and knead it several times by hand. The dough shouldn’t be sticky, so you won’t need to flour the surface. Shape the dough into a ball and place it into a large, lightly greased bowl and cover it with a damp towel, silicone lid, or plastic wrap. Let the dough rise for 1 hour to 1 hour 30 minutes, until the dough doubles in size.
MAKE THE PINEAPPLE BUN TOPPING
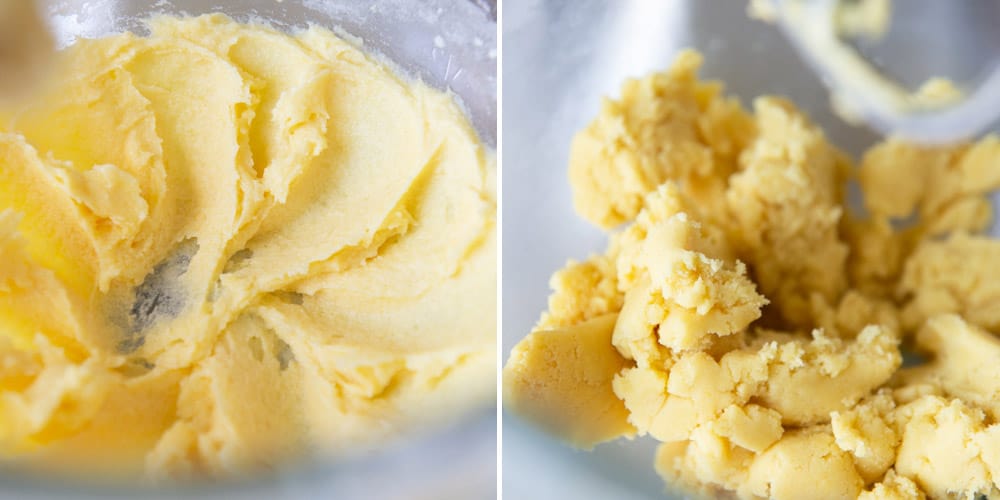
While the bread dough is rising, make the pineapple bun topping. A lot of pineapple bun recipes, will call for lard and custard powder. I wanted to use ingredients that I often keep around the house, so I used butter, vanilla, and turmeric instead. The turmeric gives the topping a beautiful and natural yellow hue. To make the topping, simply mix all the ingredients in a stand mixer and let the topping sit at room temperature until you are ready to shape the pineapple buns.
SHAPE THE BUNS
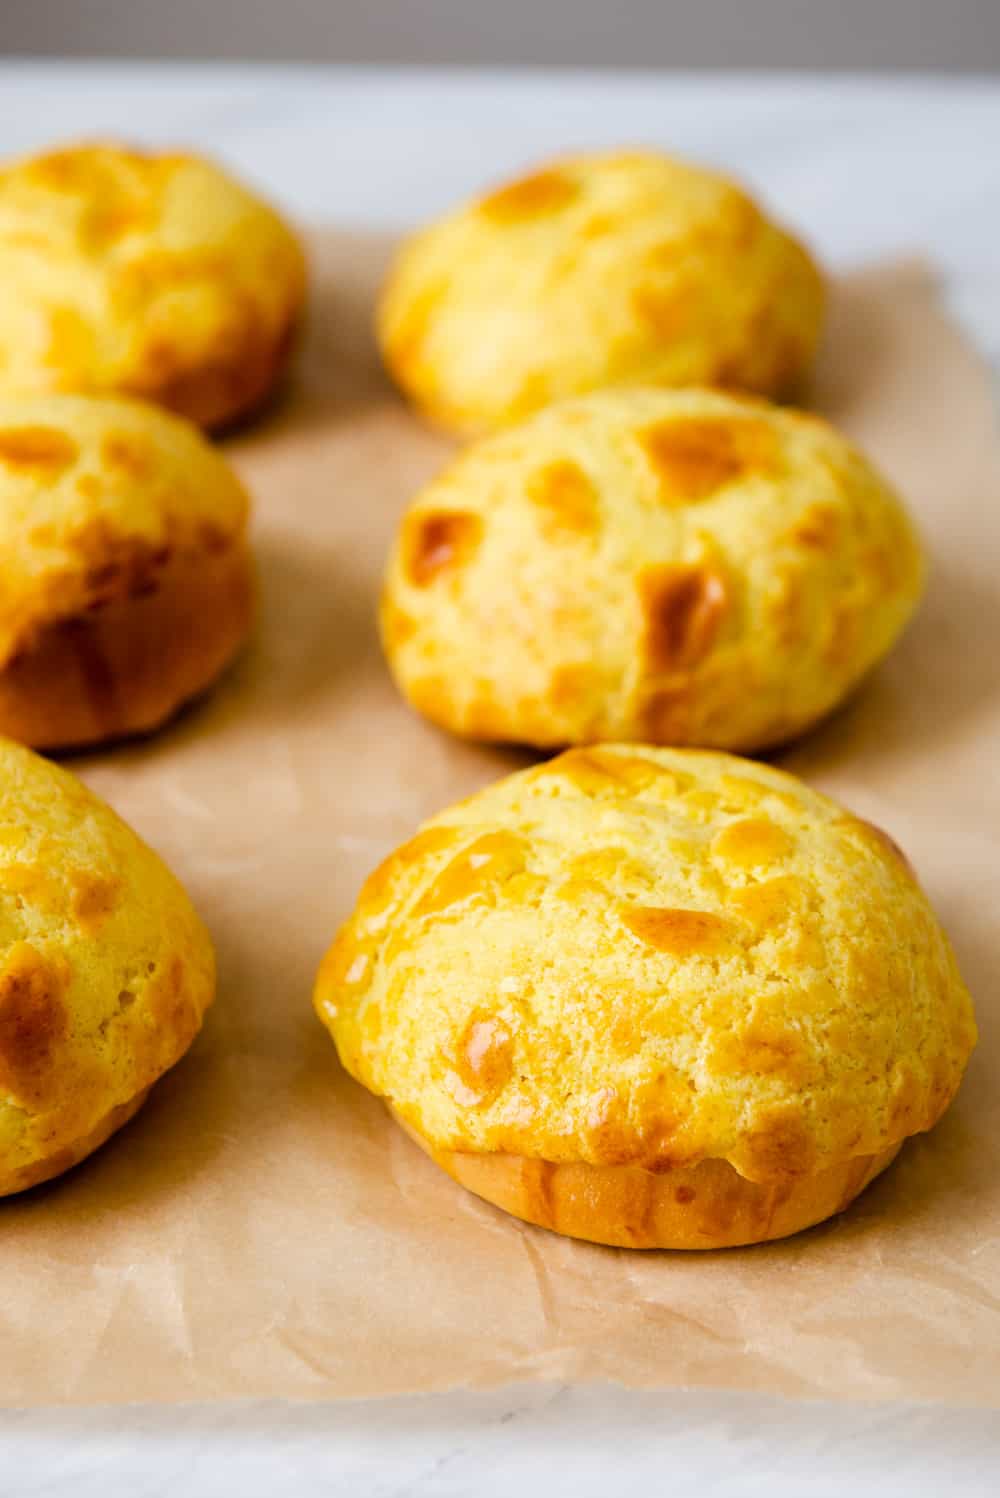
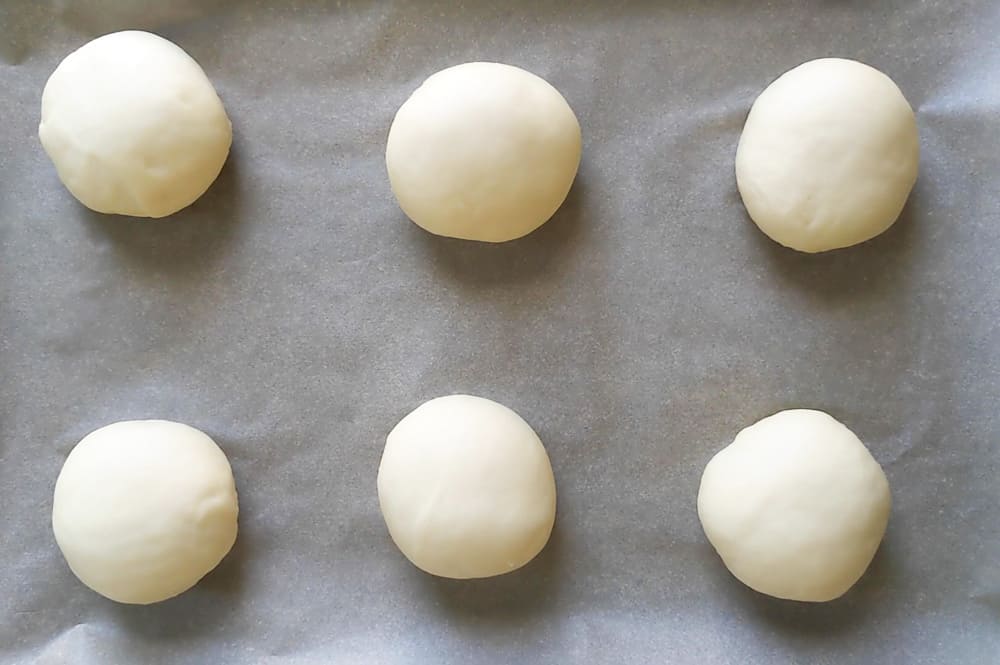
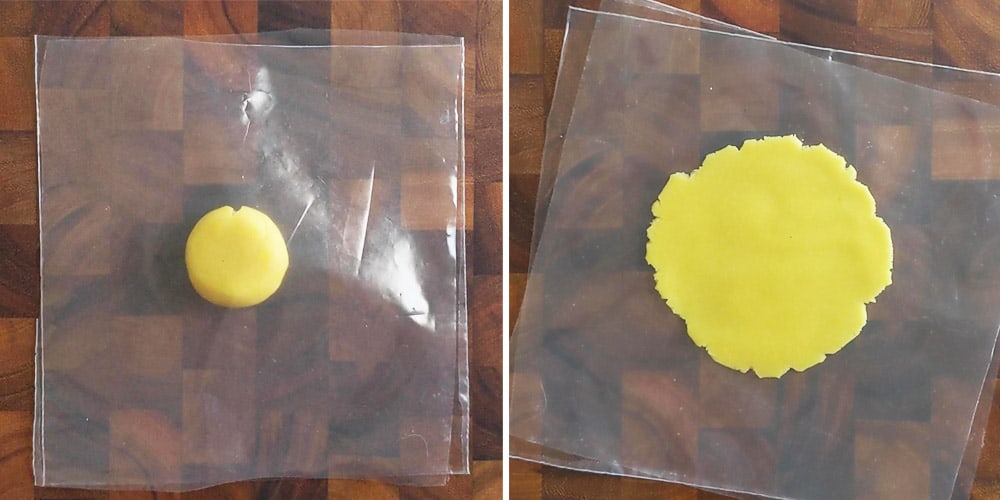
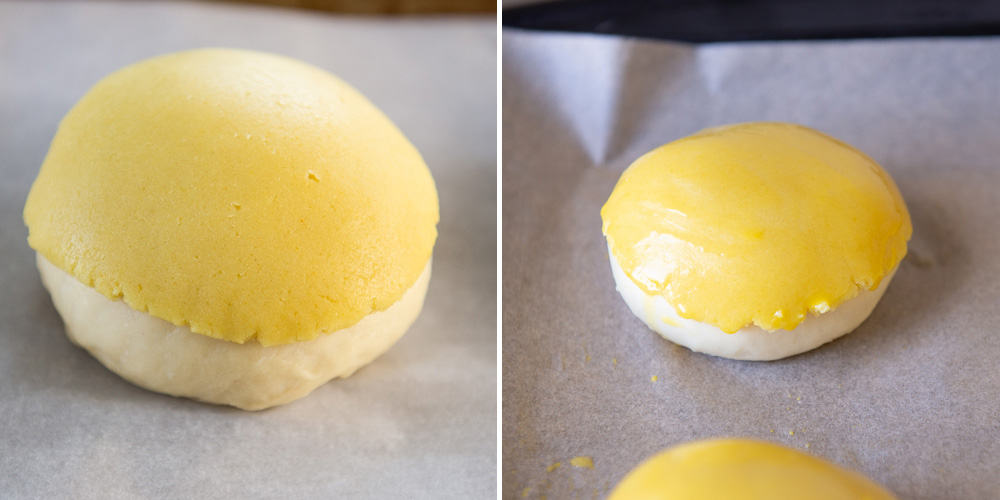
I prefer baking 6 pineapple buns at a time on a single baking sheet. I tried baking 12 at a time with 2 baking sheets, but I noticed the bake was very uneven on the buns. As a result, I started weighing the dough, divided it in half so that I can bake the bread in 2 batches. Put half of the dough in the refrigerator while you shape and proof the first batch of pineapple buns. Putting the dough in the refrigerator the activity of the yeast so that the dough doesn’t overproof. Once the first batch of pineapple buns are in the oven, start on the second batch. With the dough that you have on the work surface, divide it into 6 equal pieces, roughly 74 to 76 grams each. Knead each piece of dough several times to get rid of any air bubbles. Then, shape them into balls. Place all 6 pieces of dough onto a baking sheet lined with parchment paper. Then, cover the dough with a towel. Let the buns rise again for 30 to 45 minutes, until they expand to 1.5 times its size (they’ll be about 3 inches in diameter). After the second proof, divide the dough for the topping into 12 equal pieces, about 27 to 29 grams each. Then, shape each piece of dough into a small ball. Take one of the balls of dough and roll it out into a circle between 3.5 to 3.75 inches in diameter. I like to roll out the topping between 2 sheets of plastic so that the topping is easy to remove. To get the plastic sheets, I cut up a plastic storage bag. Alternatively, you can use parchment paper, but it tends to crease. Carefully cover each bun with the topping. Then, brush the tops of the buns with egg wash. The egg wash enhances the look of the crackling effect once the buns are baked.
BAKE
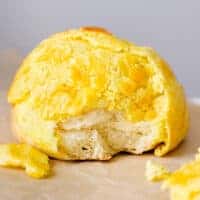
Bake the buns at 375ºF for 14 to 16 minutes. If you want the top to look darker, bake them at 385ºF for 14 to 16 minutes, until they are golden at the top.
CAN YOU PREPARE PINEAPPLE BUNS OVERNIGHT?
Yes! You can proof the dough for the buns and the topping overnight if you want to break up the work. Place the bread dough in a greased bowl and cover with plastic. Next, shape the topping dough into a flat disc before wrapping it in plastic. On the following day, an hour before you are ready to shape the buns, take out the topping dough and let it sit on your counter. The topping is easier to roll out when it is at room temperature. You don’t need to let the bread dough reach room temperature before shaping. However, the chilled dough will take longer to rise. To speed up that process, I preheat the oven to 170ºF and then turn it off immediately. Then, I place the shaped buns on a baking sheet and into the warm oven. Let the buns rise for 10 to 12 minutes, until they expand to 1.5 times its size. Take the buns out of the oven, add the topping and egg wash, and bake as usual. Note that the buns are more delicate after this speeded up proofing process, so be careful not to deflate the buns when you add the topping.
MORE RECIPES WITH BOB’S RED MILL FLOURS
Milk BreadChinese Chive BoxesVegetarian Gua Bao
Disclosure: This post was sponsored by Bob’s Red Mill! To learn more about their products and to get more recipe inspiration, follow them on Instagram or Facebook.