What’s the difference between apple juice and apple cider? Apple cider is made by simmering the fruit in water and mashing it when it’s tender, almost like homemade applesauce. Then you’ll drain out the solids and lightly sweeten it, leaving behind a warm, flavorful beverage. Apple juice, on the other hand, is made by processing the apples through a juicer and removing the pulp. The only liquid in apple juice is the juice directly from the apple, while apple cider includes added water, so you’ll be able to make a much larger quantity, with fewer apples. Want more juice recipes? Try Green Juice or my favorite Beet Juice.
Ingredients You’ll Need
How you sweeten this homemade apple cider recipe is up to you. I usually add maple syrup at the end of the process, after the solids have been drained out, so you’ll have complete control of the sweetness. You can also use honey, or cane sugar, if you prefer. Or omit the sweetener, for a more spicy drink.
Homemade Apple Cider (Stovetop Version)
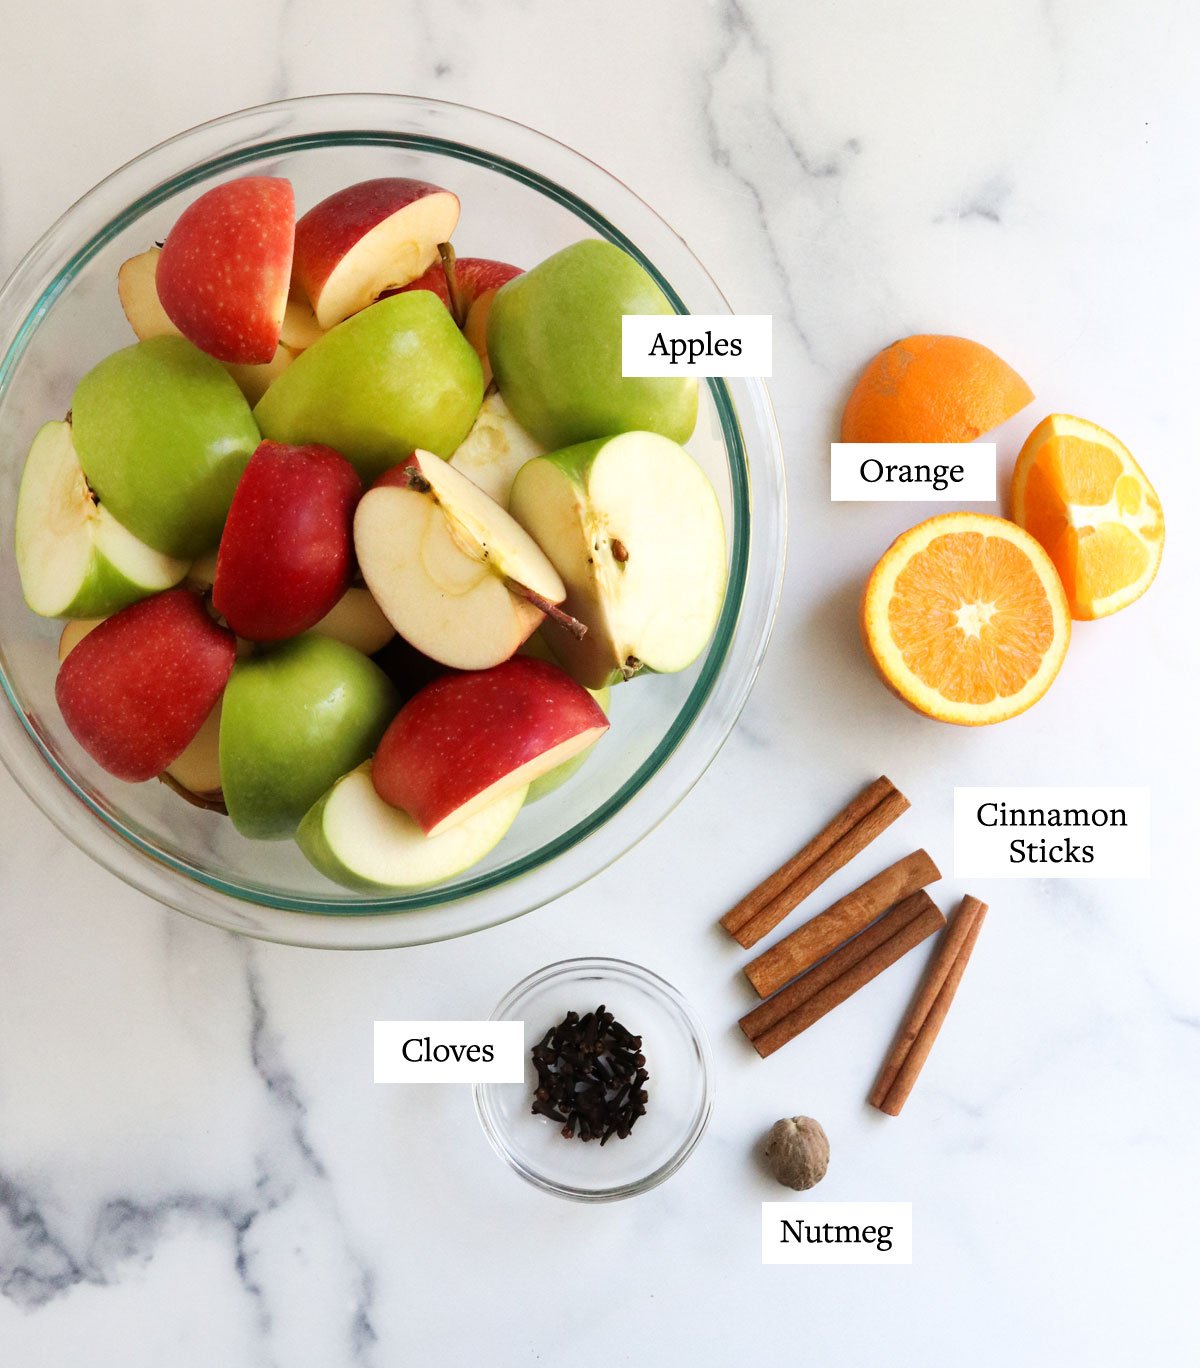
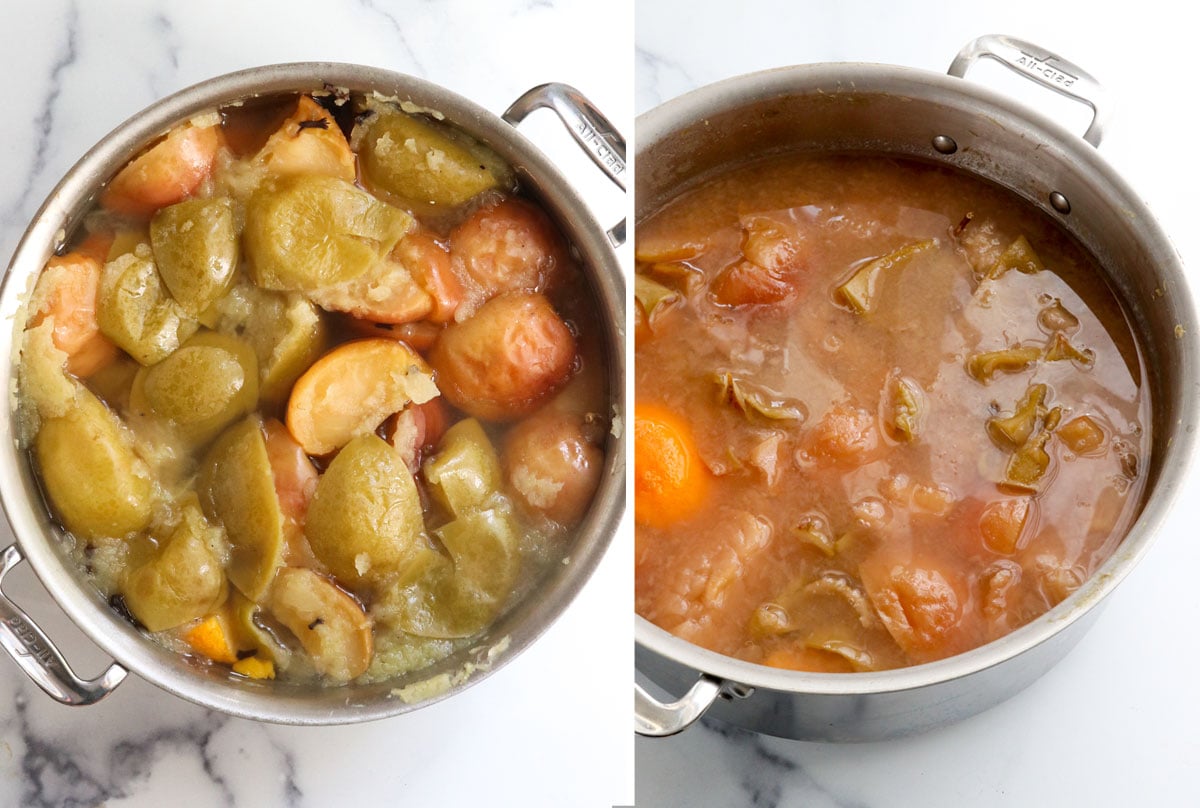
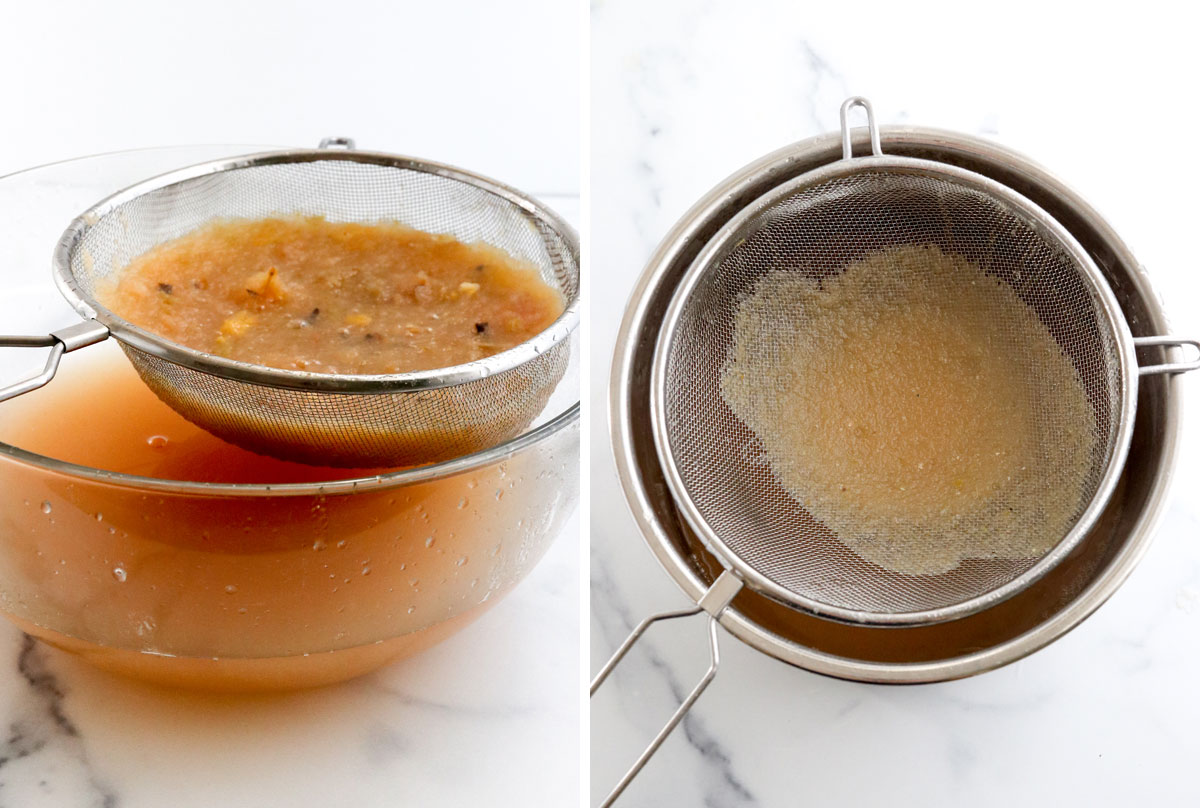
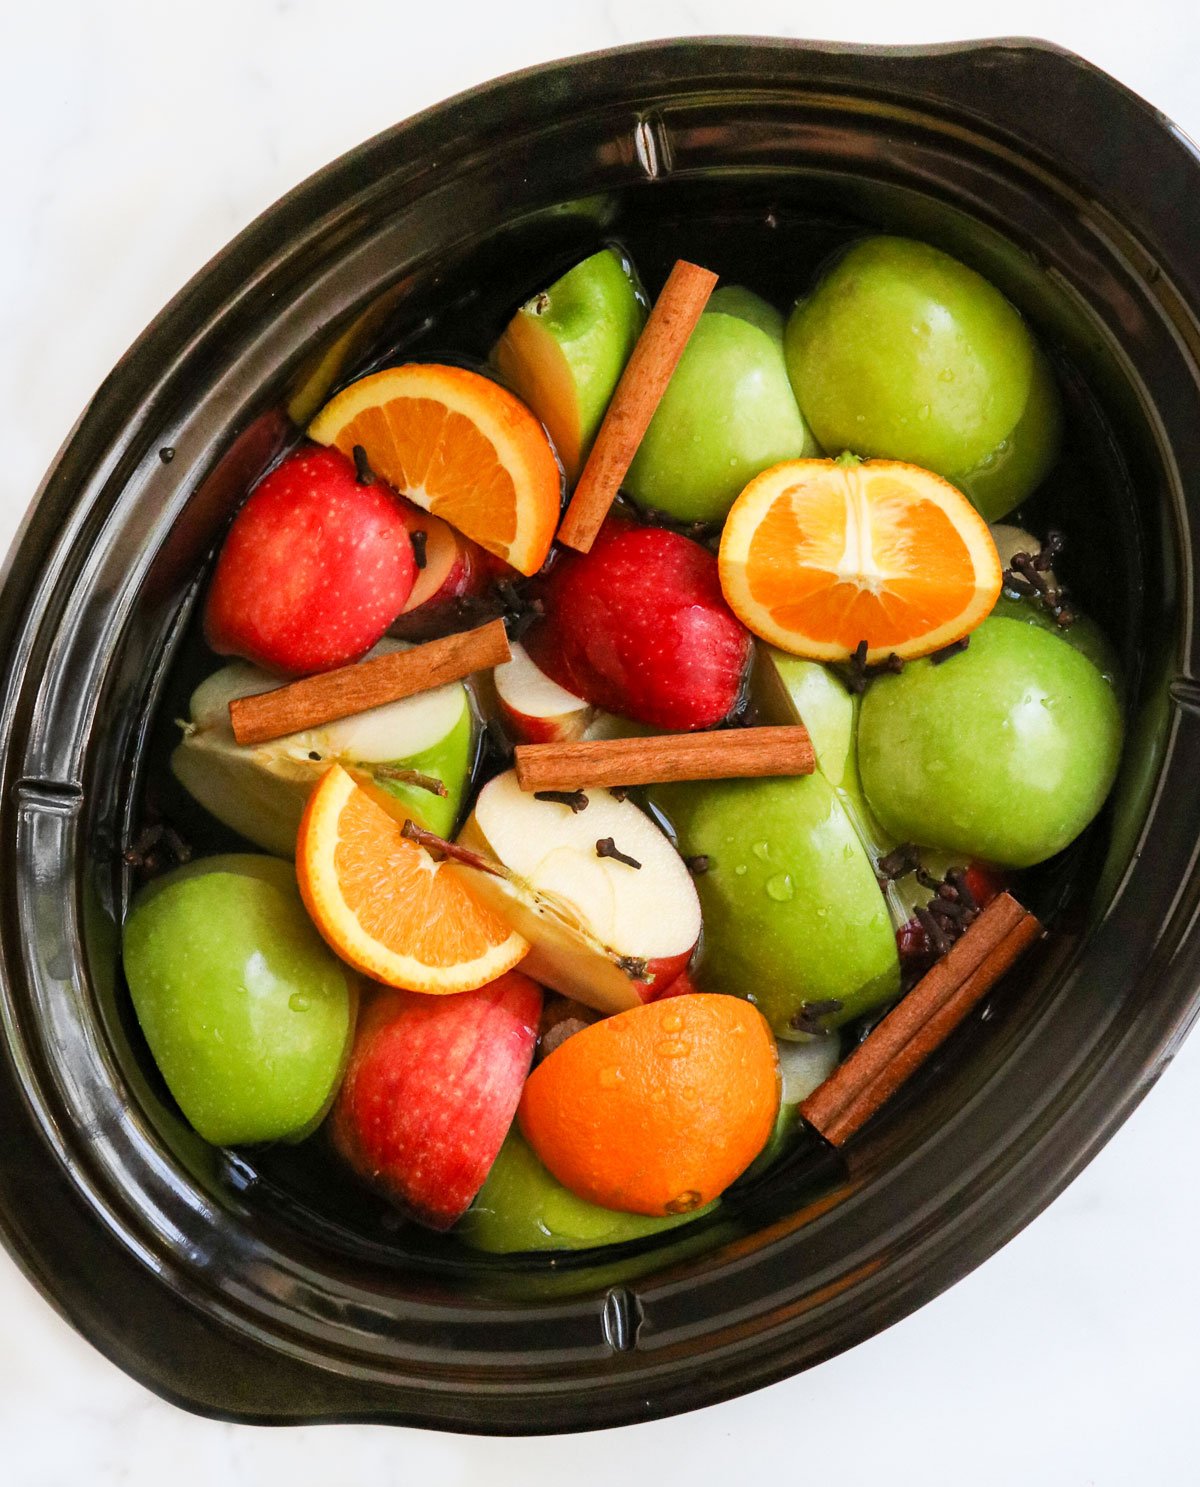
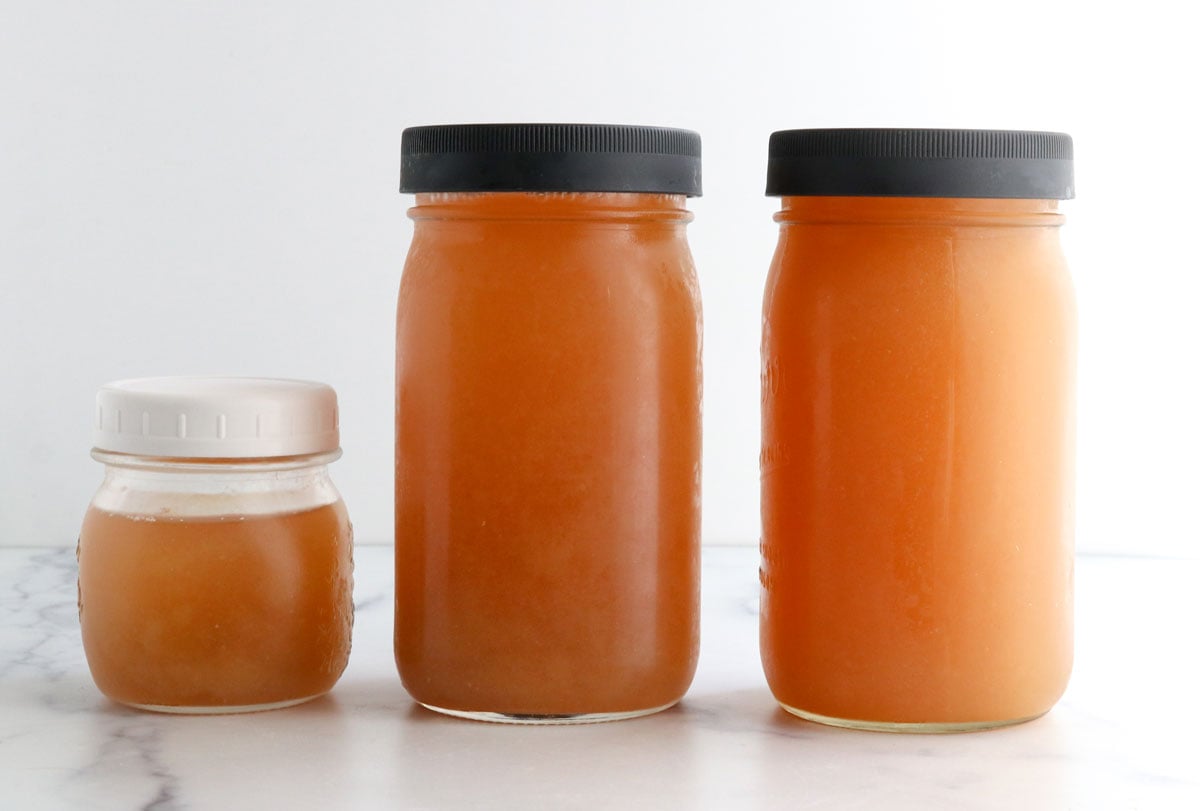
Start by cutting the apples into quarters. You don’t have to remove the seeds or stem, because you’ll be draining out everything later. You’ll also need to slice an orange into quarters. If you can’t find a large orange, use two smaller ones instead. I leave the peel on, for extra flavor and potential benefits, but you can remove the peel if you’re concerned about it adding bitterness to the final drink. (I don’t think it’s noticeable once you add the sweetener.) Add the apple slices and oranges to a large stockpot (at least 8 quarts or larger), along with cinnamon sticks, whole cloves, and whole nutmeg. You can use ground spices if you prefer (see the substitution notes below) but the whole spices are easier to strain out later, without any sediment left behind. Add in enough water to fill the pot, and bring it all to a boil over high heat. Lower the heat and cover, simmering for about 1 hour. When the timer goes off, remove the lid and use a potato masher to mash the cooked fruit. It should start to make the liquid look cloudy, with lots of mashed pulp inside. Return the lid and simmer for 1 more hour. When the timer goes off, remove the lid and carefully drain the solids out of the apple cider. You will most likely have to do this in batches, as there is a lot of pulp to remove! For the most smooth results, I recommend double-straining the apple cider. Once you think you have removed all of the pulp, strain it again! I don’t have any creative ways to use the pulp, so I discard it, but let me know if you have any genius ideas. You know I love using almond pulp (leftover from making almond milk) to make hummus or crackers. Once the apple cider is strained, add the maple syrup and adjust the sweetness to your liking. Serve the apple cider warm, with extra sliced fruit, if you’d like a pretty presentation for a holiday party.
Expert Tips & Common Questions
Instant Pot Apple Cider
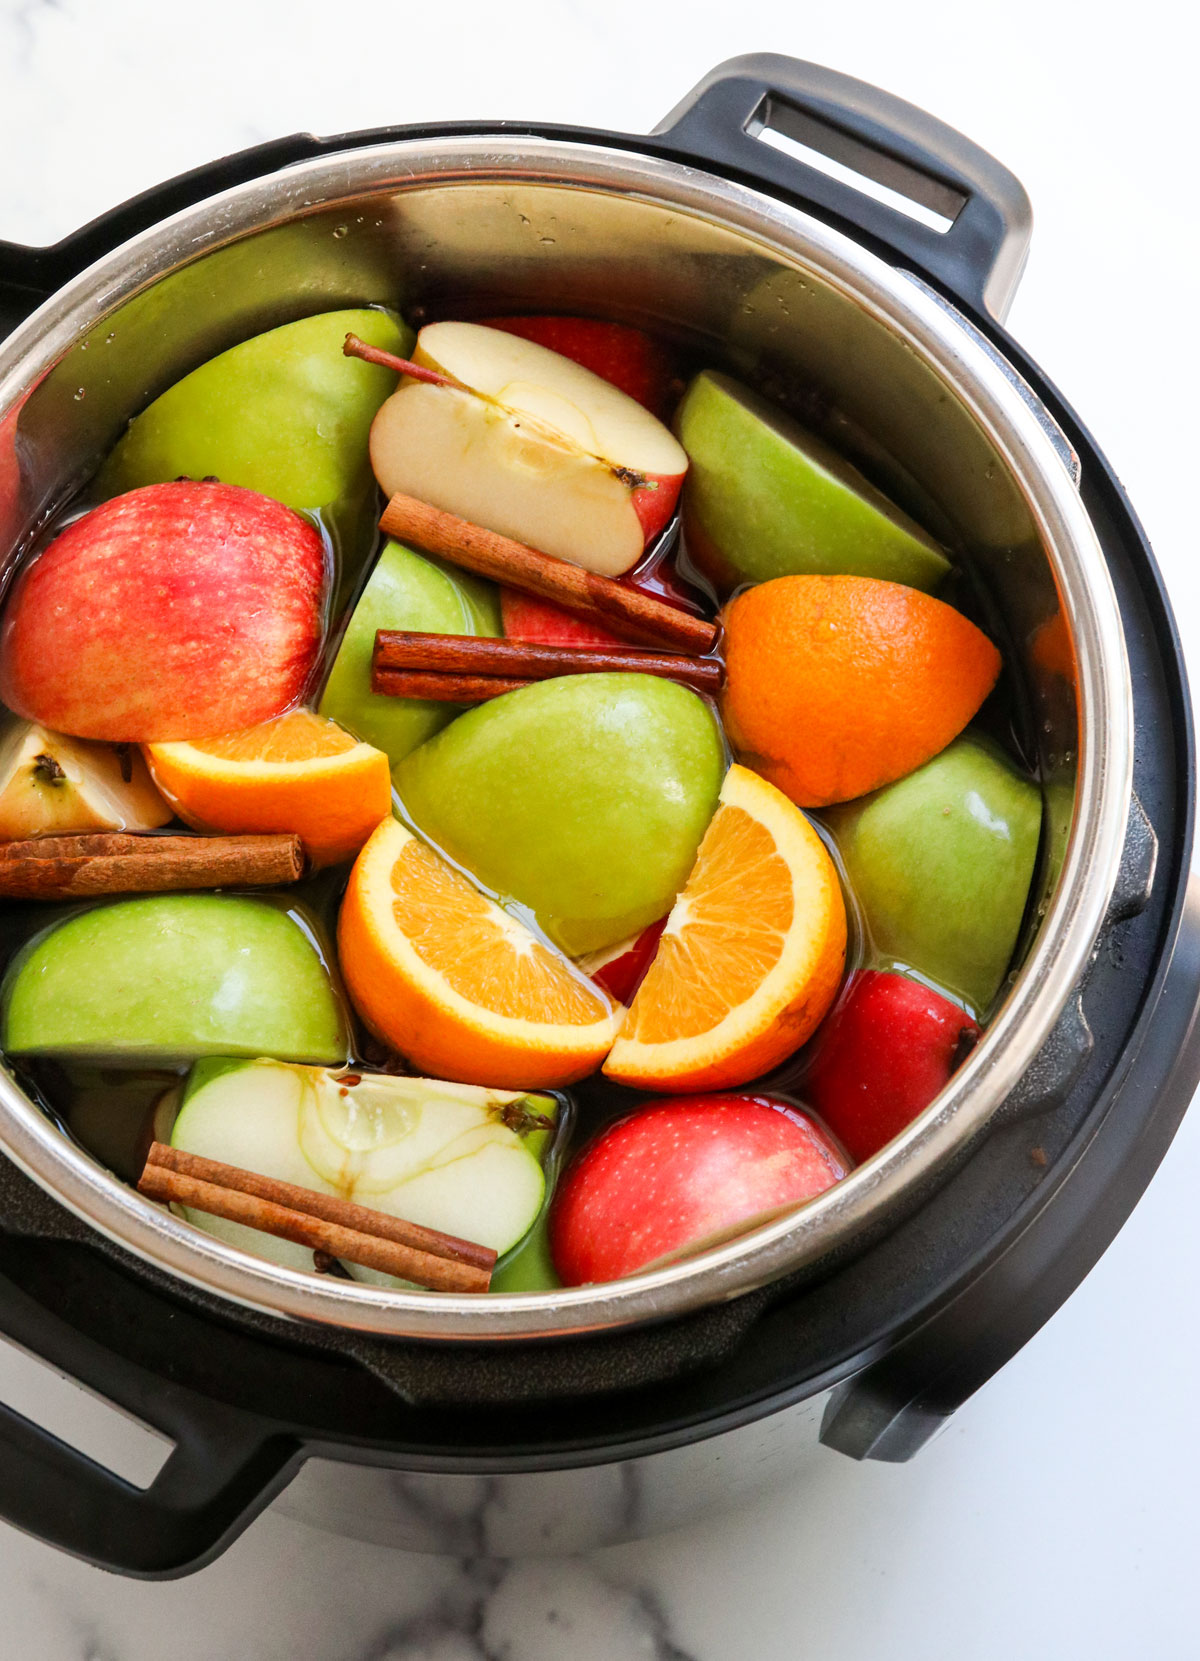
Make apple cider in your Instant Pot for a faster method. Keep in mind, this version won’t make your home smell quite as good, because the apples won’t be simmering for hours… but that’s also the point. It doesn’t take hours to make it this way! To make Instant Pot apple cider, combine the sliced apples, orange, and spices, and fill the pot to the MAX fill line of your Instant Pot. (Don’t ever go past the max fill line, for safety.) Cook at high pressure for 15 minutes, then let the pressure naturally release for 20 minutes. (If you try to release the pressure early, the apple cider might start to spray out of the release valve, so don’t rush it!) Mash the cooked apples and spices, then strain and sweeten as directed in the recipe. You can keep your apple cider warm in the Instant Pot for up to 4 hours if you plan on serving it the same day, or you can keep it chilled in the fridge for up to 7 days.
Slow Cooker Apple Cider
If you’d rather not watch the stove for 2 hours, the slow cooker is the way to go. It will still make your home smell amazing! To make apple cider in the slow cooker, add the sliced apples, orange, and spices and cover them with water. My slow cooker can hold about 10 cups of water, but yours might vary. Cook on high for 4 to 5 hours, then mash the apples and strain out the pulp. Just like the stovetop version, I recommend double-straining the cider for the smoothest results. Return the cider to the slow cooker and add in the maple syrup. Let it cook on low for another 1 to 2 hours, or until you are ready to serve it. The slow cooker can keep it warm for up to 4 hours.
Storage Tips
How long does homemade apple cider last? You can keep it in an airtight container in the fridge for up to 1 week, or you can freeze it for up to 3 months. When freezing a liquid like this, be sure to leave at least an inch of room at the top of the jar, to allow for expansion. That way the lid won’t pop off the jar when you freeze it! Looking for more cozy beverages? Try my homemade Chai Latte, healthy hot chocolate, or Pumpkin Spice Latte for more ideas. If you try this Apple Cider recipe, please leave a comment and star rating below and let me know how you like it.