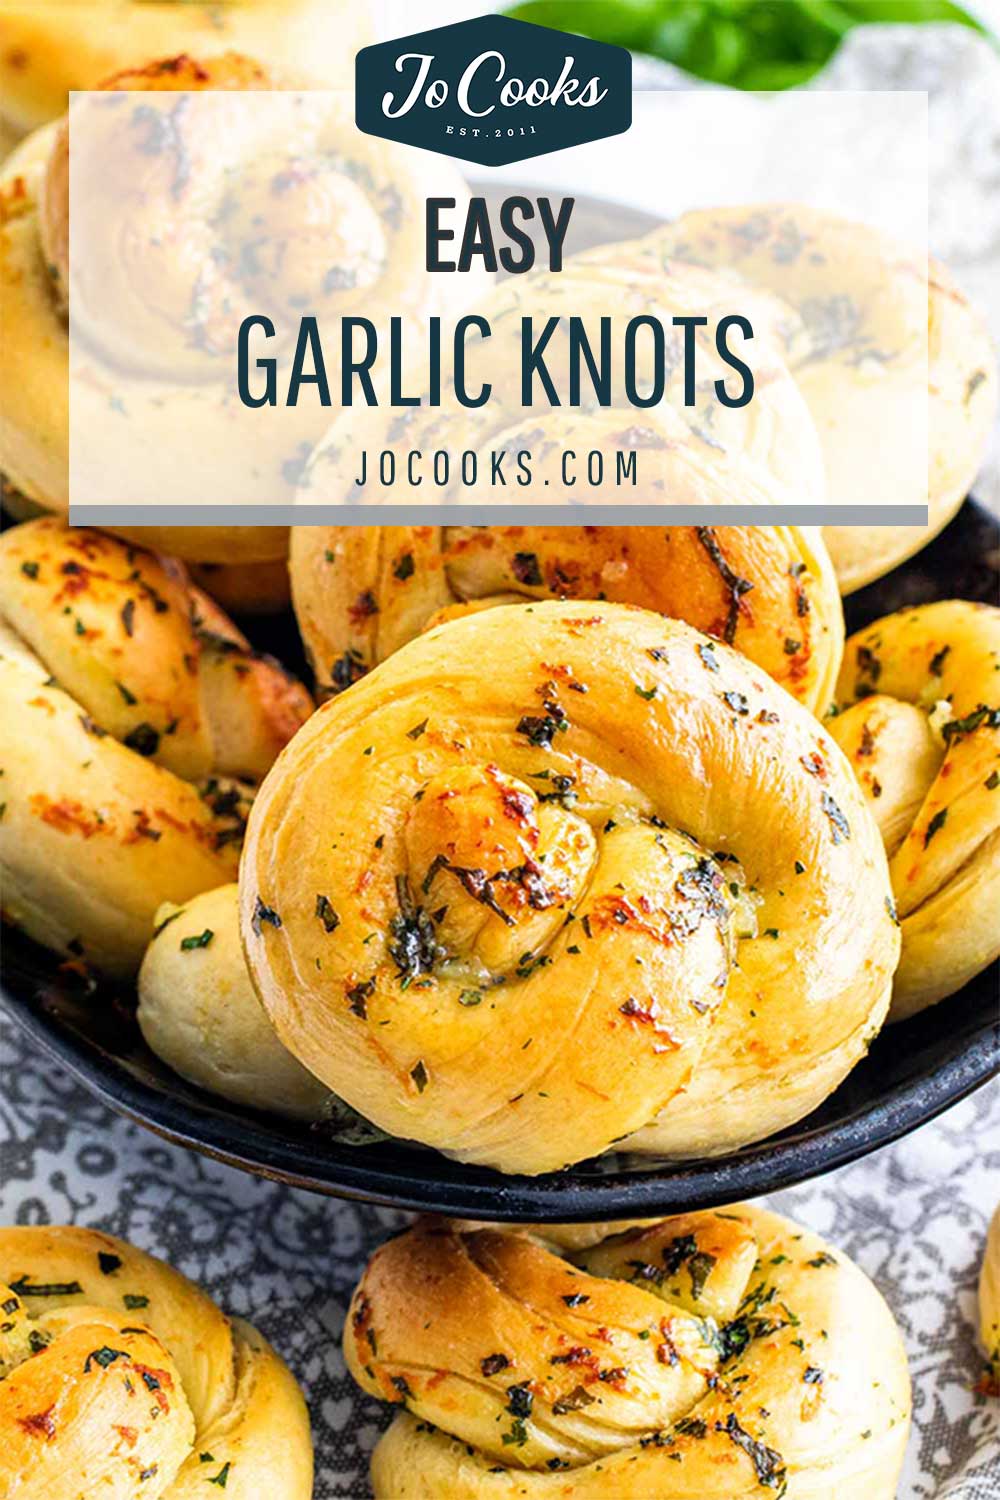
The Best Homemade Garlic Knots Recipe
Baking is one of my all time favorite things to do! Especially when I bake something as adorable and delicious as these Garlic Knots! Don’t let the knots scare you, they are incredibly easy to make. I’ve baked my share of rolls in my day, from these Classic Dinner Rolls, to Best Ever Dinner Crescents to these Brioche Buns, but I have to say these garlic knots are some of my favorite! Requiring just a handful of simple, kitchen staple ingredients, you will be blown away by how spectacular and easy this dough is to put together!
Knots
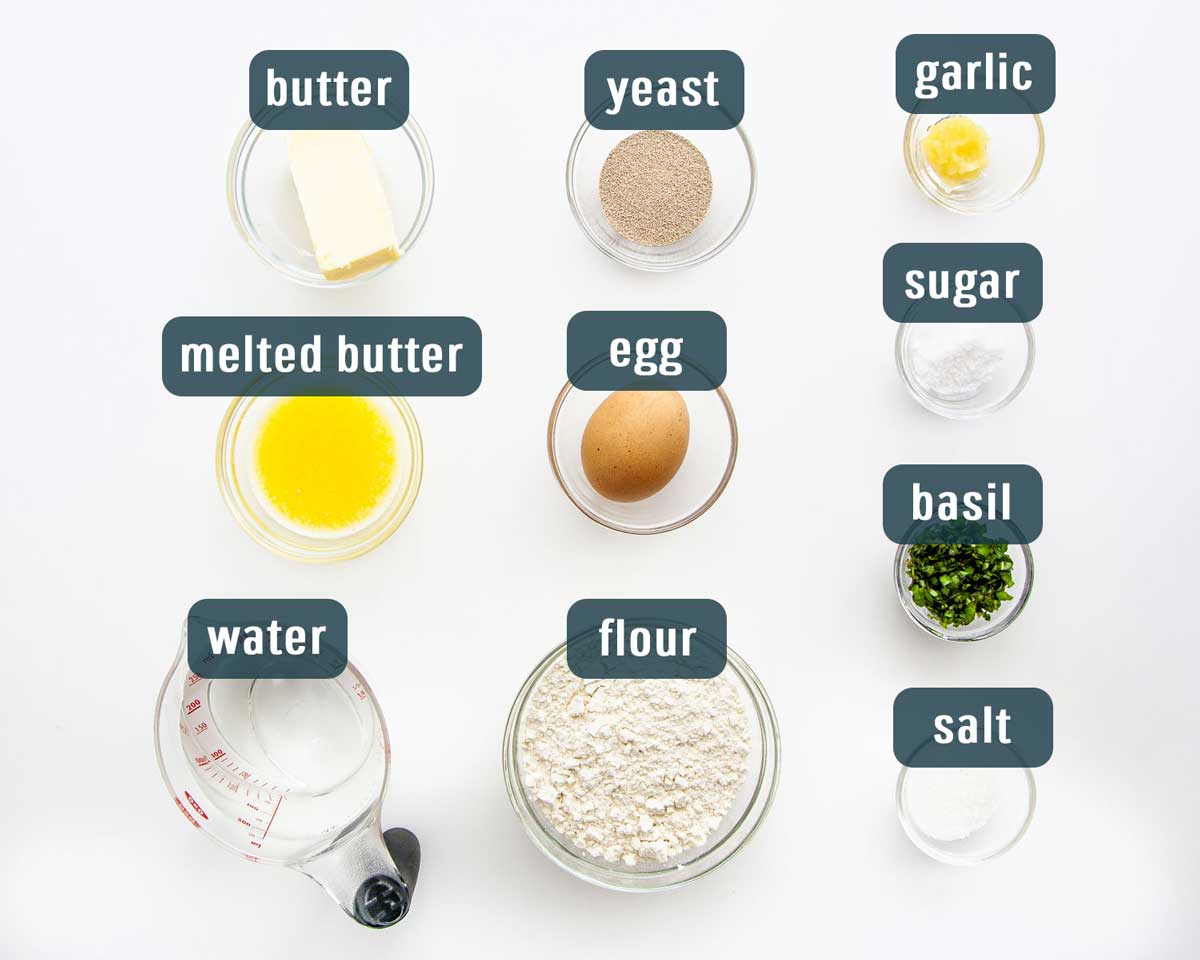
Water – It’s super important to make sure your water is lukewarm. The best temperature of the water should be anywhere from 95°F to 105°F for this. You don’t really want anything warmer, as it will kill the yeast. Butter – I always use unsalted butter, especially in breads, because we already add salt, so this way I can control how much salt is added to my bread. Did you know that small quantities of butter is added to breads because it results in a higher rise and a crisper crust! Egg – I used a large egg. Flour – All purpose flour or you can use bread flour. Sugar – Sugar is important when making bread, it’s what makes it soft and tender by absorbing some of the water and slowing down the formation of gluten strands. Sugar is what feeds the yeast. Salt – To taste, but a must in any baked good. Yeast – Regular active dry yeast, though you can use instant yeast as well, you just don’t need to activate it.
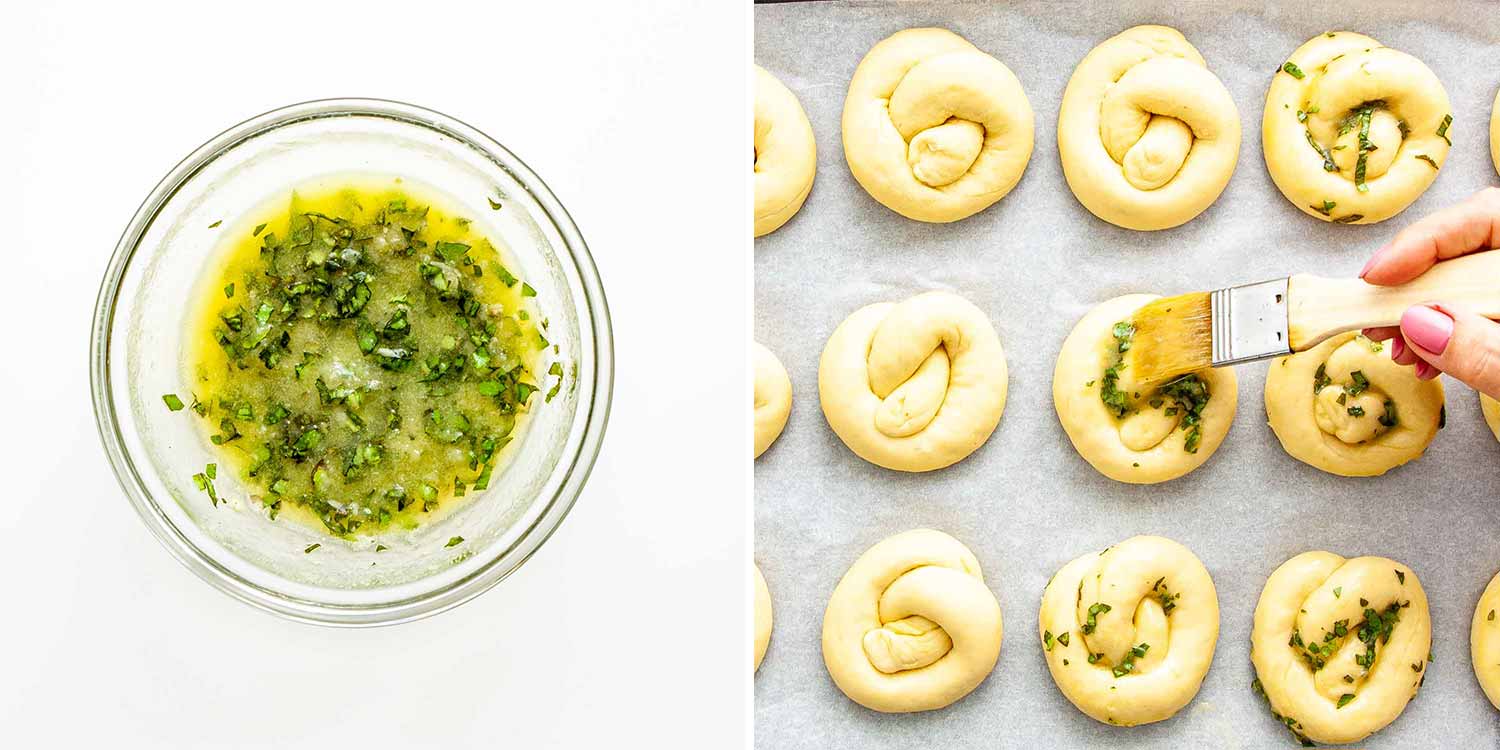
Garlic Butter
Butter – I used unsalted, melted butter. Garlic – Fresh garlic is best! Minced. Basil – Freshly chopped basil. Feel free to sub with parsley.
The most important part of a garlic knot recipe from scratch is activating the yeast. Once that’s done, all you have to do is make a simple dough with the help of a stand mixer, form the knots, and bake! Super easy and delicious!
Activate The Yeast
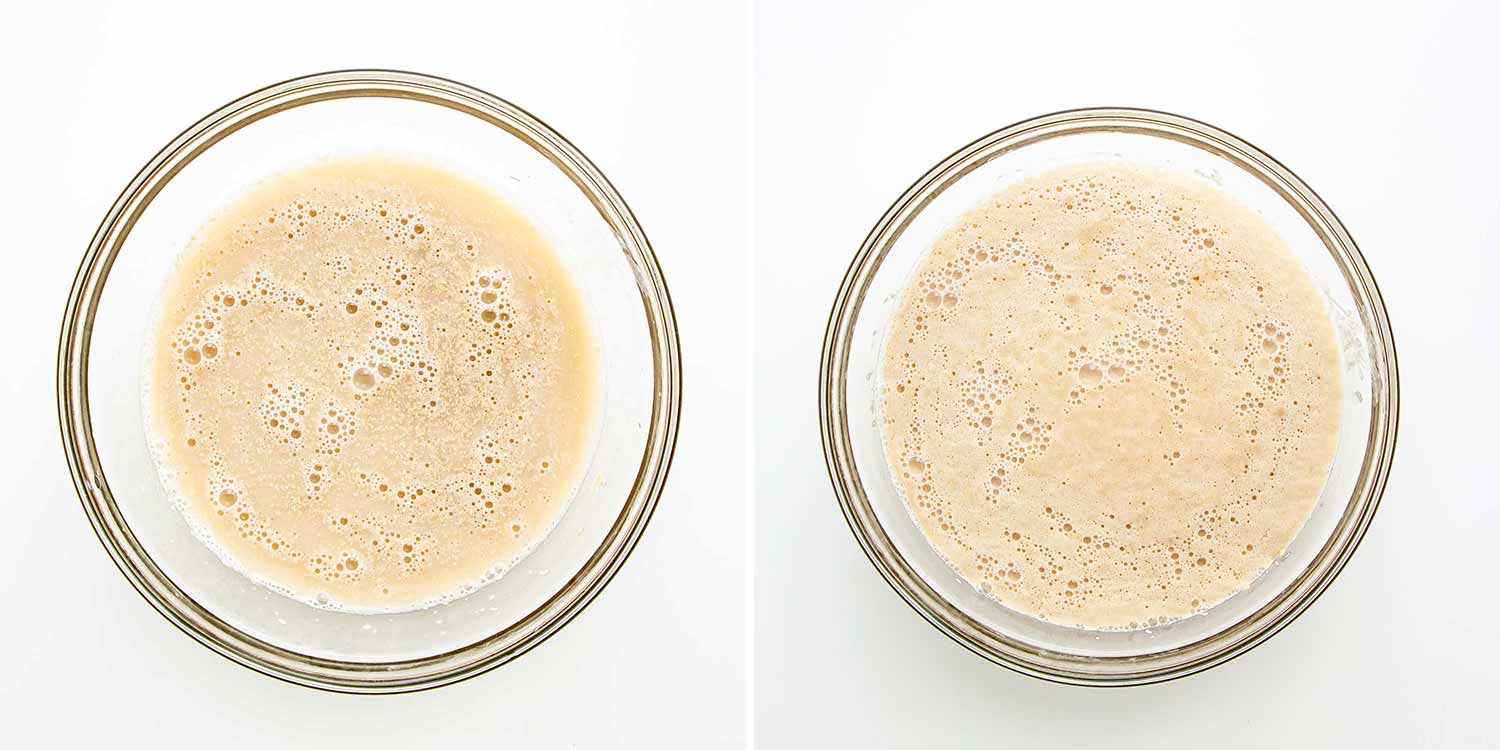
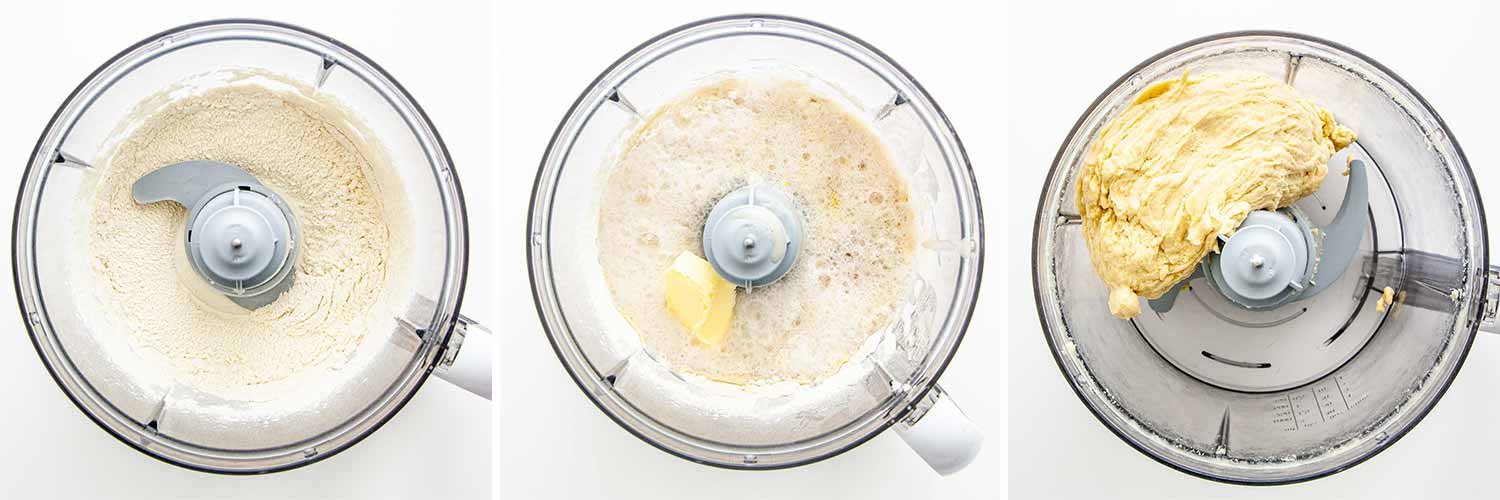
To make any type of yeast bread you have to bloom the yeast properly before you can even begin your dough. To do this, start by whisking the active dry yeast, sugar, and warm water together in a bowl. Then let it sit for 10 minutes undisturbed until the yeast foams up. The water must be warm for this step or the yeast will not activate. Don’t move forward with the recipe if your yeast doesn’t foam up. This means that your yeast is dead and you need to buy new yeast.
Make The Dough And Let It Rise
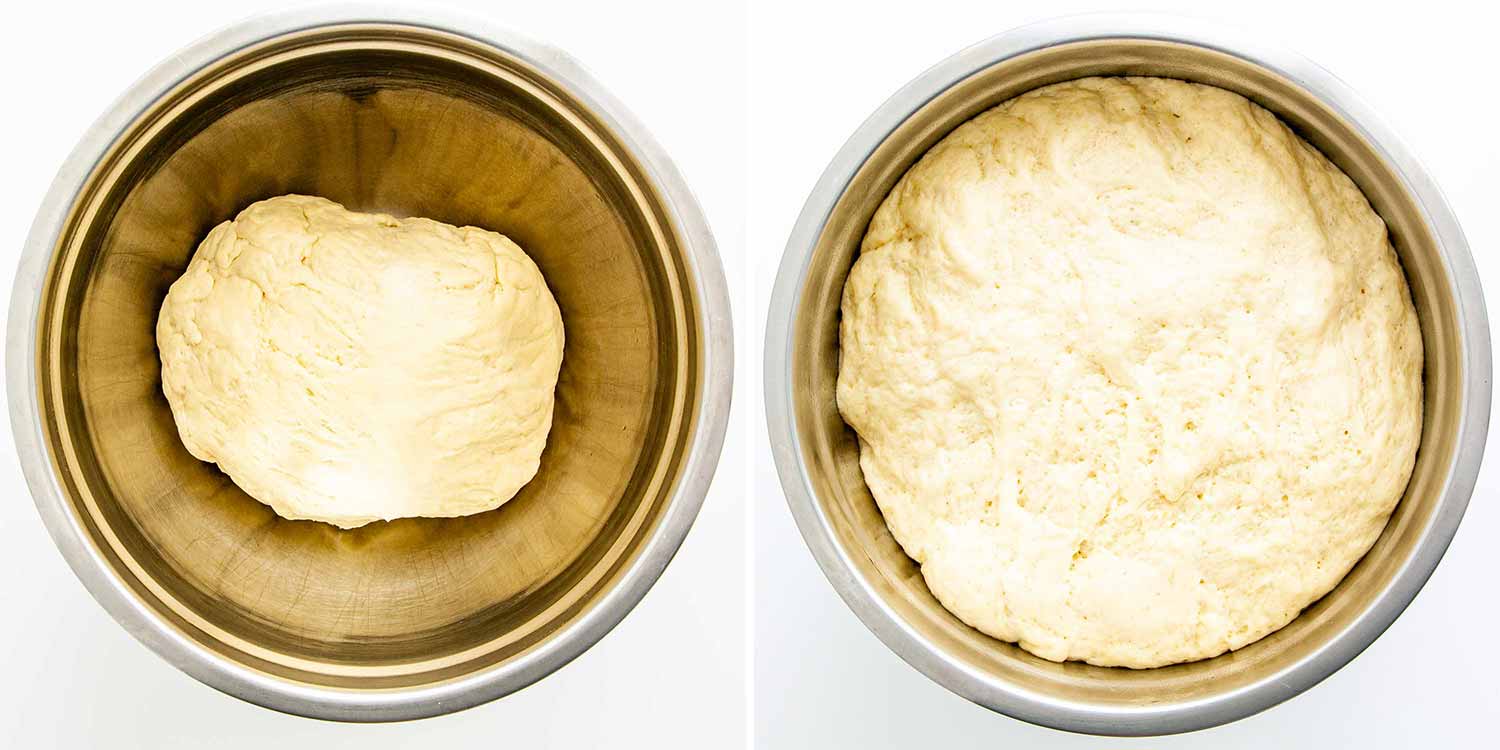
Once the yeast has bloomed, you can make the dough. First, mix the flour and salt together in the bowl of your stand mixer. Then add the egg, butter, and yeast mixture. Next, using the paddle attachment, mix the ingredients together until they are well incorporated and a soft dough has formed. Now, place the dough in a well oiled large bowl and cover it with plastic wrap. Then set it in a warm dark place for about 1 to 2 hours or until it has doubled in size.
Preheat The Oven And Prep The Pan
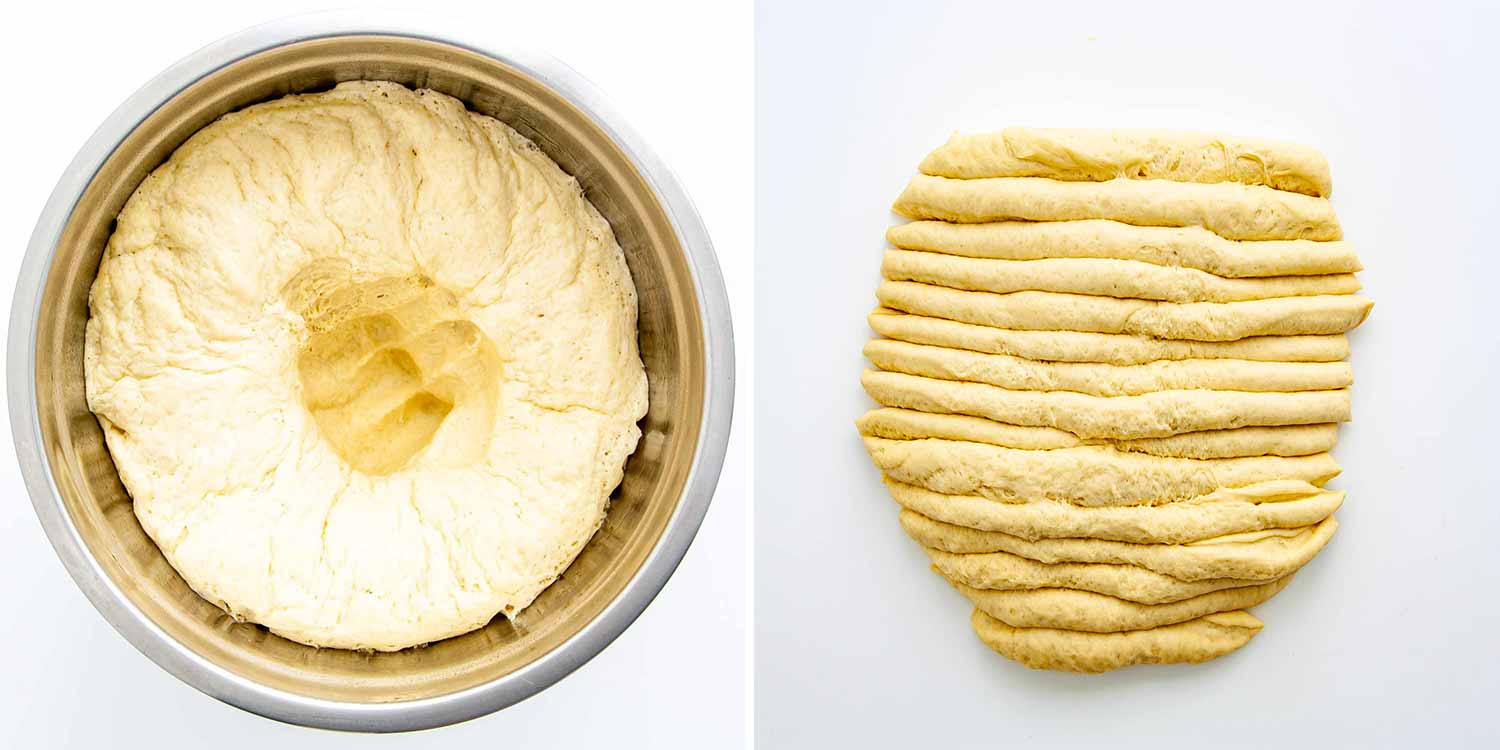
When the dough has doubled in size you can preheat your oven to 400°F (204°C) to prepare to bake the garlic knots. Then line a large baking sheet with parchment paper or a silicone baking mat. You must line the sheet pan or the rolls will stick.
Form The Garlic Knots
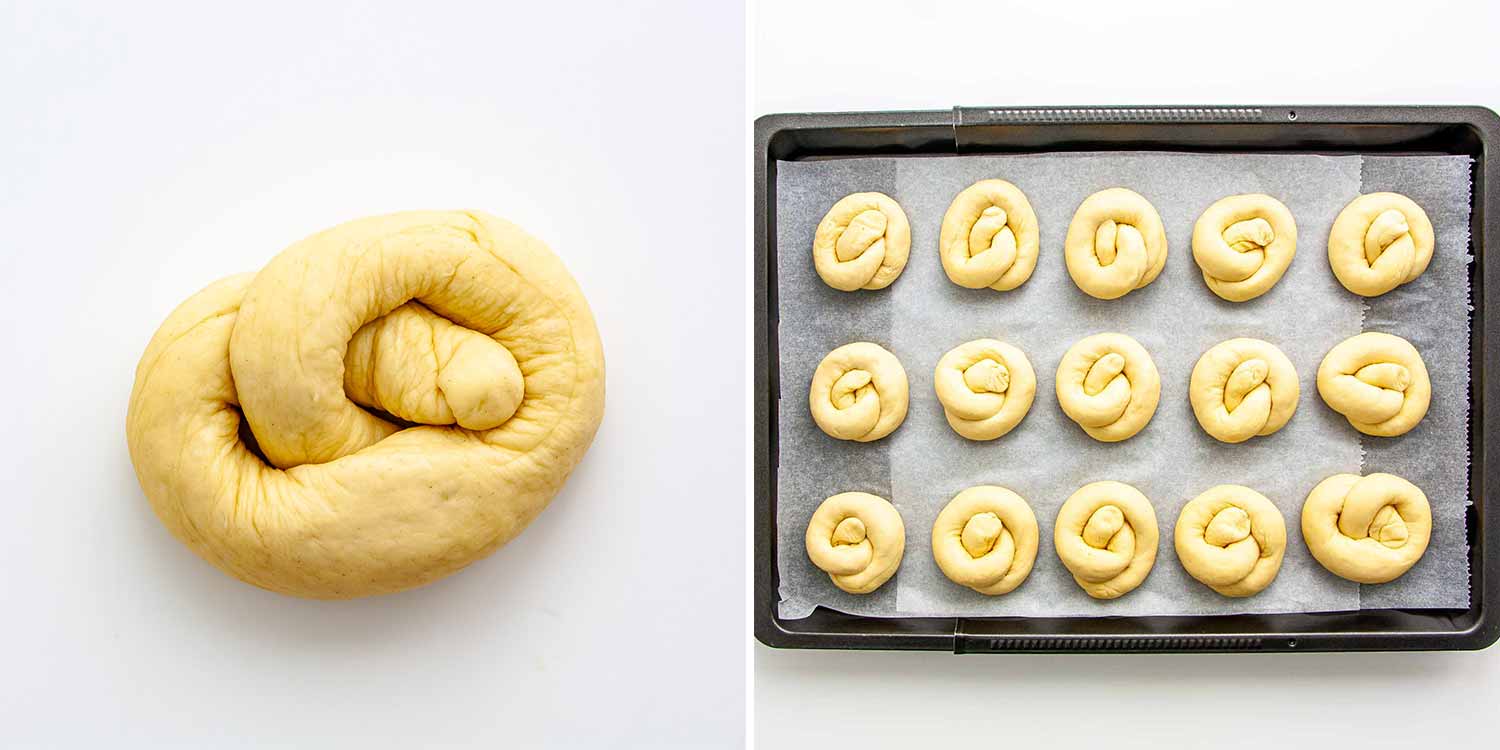
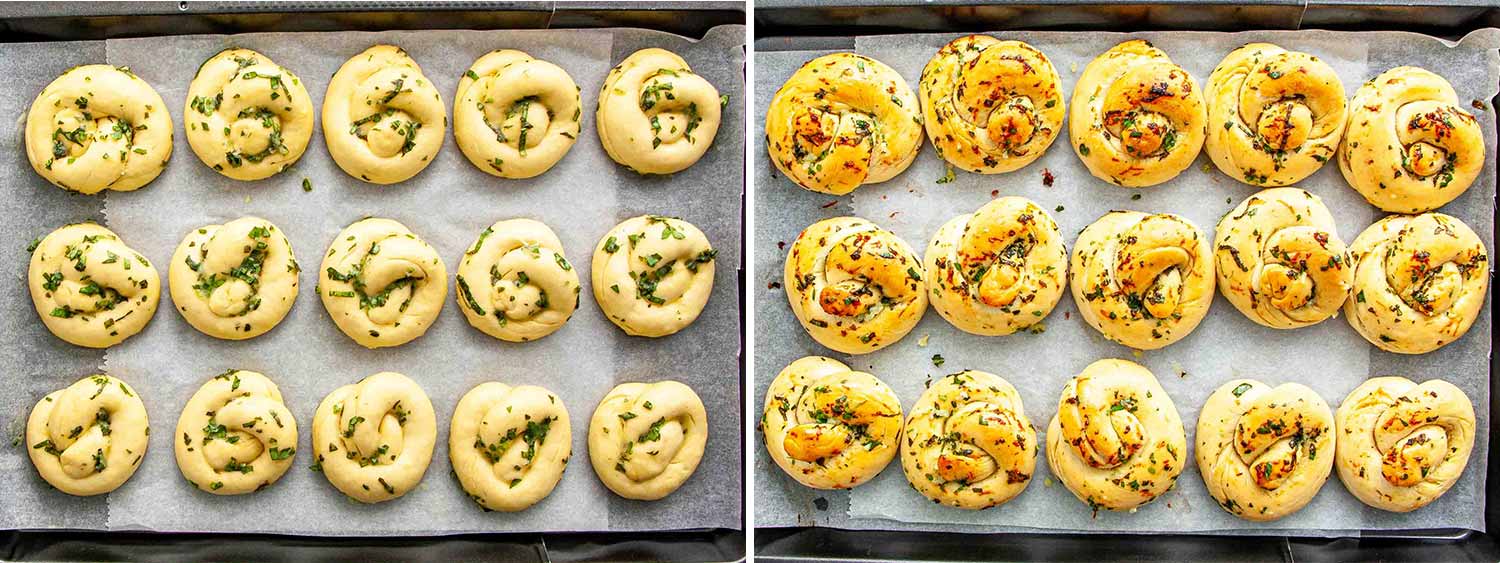
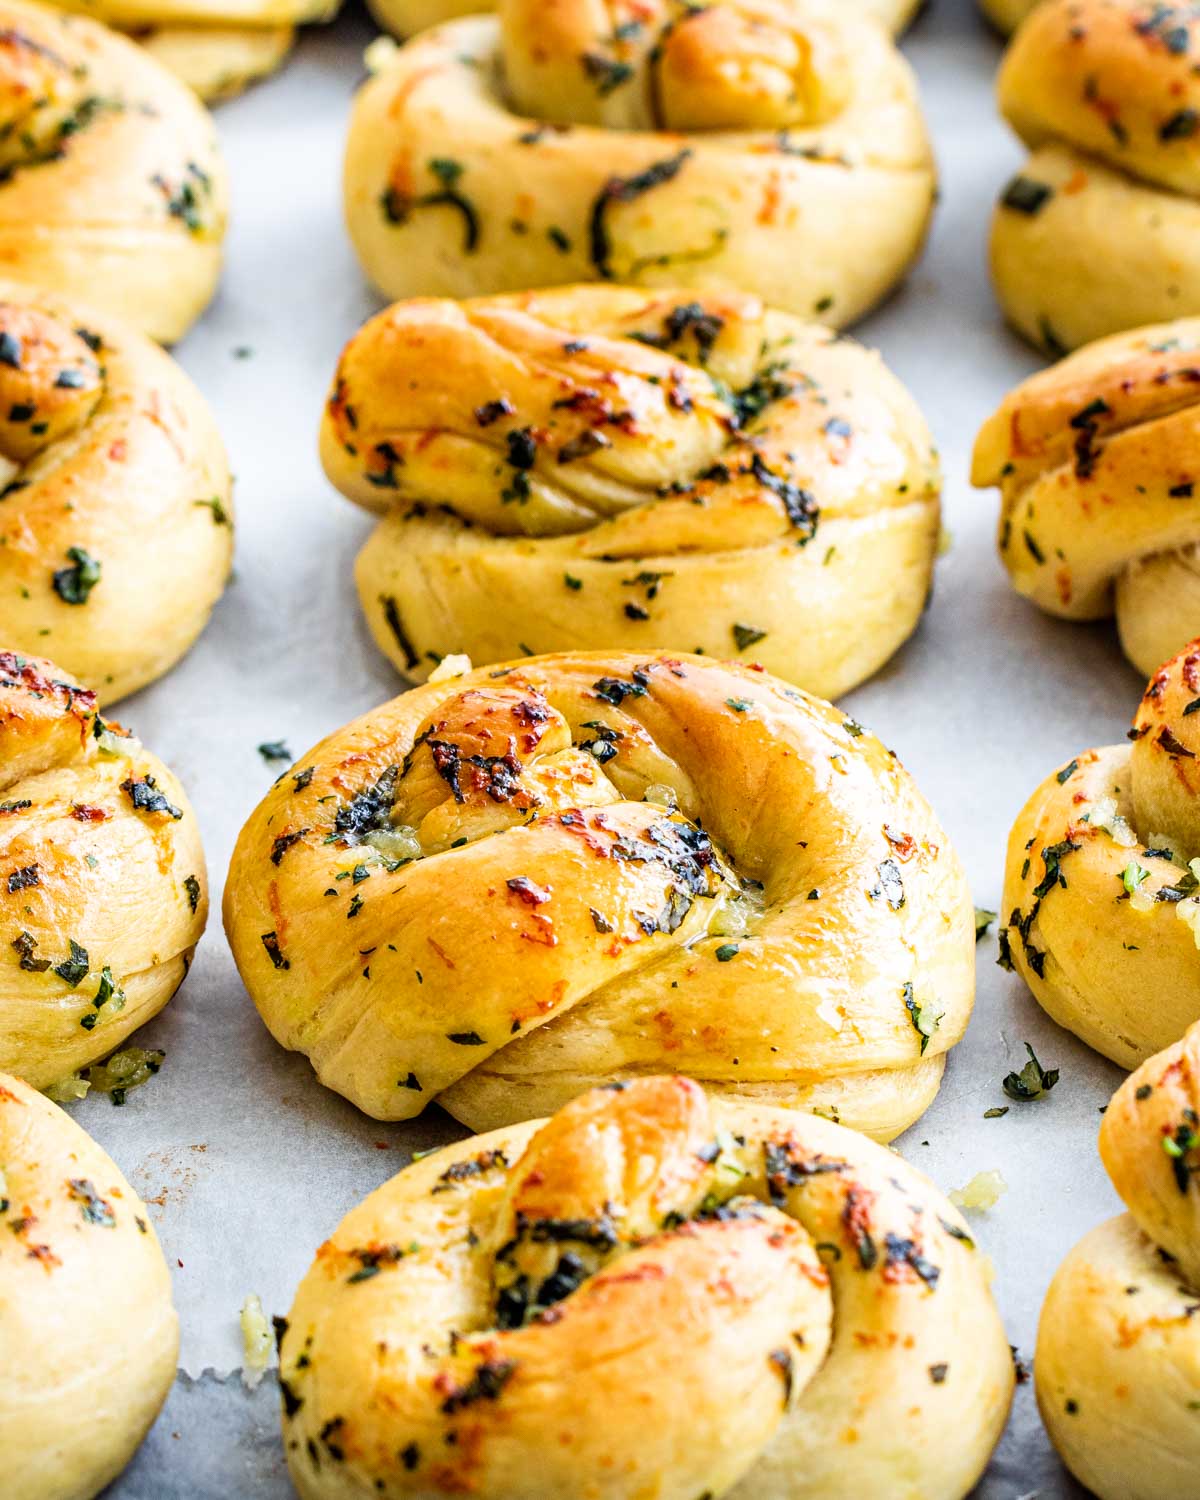
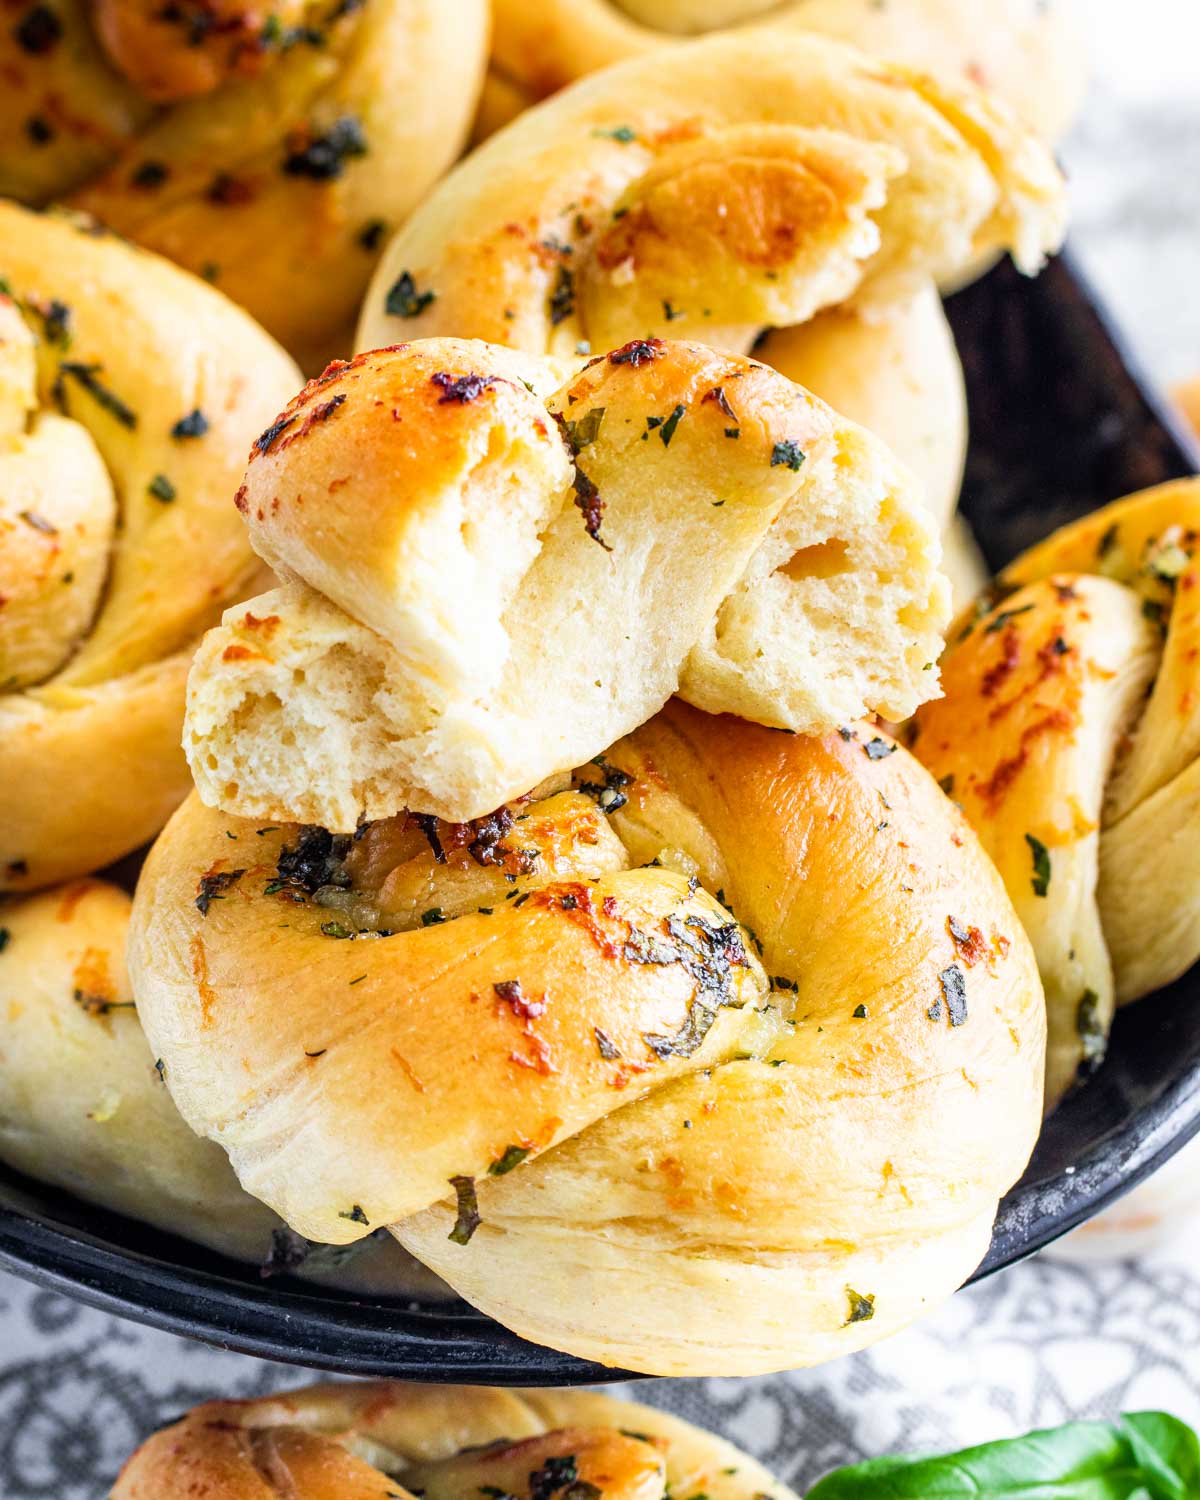
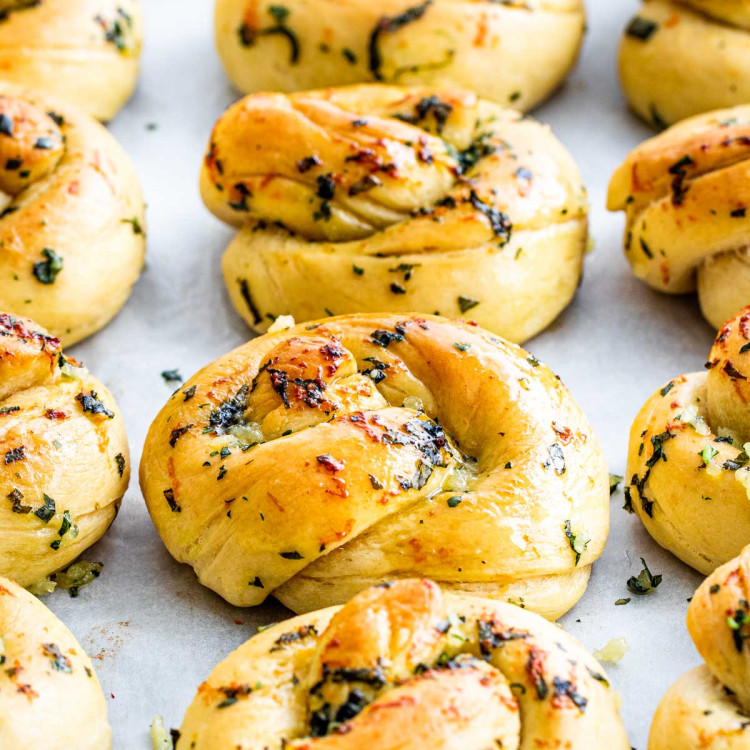
Forming the knots is pretty simple if you just follow a few easy steps. To begin, punch down the dough to let some of the air out and knead it a couple of times with your hands. Now, roll it out on a lightly floured surface until it’s about ½ inch in thickness. Then cut the dough into 15 long pieces each about the same size. Next, shape the knots by rolling out each piece of cut dough into a long rope about 8 inches in length and tying it into a knot. Then place the formed knot on the prepared baking pan and repeat with the remaining pieces of cut dough.
Brush With Garlic Butter And Bake
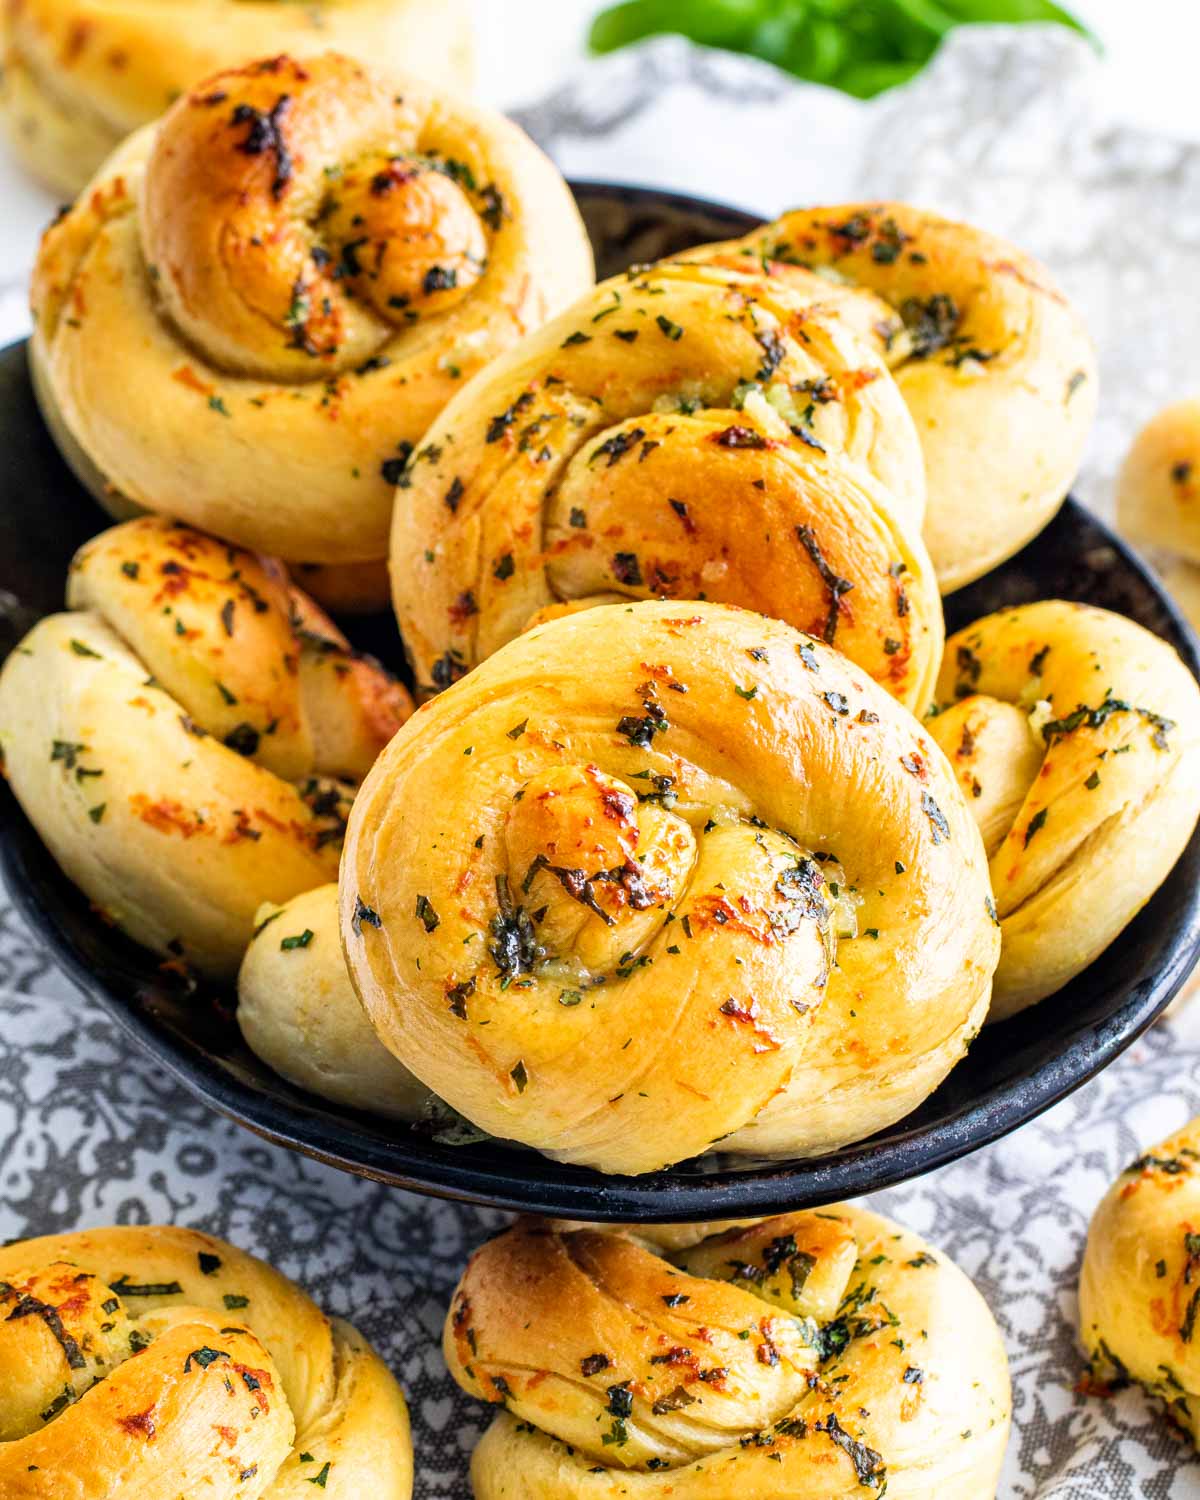
With your knots formed it’s time to make the tasty garlic butter! So mix the melted butter, minced garlic, and chopped basil together in a small bowl. Next, generously brush all the knots on the baking sheet with the butter mixture. Now, allow the knots to rest on the pan for another 10 minutes. Then pop them in the oven to bake for about 9 to 12 minutes or until golden brown in color.
Serve
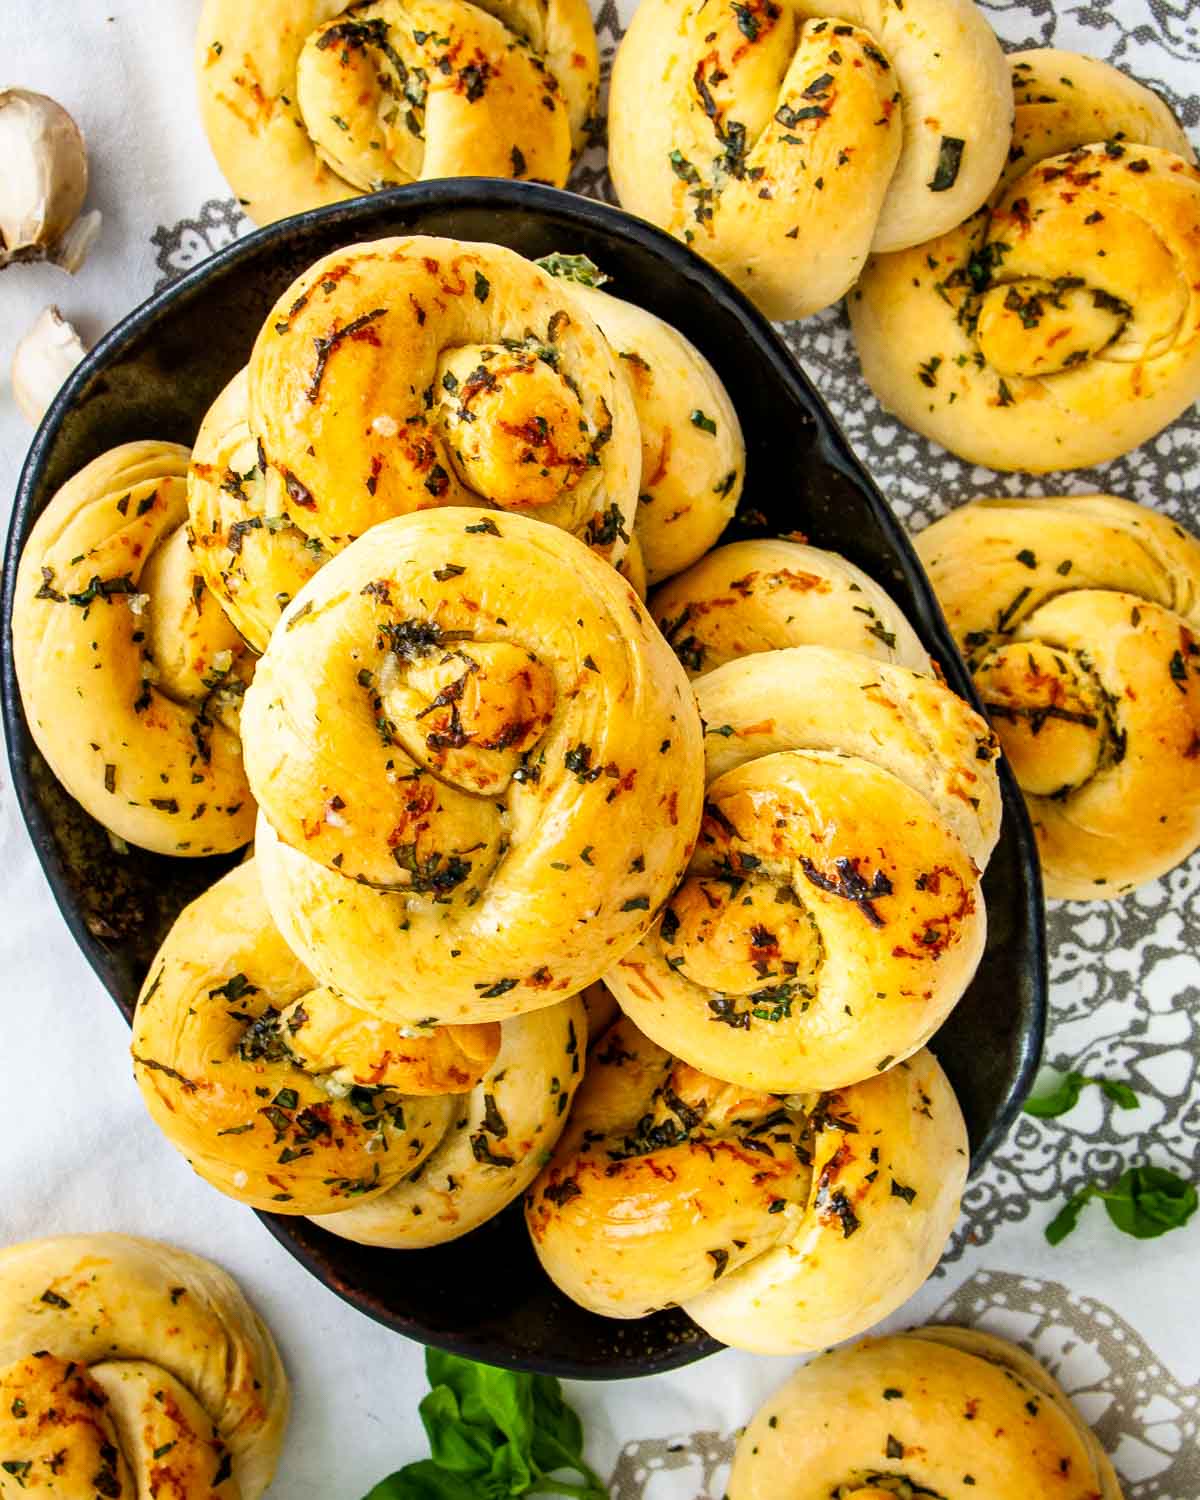
When the garlic knots are done baking, brush them once again with any of the leftover basil butter before serving.
What To Serve With Your Garlic Knots
These garlic knots pair well with any meal! I mean garlic, basil and butter, you can’t go wrong. I would highly recommend pairing this with any Italian cuisine! Try these options:
Pair them with a comforting bowl of Tomato Bisque Sop up all that extra goodness of these Italian Stuffed Peppers Dipped in marinara sauce! Or of course, with the Classic Spaghetti and Meatballs!
Whatever you choose to pair these knots with, you’ll be glad you did.
Can I Make These In Advance?
These knots can definitely be made ahead! Prepare everything as stated in the recipe up until step 5 where you place the knots on the baking sheet. Make sure to wrap them up tightly with plastic wrap and store them in the fridge overnight. The next day, transfer the pan to the preheated oven and bake them as instructed.
Make Ahead Freezing Instructions
Same thing applies, complete the recipe up to step 5 and place the knots on the baking sheet. Wrap the pan in two layers of plastic wrap and make sure they are sealed to prevent freezer burn. Your garlic knots will keep for 2-3 months. The night before you want to bake them, thaw them out in the refrigerator overnight, still wrapped. Finish the rest of the steps and voila!
How To Store
Store garlic knots sealed in an airtight container or bag for up to 5 days.
Freezing
If you’ve already baked your garlic knots, but still want to freeze them: let them cool completely before wrapping tightly in plastic wrap or a freezer bag and store in the freezer for 2-3 months.
Other Delicious Rolls To Try
Quick Yeast Dinner Rolls Butter Biscuits Parker House Rolls Texas Roadhouse Rolls Hawaiian Sweet Rolls Finnish Cardamom Rolls
Recipe adapted from For the Love of Cooking