Be sure to pair this with my crusty, airy, No Knead Bread for dipping!
Clam Chowder
I am a New England native, so it is my honor and privilege to present this incredible, restaurant-worthy clam chowder to you. If you’re new to this recipe, don’t worry. The process is simple. (I promise!) I’ve outlined how to use fresh OR canned clams in this recipe, and I swear- the canned clam version is great. Using canned clams is not only super easy, but it allows you to put a plentiful amount of clams in the chowder without spending a ton of money. It’s really easy to control the consistency of this chowder too, I know some people like their chowder to be super thick, and others, not so much. The longer this soup simmers, the thicker and more concentrated it will be.
New England Clam Chowder vs. Manhattan Clam Chowder
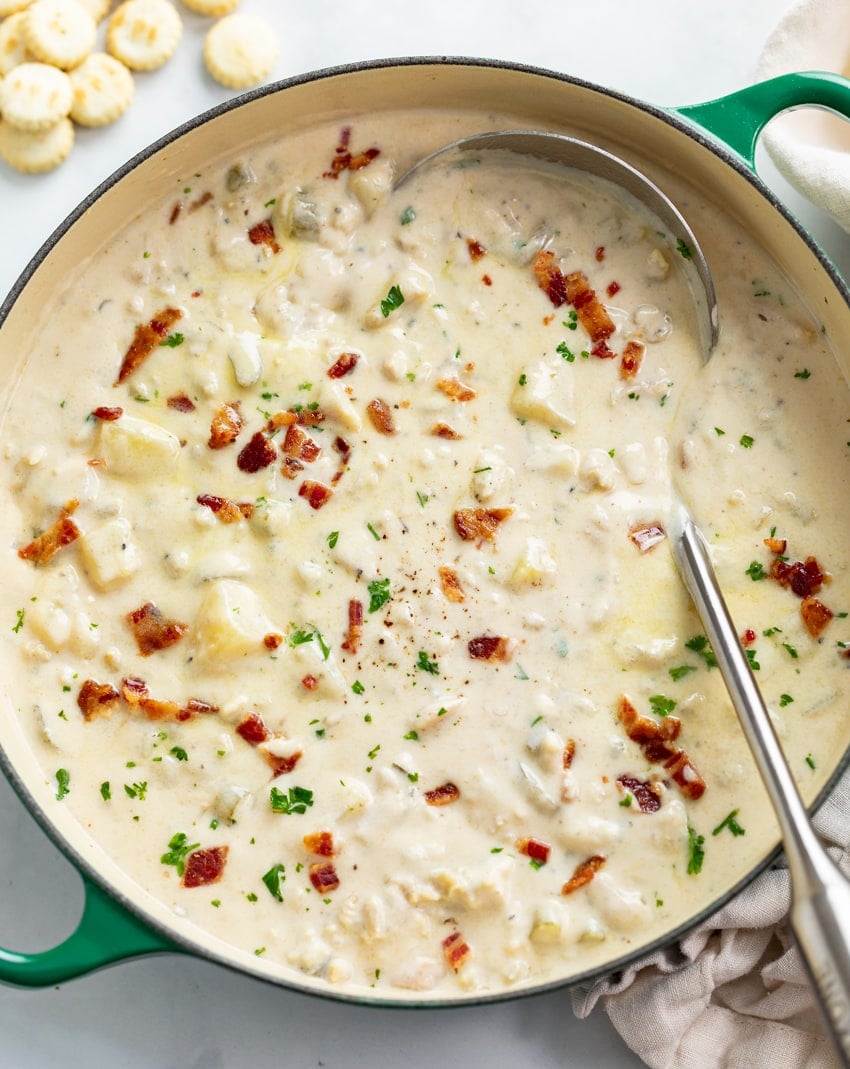
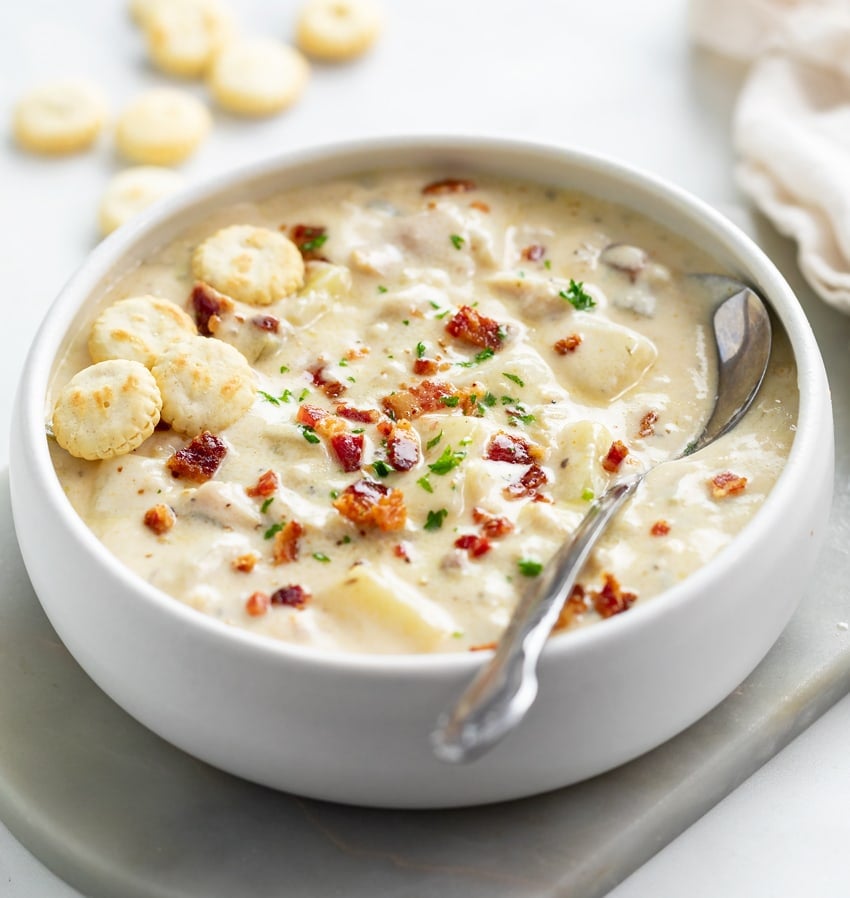
New England Clam Chowder is white and creamy, (as shown in this post). Manhattan Clam Chowder has a tomato base with no cream.
How to Make It
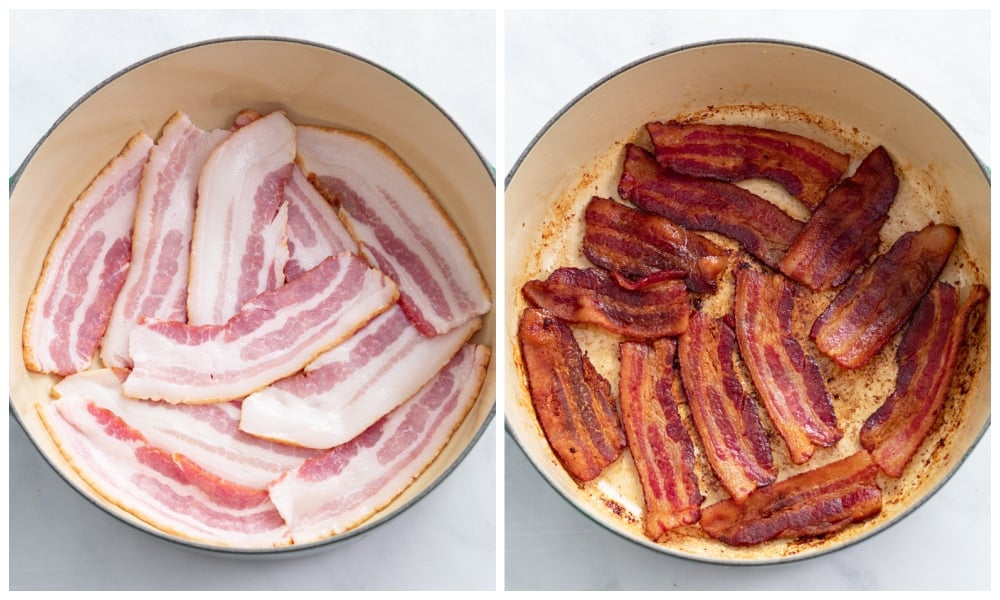
See recipe card below this post for ingredient quantities and full instructions. Cook bacon and set aside, reserve bacon drippings. Chop bacon once cooled.
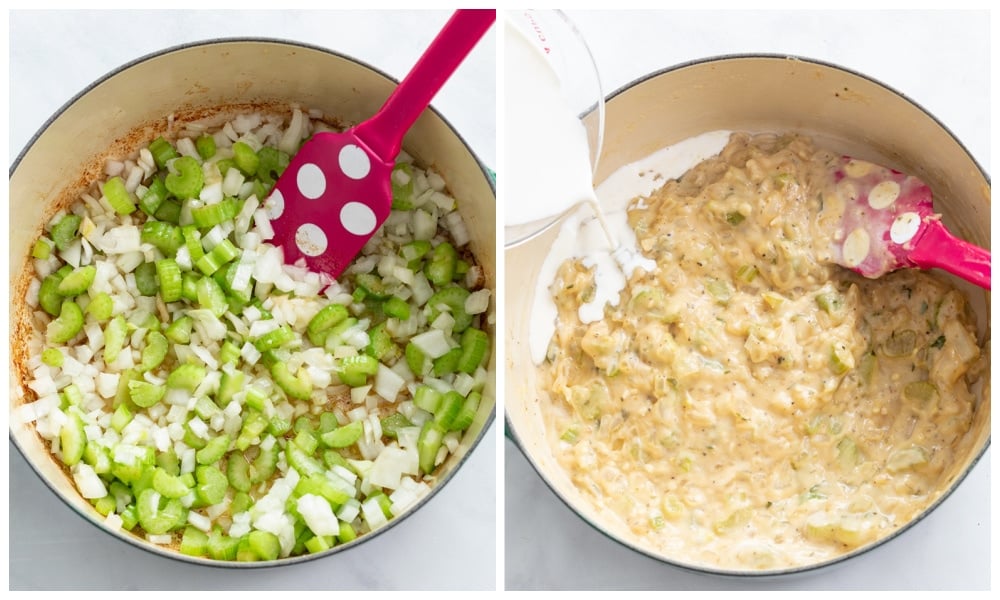
Add bacon drippings, butter, onions, and celery to the pot and soften for 5-6 minutes. Add the garlic, hot sauce, Worcestershire sauce, and seasonings. Cook for 1 minute. Add the flour and cook for 2 minutes. Add the chicken broth and half and half in small splashes, stirring continuously.
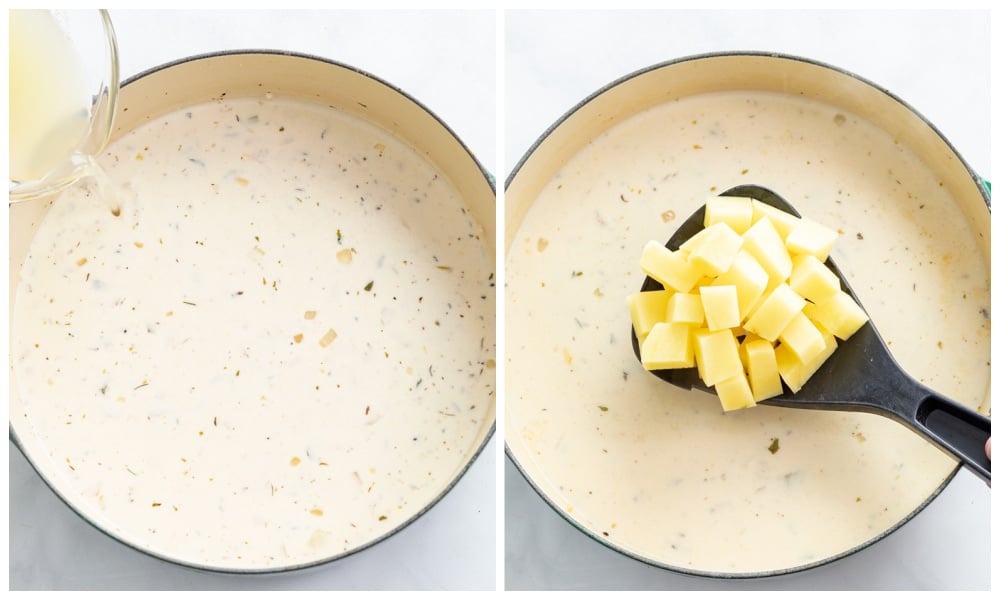
Add the chicken bouillon, clam juice, and bay leaf. Bring to a boil, reduce to a simmer. Simmer and reduce for 20 minutes. Add the potatoes and simmer until the potatoes are fork tender, 20-25 minutes.
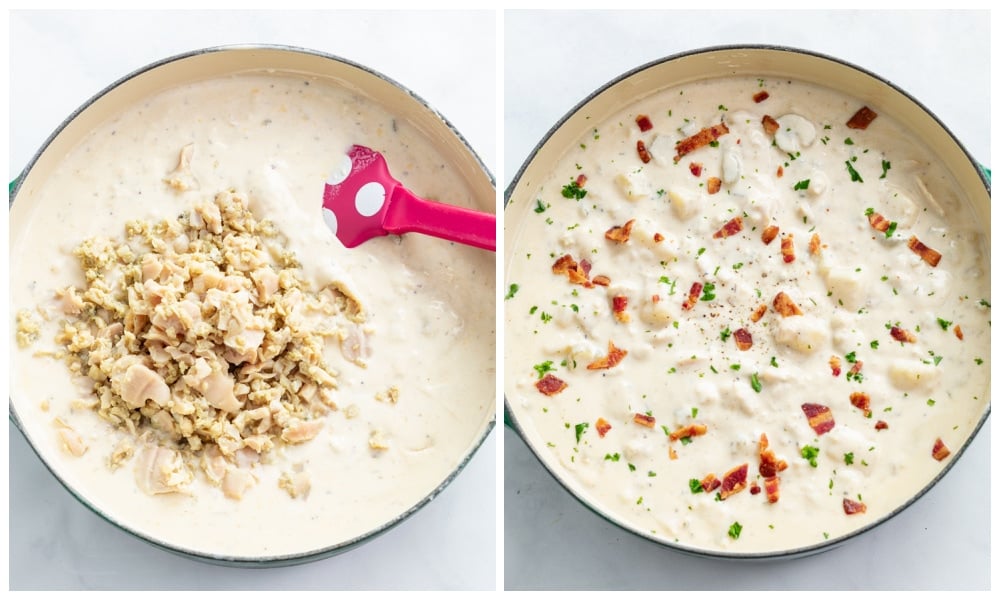
Add the clams and heat through for 5 minutes. Remove the bay leaf. Garnish with parsley, chopped bacon, and freshly cracked pepper. Serve!
Using Fresh Clams
1 heaping cup of chopped fresh clams can be used in this recipe along with 1.5 cups of clam juice. (1.5 cups = the 8 oz. jar + reserved juices from the can.) Make sure the clams are cleaned and steamed prior to chopping.
Storage
Store in an airtight container and refrigerate for up to 3-5 days. The flour in this soup helps it maintain it’s original consistency a little bit better when reheated. While you can freeze this soup, it likely won’t restore back to it’s exact consistency as dairy-based soups don’t reheat as well. (But that doesn’t stop me from freezing it.) It’s best to let it thaw completely in the fridge before reheating it in the microwave or on the stovetop. Make sure you don’t overcook the potatoes if you plan on freezing it, as you don’t want them to be crumbly when reheated.
Try These Next
Tried This Recipe?
Leave a review, I love hearing your feedback! ⭐⭐⭐⭐⭐
4.5 Quart Dutch Oven– This is the one I use that’s pictured in this recipe. Food Storage Containers– These are what I use to store leftovers! Better Than Bouillon– This is what I always use for broth in my recipes. It takes very little space and makes it easy to measure out customized amounts of broth. Silicone Spatula– To “clean” the pot throughout cooking, which incorporates flavor into the broth. It’s nice and gentle on the surface of your cookware. Measuring Spoons– I have these magnetic ones which stay nice and organized in my utensil drawer. Pinch Bowls– For measuring seasonings, etc. ahead of time. Soup Ladle 16 oz. storage containers I use these to store/freeze my soups. They have 8 oz. sizes as well. They’re stackable, leak proof, and dishwasher/microwave safe.