In case you are looking for vegetarian potsticker recipes, try my vegetable potstickers or red curry tofu dumplings recipe. There are a lot of tips and steps to go through in the recipe, so let’s get to it!
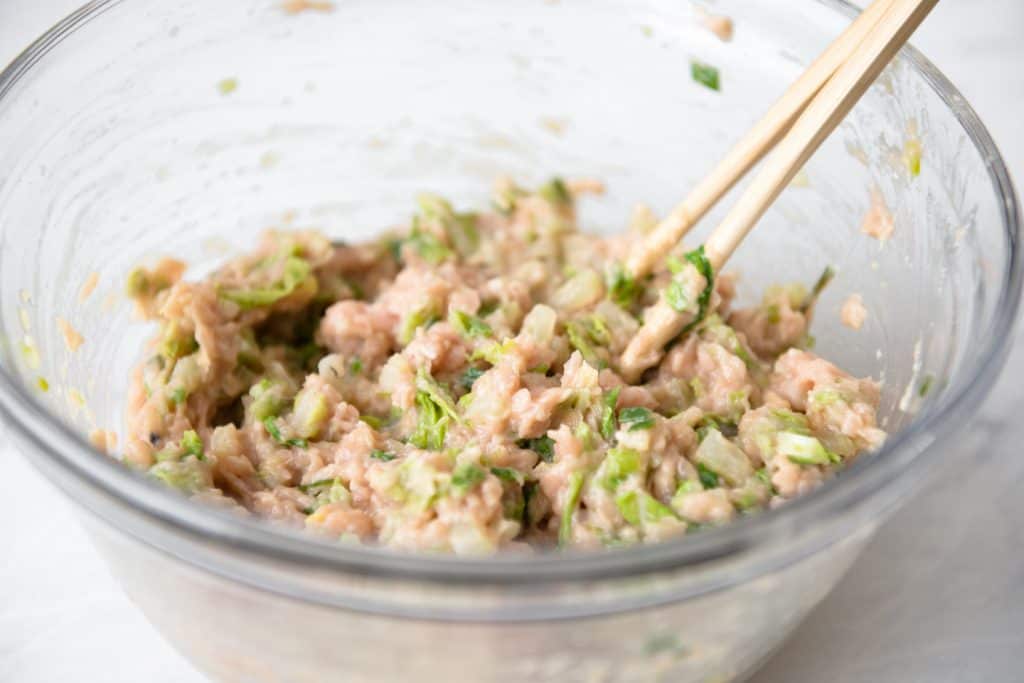
FILLING FOR CHICKEN POTSTICKERS
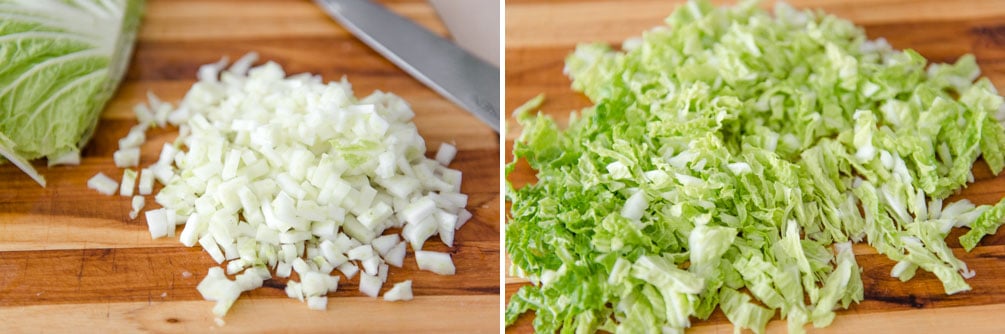
One of the most common ingredients in potstickers is cabbage. Often times, you’ll see Napa cabbage in dumpling recipes because it is mild in flavor. I’m using Napa cabbage in this recipe, but I like using green cabbage as well. I also used savoy cabbage in this vegetable potsticker recipe. Because Napa cabbage leaves are large, you want to cut them up into small pieces before mixing them in with the rest of the filling. I usually separate the white from the green parts of the cabbage, and cut the white part into a small dice. For the green part, I slice the leaves into 1-inch strips, and then slice the strips into very thin pieces (see the photos below for reference). Often times, recipe writers recommend salting Napa cabbage for about 10 minutes and then squeezing out the liquid from the cabbage. That’s because Napa cabbage contains a lot of moisture, particularly in the white parts. The excess liquid isn’t necessarily bad. The only issue (if you don’t squeeze out the liquid) is that you’ll find liquid inside your dumplings after you cook them. I actually quite like that liquid because it reminds me of biting into soup dumplings. However, that liquid will soften the base of the potstickers quicker, which means you’ll lose that crispy texture of the potstickers. Because I’m only using 1 1/2 cups of Napa cabbage in my recipe, I’m not going to bother squeezing out the excess liquid. The excess liquid is really only an issue if you use more Napa cabbage. Note also that other types of cabbage don’t release as much liquid, so you may want to play around with the different varieties. One final note about the filling: I like cooking the spices and vegetables a little because I think it releases the flavors of the spices and helps to wilt the vegetables. I think the filling tastes better than those recipes that don’t call for cooking the spices.
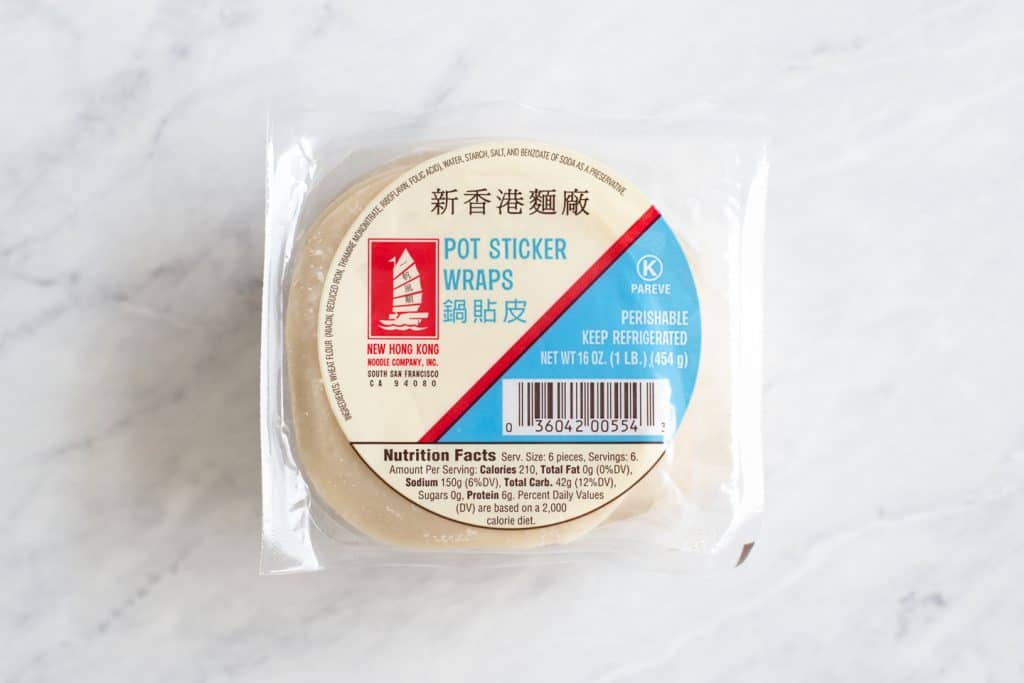
POTSTICKER WRAPPERS/DUMPLING SKINS
Another question I get often is, “What kind of wrappers do you use?” Let me put it out there that I use store bought potstickers 90% of the time. They’re convenient and easy to use. If I make fresh dumpling skins, that will easily add 1 to 2 hours to my cooking time, which I don’t always have. For potstickers, you want to buy thicker dumpling skins, if possible. The reason is that they need to withstand the heat from the pan frying. Thinner wrappers tend to rip apart easier. One brand I use often is from the New Hong Kong Noodle Company. The skin is very pliable, which allows me to create a lot of pleats to my dumplings. The slight problem with this brand is that they don’t use much starch to dust the dumpling skin, which makes them stick together easily inside the package. Pulling the dumpling skins apart can stretch out their shape. Not the end of the world, but it is worth noting.
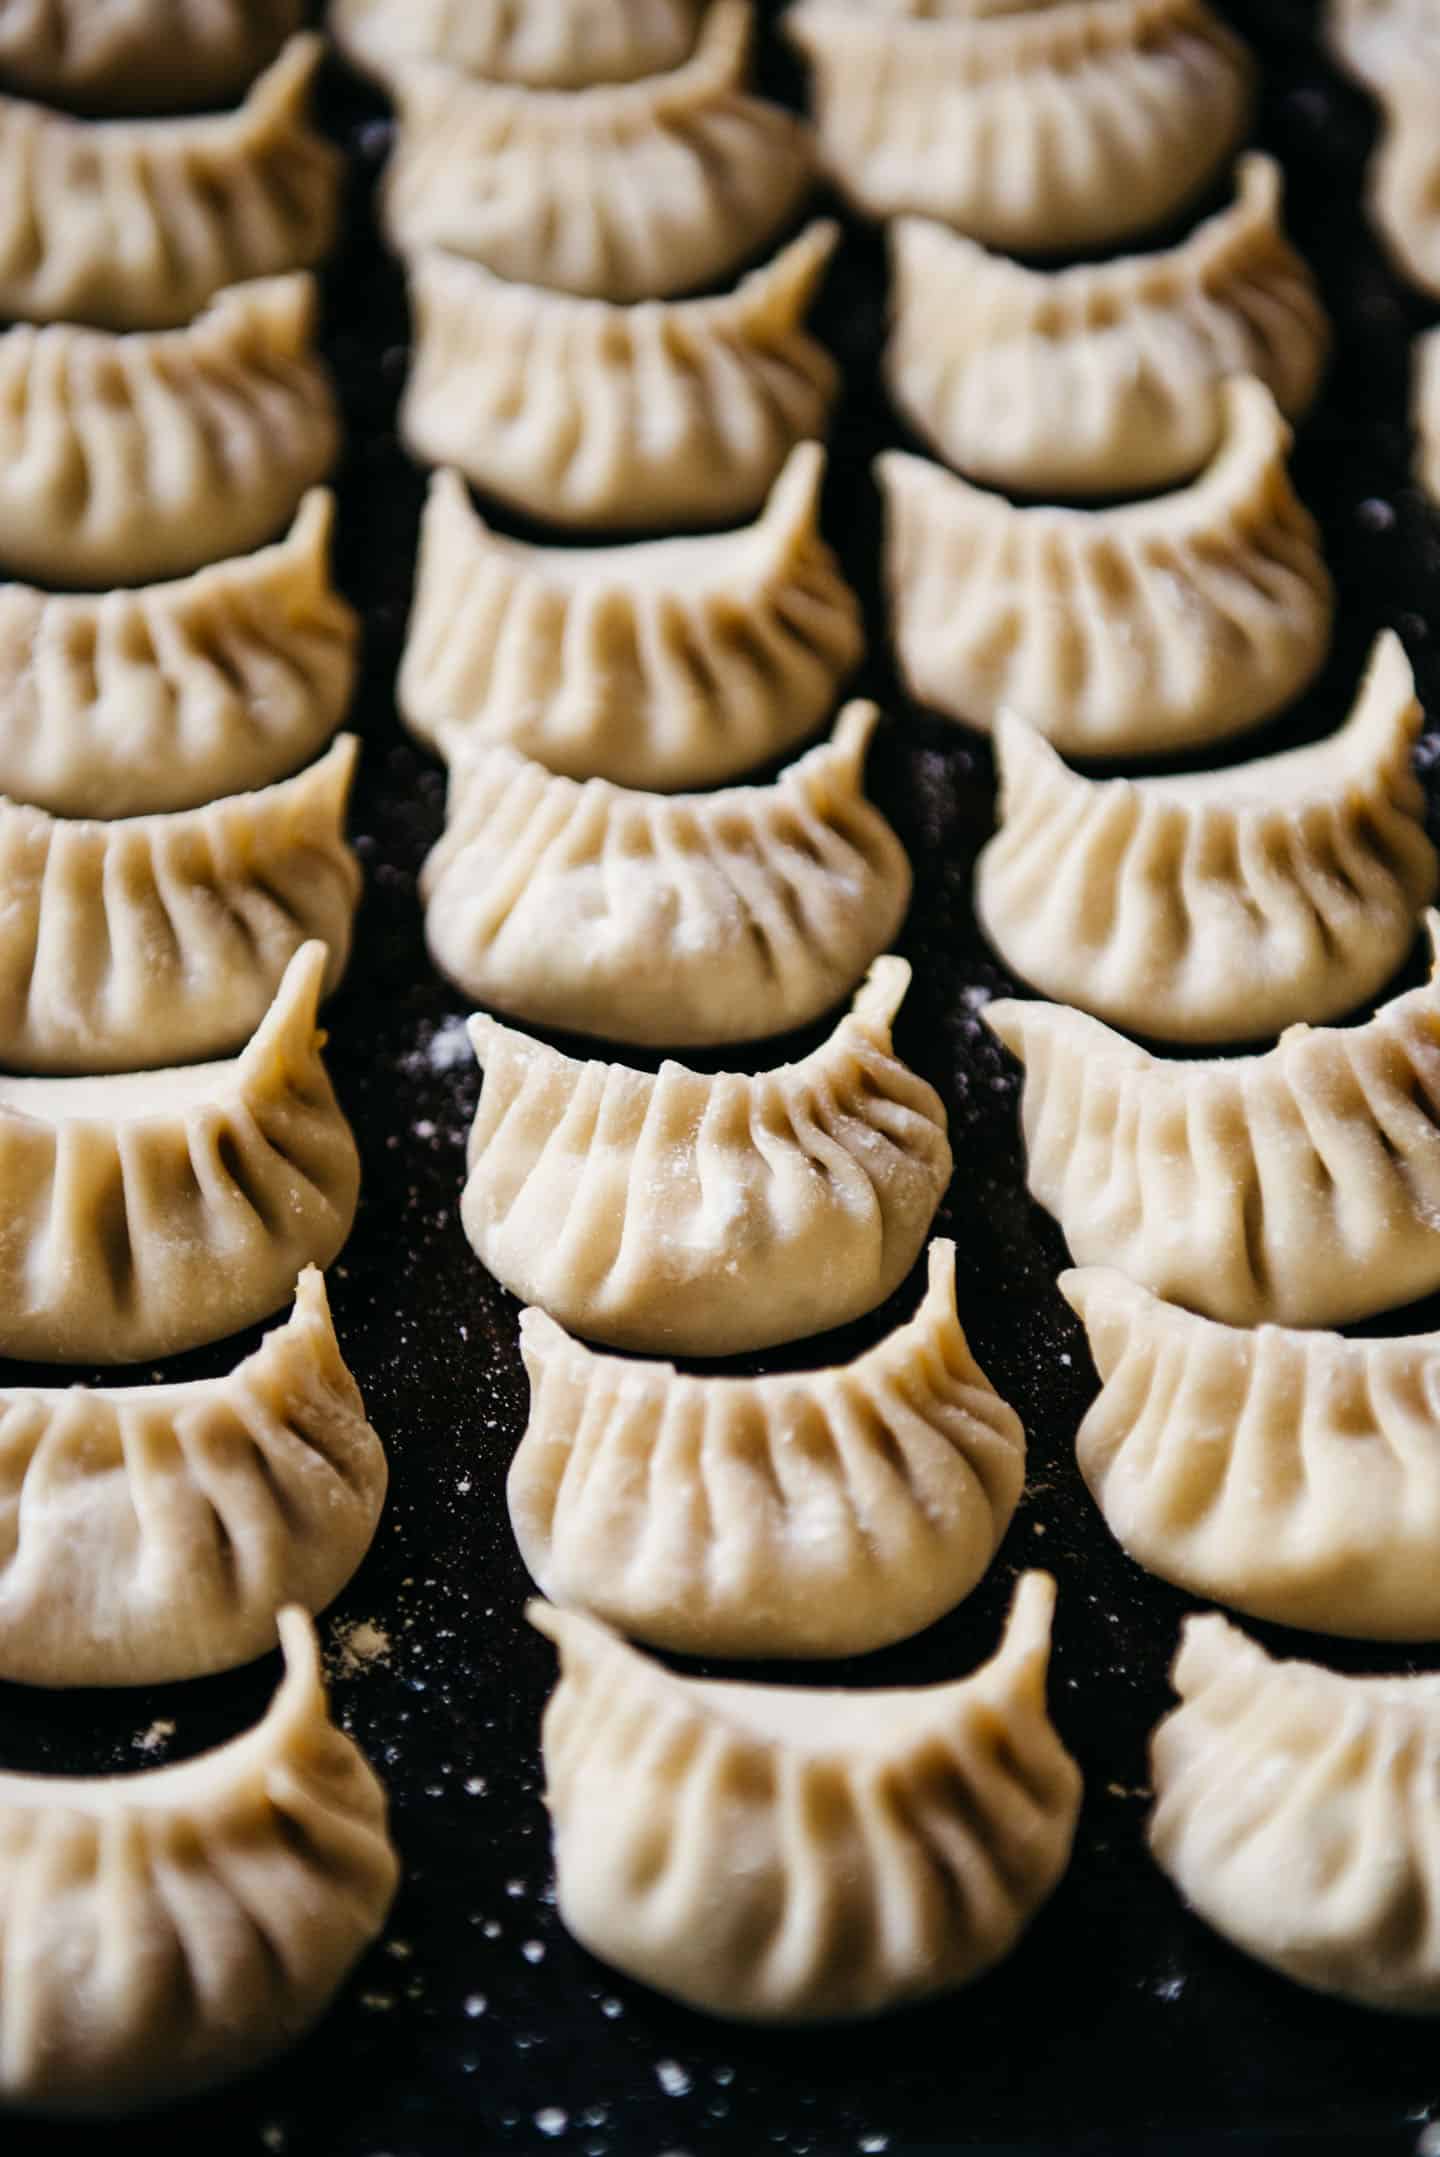
POTSTICKER PLEATING
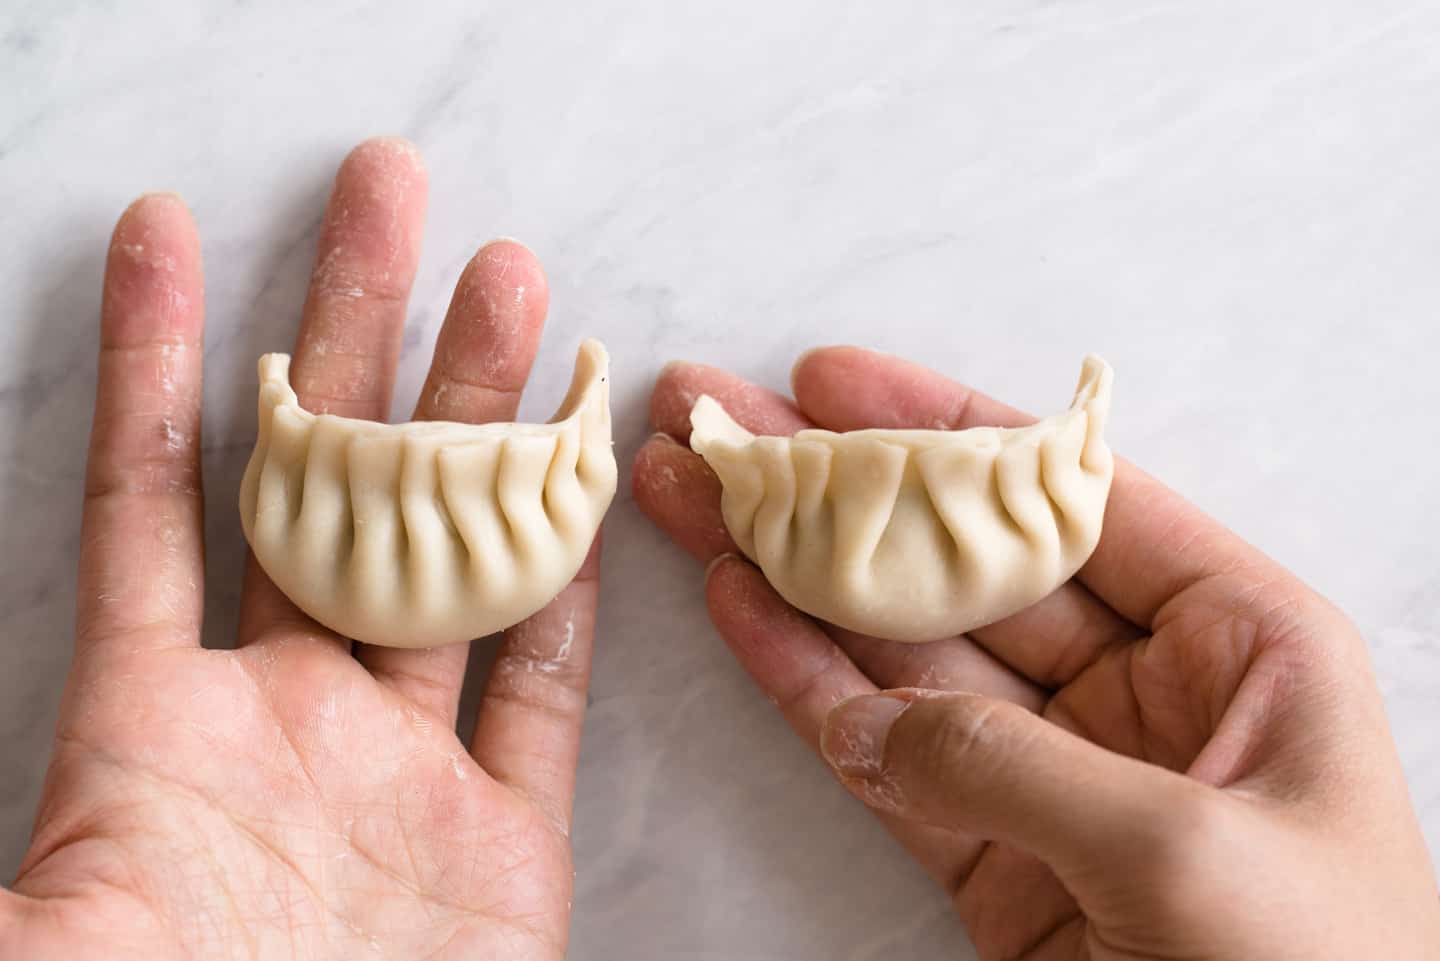
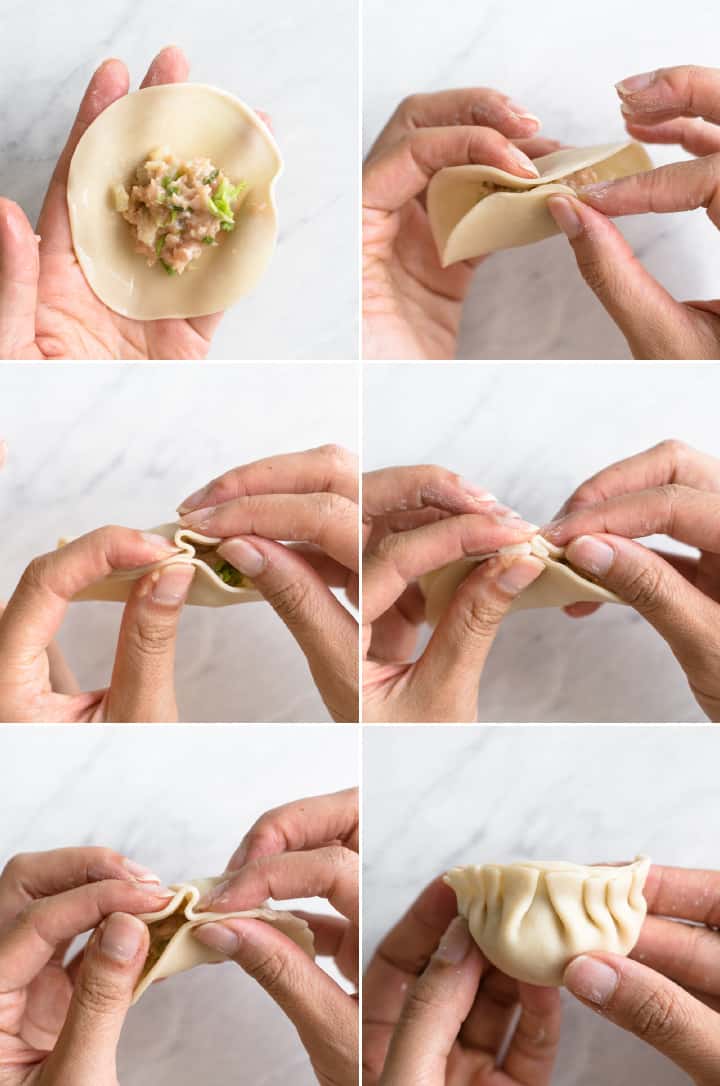
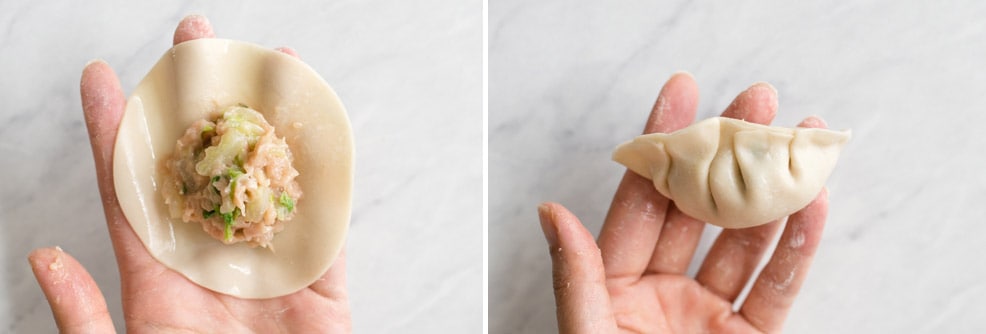
For these potstickers, I added about 1 tablespoon of filling in the center. The amount of filling you can fit into the dumplings depends on the size of your wrappers. I would start with adding about 2 teaspoons of filling in the center first and see if you can pleat the dumplings without the filling squishing out. If you can fit more, great! I usually pleat potstickers with all the pleats going in one direction—towards the right. That’s how I learned pleating when I was a kid, and that’s what is natural to me. Another common way to pleat potstickers is to have pleats going towards the center. To do that, you start folding the dumpling like a taco and pinch the dumpling skin together, right at the center. For all the pleats at the right of the pinch point, you want to fold them going in the left direction. Then, for the pleats to the left of the pinch point, you’ll want to fold those pleats going in the right direction. I know this written explanation may sound confusing, so refer to the photos above. As you can see from the photos, I use my index fingers to create the pleats and have them facing away from me. That feels natural to me. I’ve seen people fold dumplings with the pleats facing them, using their thumbs to create the pleats. There’s no right or wrong answer here, just do whatever is most comfortable to you. Mama Lin has a huge issue with the way I pleat my potstickers: she thinks I make far too many pleats. She prefers dumplings that have more filling. If you fill up your dumplings more, you won’t be able to make as many pleats. In the dumpling above, I managed to fit about 1 1/2 tablespoons of filling but was only to make 4 large pleats. Whether you make dumplings with more or less pleats is up to you!
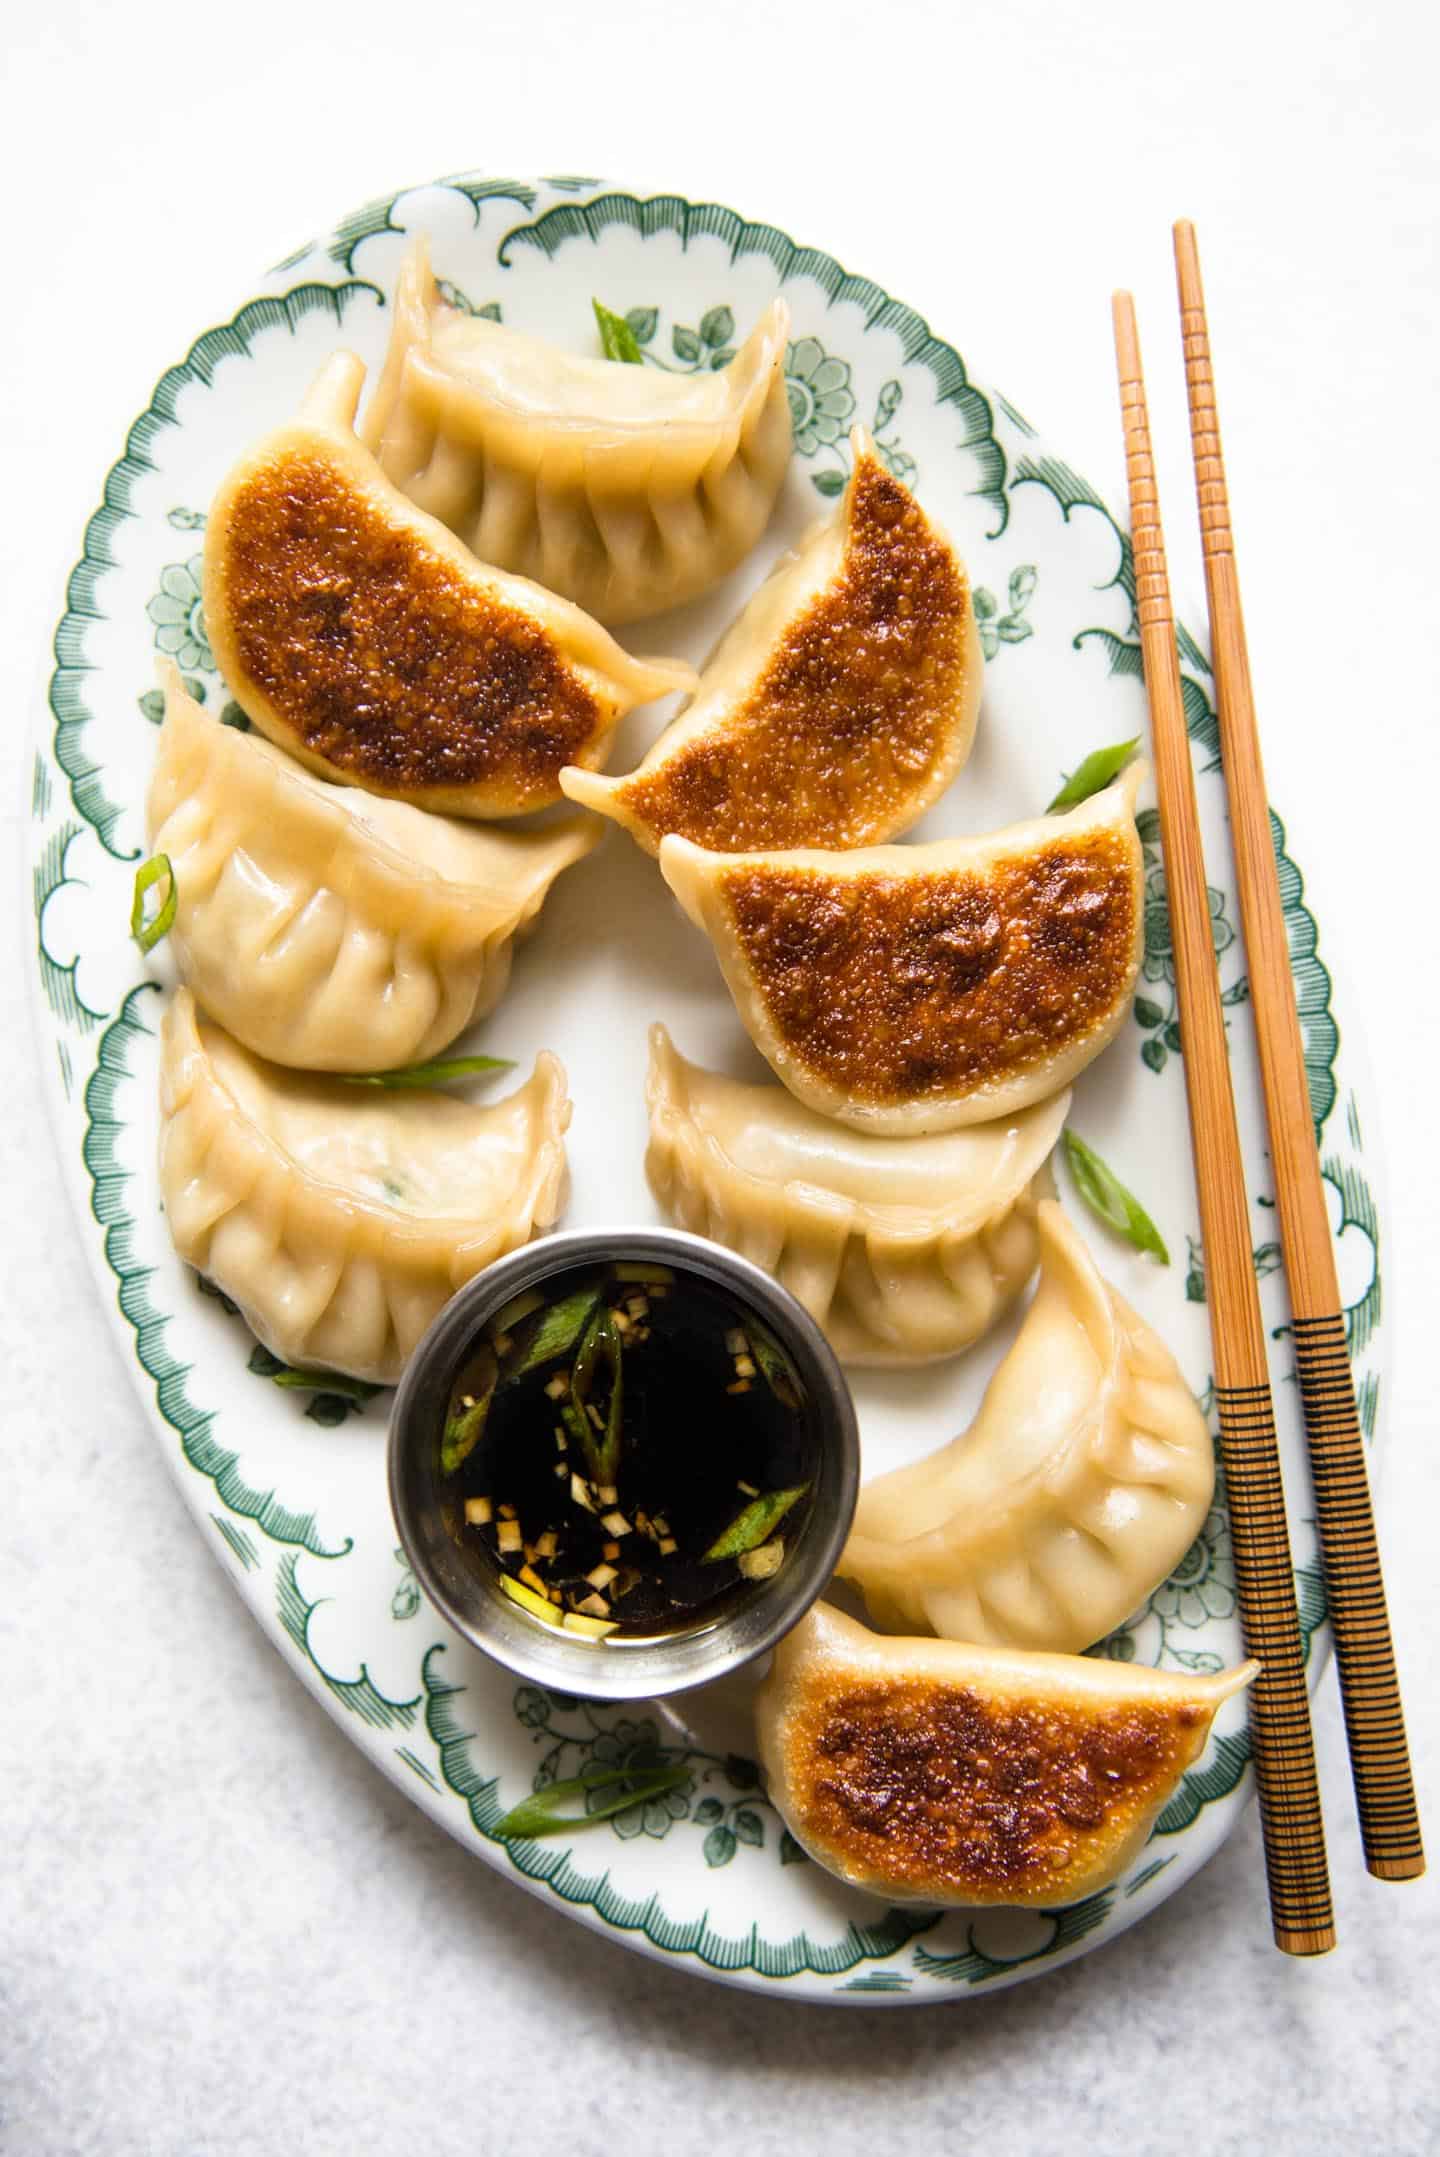
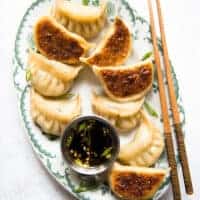
ACHIEVING THE PERFECTLY CRISPY BOTTOM
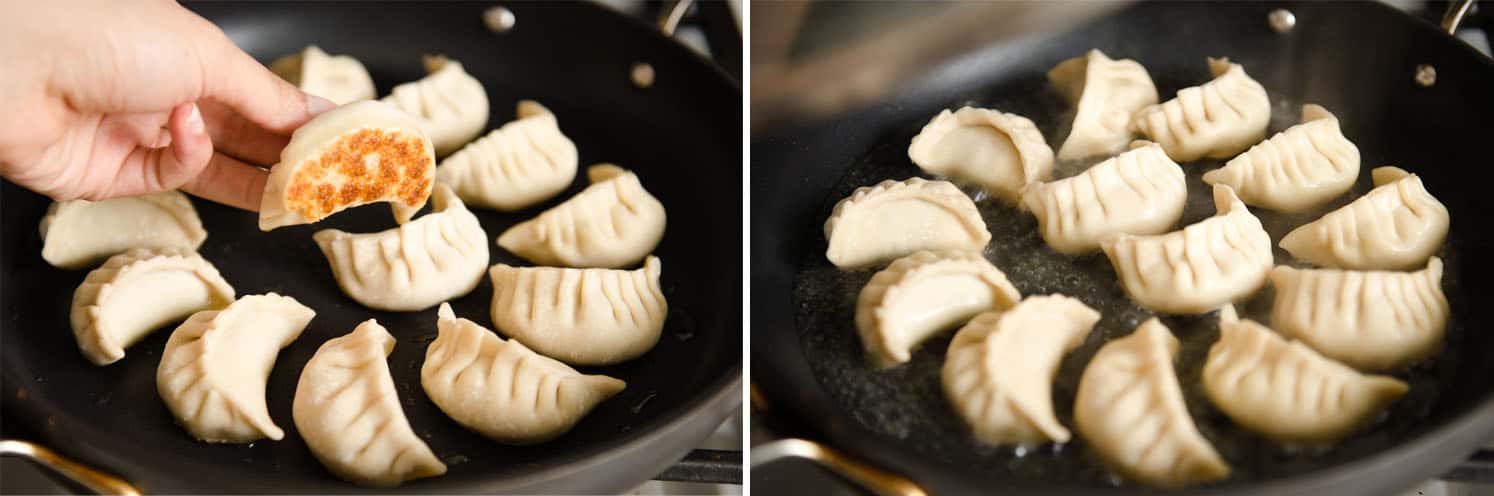
To cook potstickers, you need to pan fry and steam them at the same time. First, you pan fry the potstickers for a few minutes to get them brown on the bottom. Then, you pour water into the pan and cover it with a lid. This will help steam the dumplings so that the dumpling skin on top is fully cooked. In order to get dumplings with extra crispy bottoms, the initial pan frying is crucial. I like to pan fry them on medium-high heat for about 2 to 3 minutes, until the dumplings are golden on the bottom. Then, I add the water. After cooking the dumplings for 6 to 7 minutes, I’ll remove the lid and pan fry the dumplings for another minute so that all the water evaporates. You can also add a few teaspoons of flour to the water to create a dumpling lace (or dumpling skirt). This makes the bottoms of the dumplings even crispier. You can get the dumpling skirt recipe here.
MORE DUMPLING RECIPES
Tofu Wontons with Yellow Curry Broth (a reader favorite!)Red Curry Tofu Dumplings (step-by-step photos of the braided pleat)Red Curry Wontons with Zucchini NoodlesCurried Potato Fried DumplingsYou can see all of my dumpling recipes here.