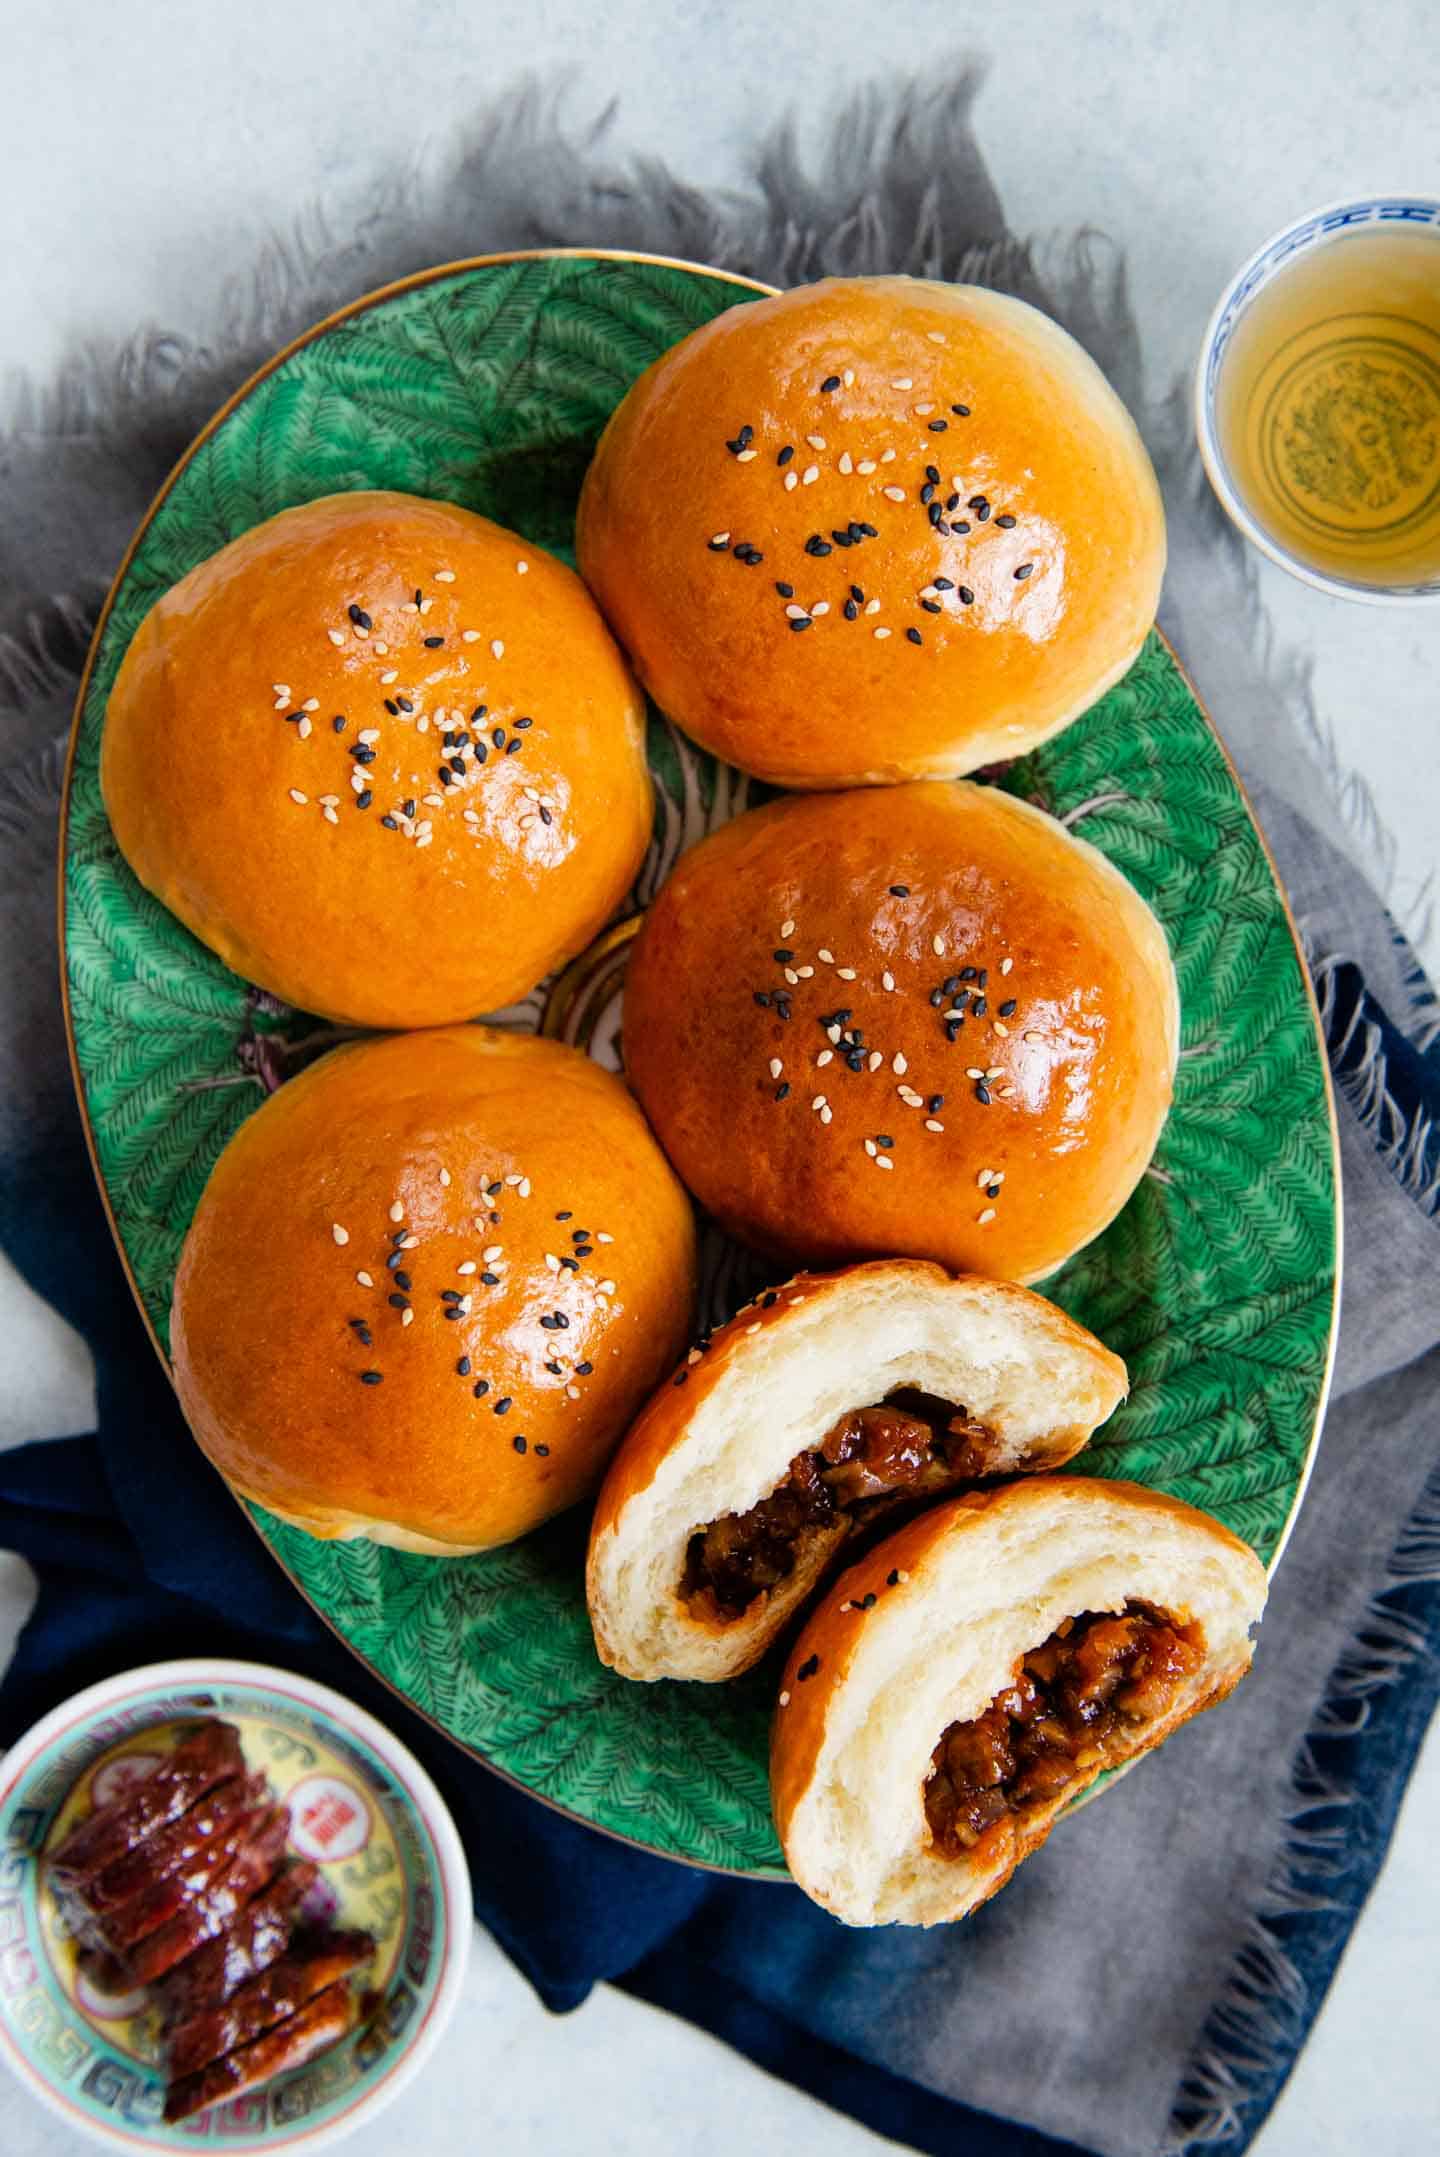
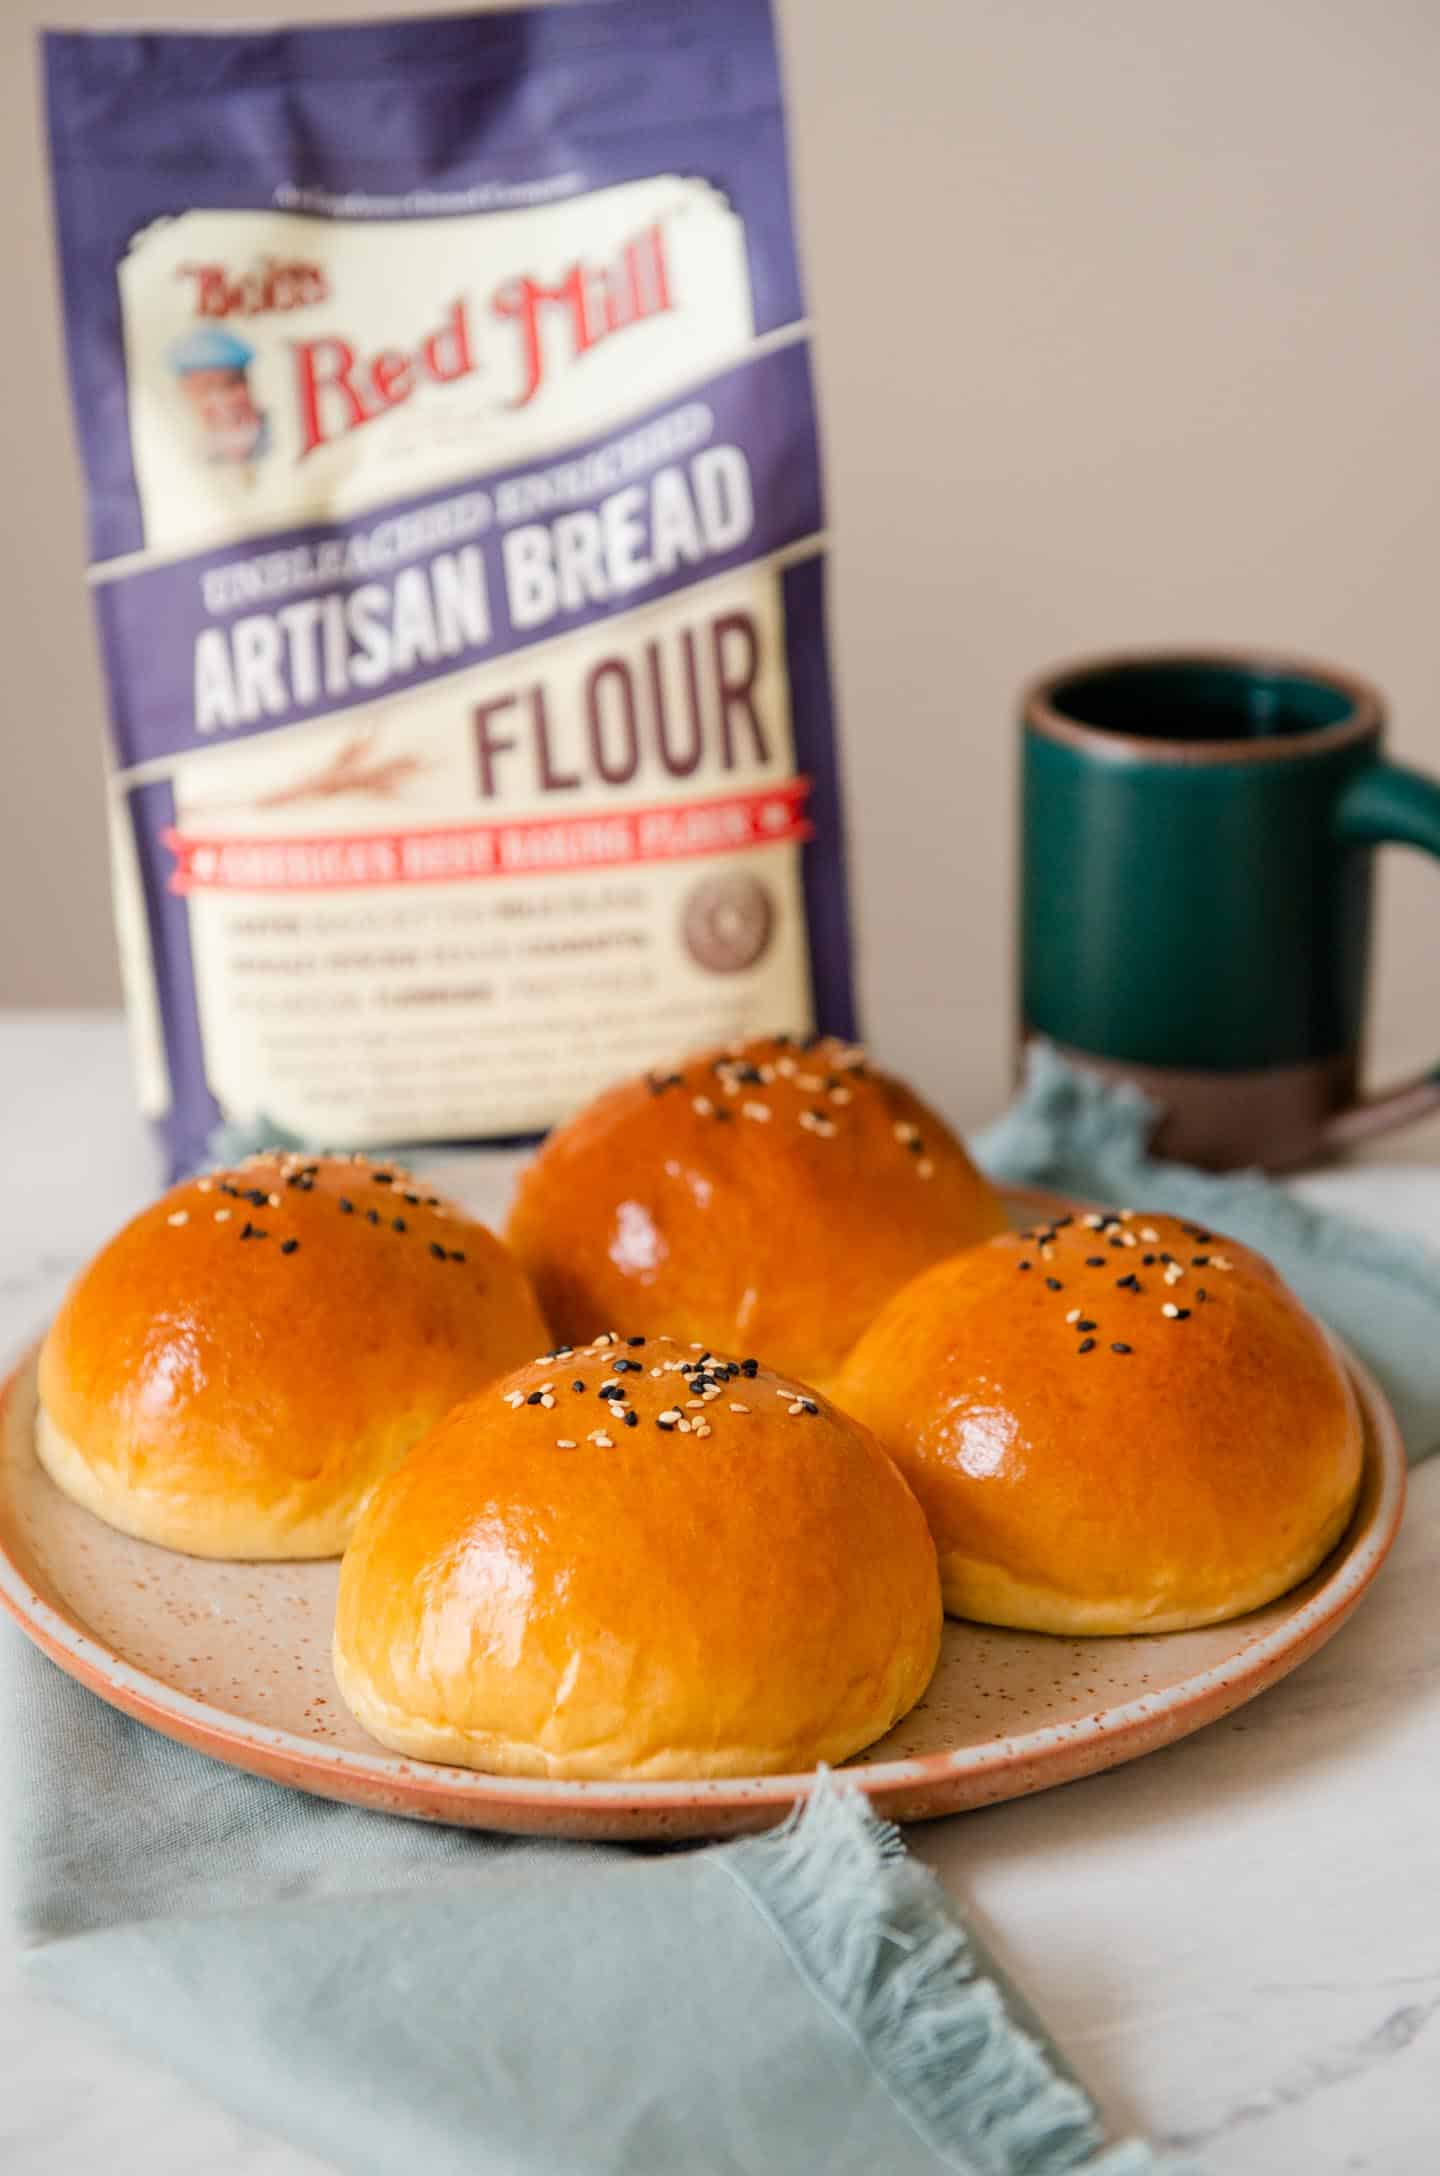
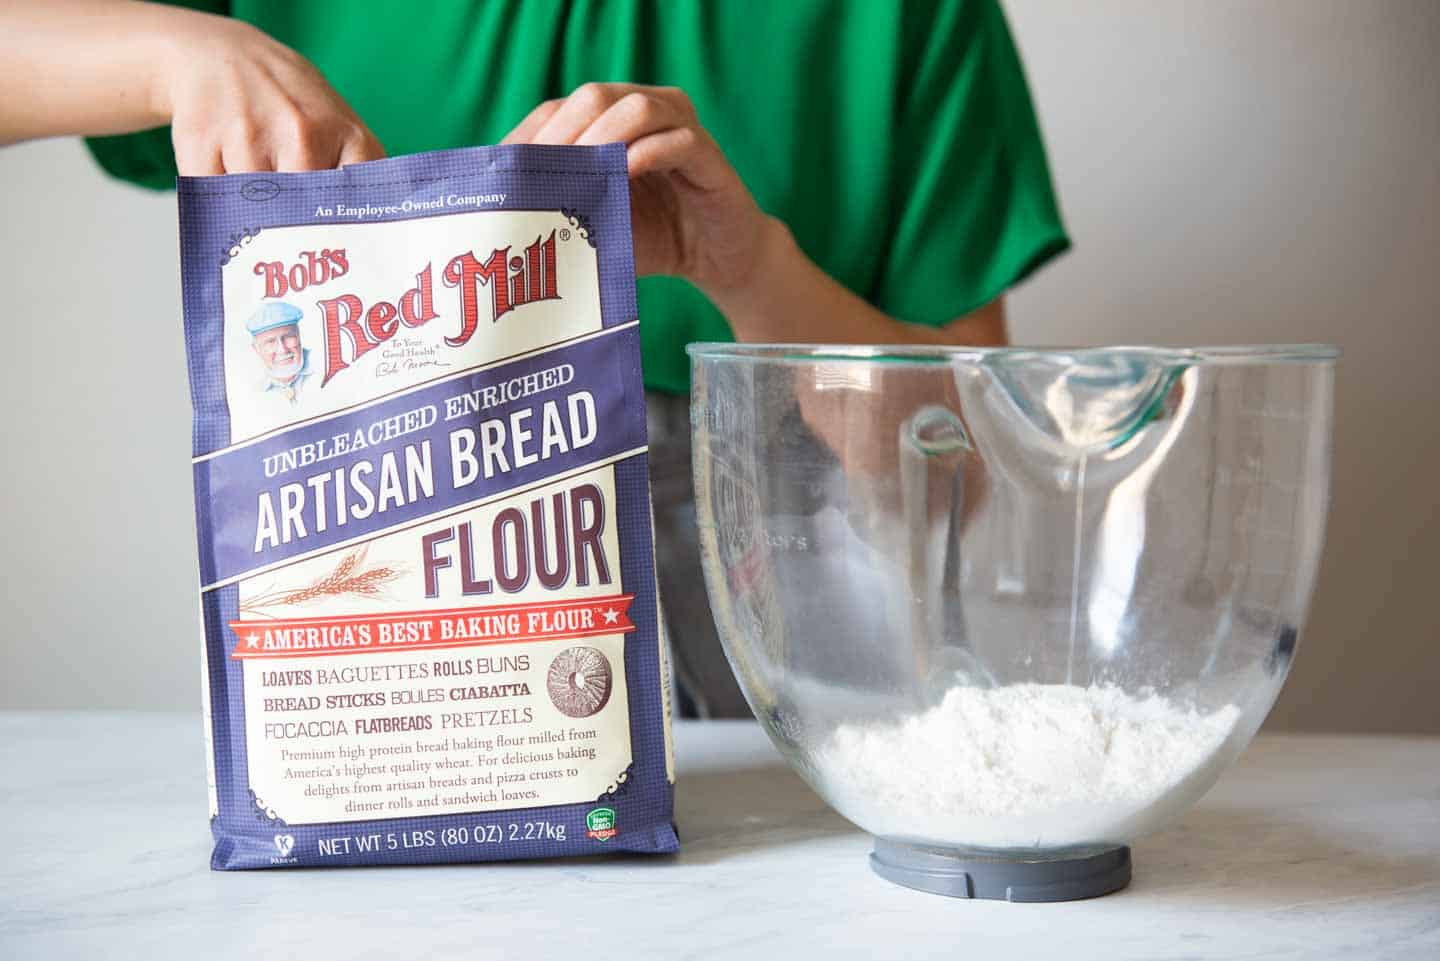
Char siu bao (叉燒包, also spelled cha siu bao) were a staple of my childhood. I have fond memories of Mama Lin buying me char siu bao to eat after school. It felt like heaven biting into the pillowy soft golden brown bread that encased a sweet and savory BBQ pork filling. There are two common varieties of char siu bao: steamed and baked. In this recipe, I am explaining how to make baked char siu bao. The baked version is often called 叉燒麵包: 叉燒 means barbecued or roasted pork; 麵包 is a term used to describe baked breads. I have seen this style of bun referred to as 叉燒餐包 (baked BBQ pork buns) or 港式叉燒包 (Hong Kong-style BBQ pork buns). The word 包 is a more general term that means bread or bun. I’m very excited to partner with Bob’s Red Mill to bring you this baked char siu bao recipe. For the dough, you will need Bob’s Red Mill’s Artisan Bread Flour. If you are familiar with my other Asian bread recipes like Japanese milk bread or scallion bread, you’ll know that I use Bob’s Red Mill All-Purpose Flour in those recipes. The flours work very well for various Asian-style breads and are convenient for me to purchase. In this recipe, I decided to use bread flour because I wanted the dough to have more structure to hold the pork filling. I tested this recipe 6 or 7 times, so I have a lot of tips below on how to bake a delicious batch of char siu bao. I’ve tried to anticipate some of the issues that might come up as you make them. Below, I’ve also provided photos and videos to give you visual references on how to make the bao. Hope you find all these tips helpful!
CHAR SIU BAO VS CHA SIU BAO
Char siu bao or cha siu bao is the Cantonese pronunciation of 叉燒包. Technically speaking, cha siu bao is a more accurate spelling of the Cantonese pronunciation as there is no “r” sound in Cantonese. However, since “char siu” is the more common spelling in English, I will use it throughout this post. For those of you who are curious, 叉燒包 is pronounced cha1 shao1 bao1 in Mandarin.
HOW TO MAKE BAKED CHAR SIU BAO (CHA SIU BAO)
TWO DOUGH-MAKING METHODS
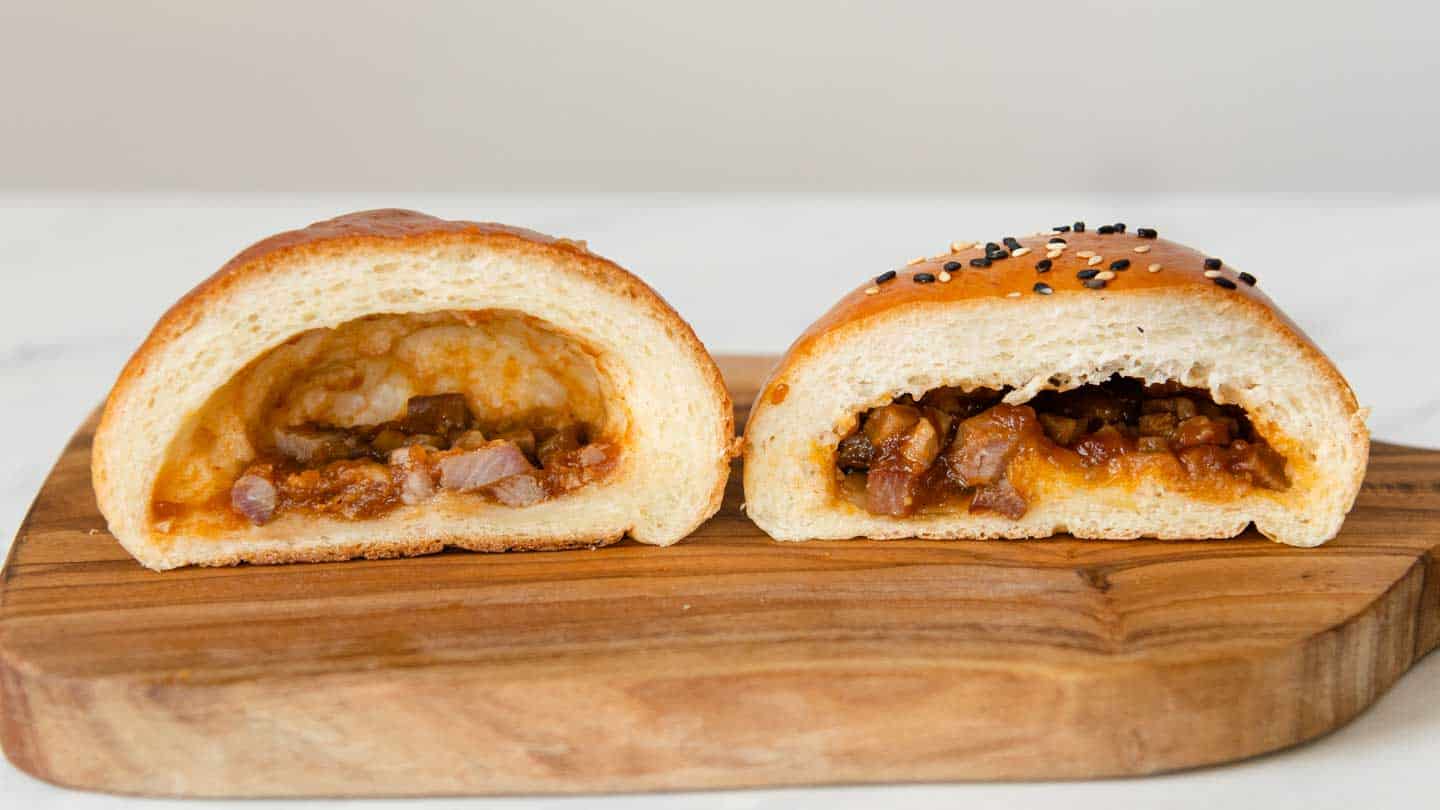
In the recipes below, I explain 2 different methods for making the dough: one version uses tangzhong and the other doesn’t. Tangzhong (湯種) is a Chinese technique of heating flour and water into a paste that is then added to the bread dough. The consistency of tangzhong is similar to a roux. The tangzhong helps give baked breads a softer texture. I originally developed this recipe with only a tangzhong-based dough, which yielded char siu bao that looked great on the outside and were nice and soft when I bit into them. However, when I cut open the buns, I could see a large cavity inside (see photo below, left). Tangzhong yeasted doughs have a higher moisture content and creates more steam when it bakes. As a result, this type of dough rises higher, which explains why there’s a larger cavity inside the bao. Because the bao didn’t look perfect visually, I decided to develop another dough recipe that didn’t use tangzhong. It is simpler to make because you omit the step of making tangzhong. Once baked, the bao also looks fuller inside (see photo above, right). Although the char siu bao looked better with this second dough method, the texture of the bread was not as pillowy soft as the tangzhong-based dough. The crumb is chewier. Since I bake this style of bread all the time, I immediately noticed the difference in texture between both doughs. However, my husband couldn’t tell the difference until he ate the bao side-by-side. In the recipes below, I have included recipes on how to make both types of dough. Personally, I prefer the tangzhong method, but let me know which you prefer!
TANGZHONG DOUGH METHOD
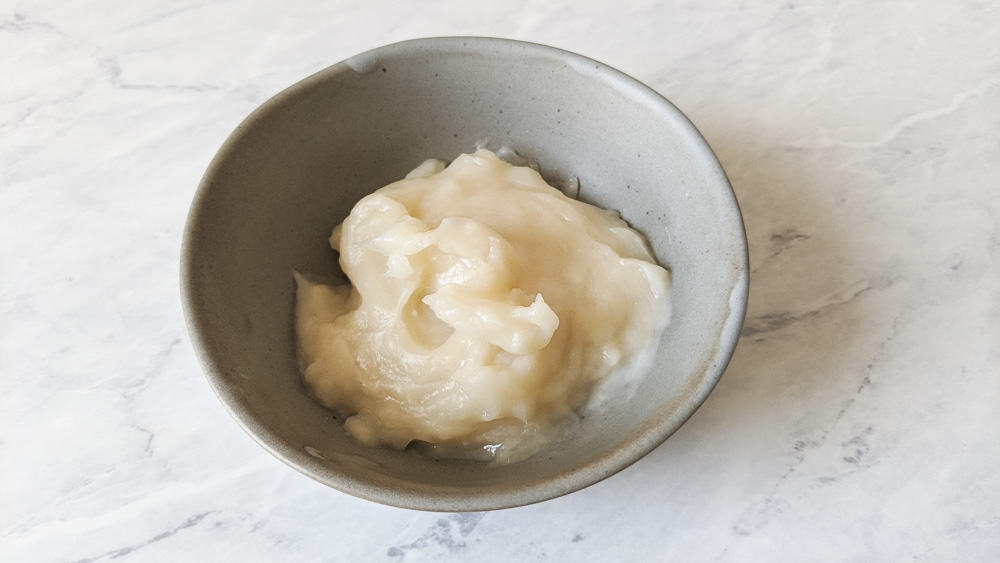
In a saucepan, whisk 30 grams of Bob’s Red Mill’s Artisan Bread Flour with 115 grams of water. Heat the mixture over medium heat, stirring frequently. Once a paste starts to form, keep stirring until all the runny liquid absorbs into the paste. Transfer the tangzhong to a bowl. Let the tangzhong cool while you prepare the rest of the ingredients for the dough. For microwave directions, see the notes to the tangzhong dough recipe.
ACTIVATE THE YEAST
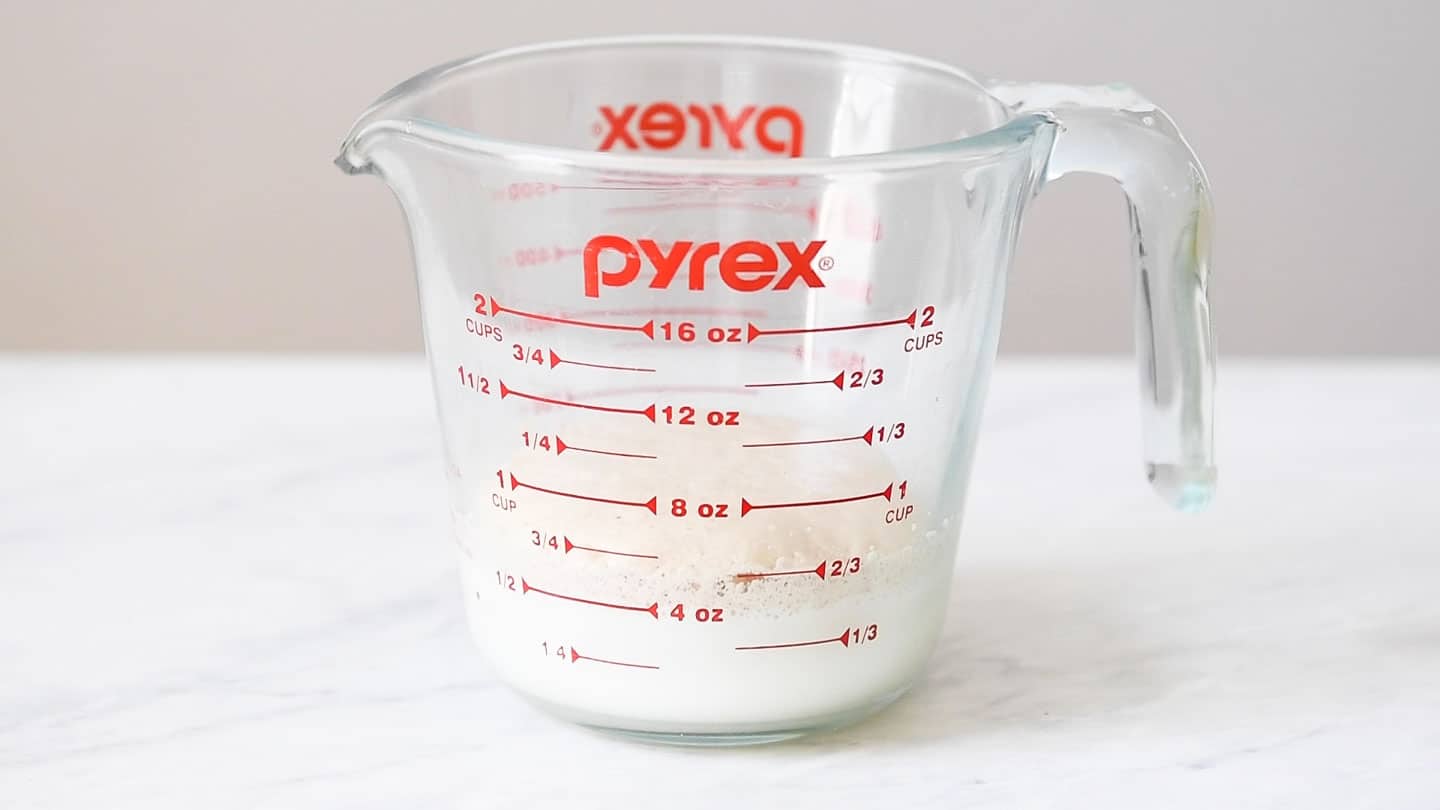
If you use active dry yeast for this recipe, you need to activate the yeast. Heat 135g whole milk in the microwave on high for 30 seconds. Check the temperature of the milk; it should be somewhere around 110ºF to 120ºF. If you don’t have a thermometer, you can test the temperature with your finger. The milk should feel very warm but not scalding hot. If the milk isn’t warm enough yet, microwave the milk again for 5 to 10 seconds until it reaches 110ºF to 120ºF. If the temperature is within the range, add the sugar and yeast. You don’t want the milk to be too hot because it can kill the activity in the yeast. After about 5 to 8 minutes, the yeast should foam up like you see in the photo above. If the milk still looks flat, it can mean that the yeast is out of date or the milk was too hot.
INSTANT YEAST
If you are using instant yeast, you do not need to activate it. In other words, you do not need to stir the yeast with warmed milk. Simply add the instant yeast along with the other ingredients for the dough into the bowl of your stand mixer. That said, I still recommend warming up the milk in the microwave for 15 seconds so that the milk reaches room temperature. Then, start mixing and kneading the dough.
MAKE THE DOUGH
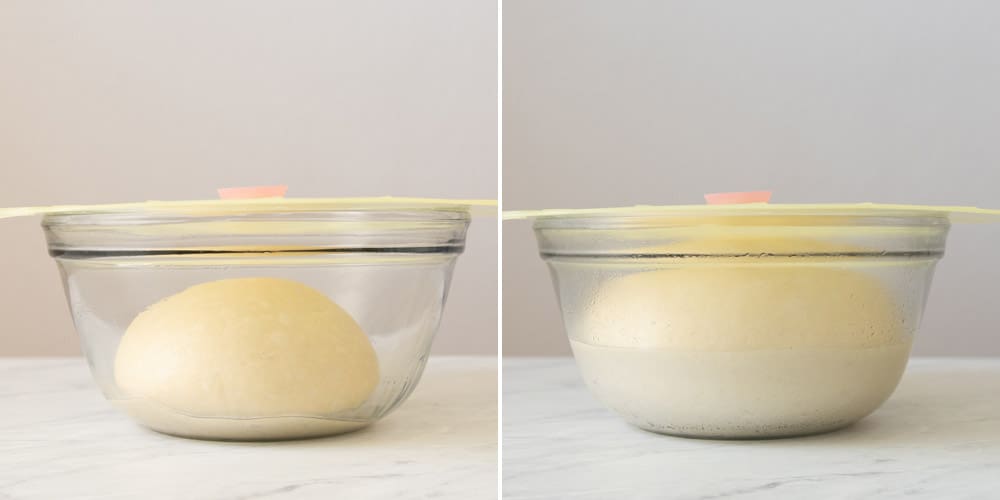
While the tangzhong is cooling and the yeast is activating, gather all the other ingredients for the dough. Because of the amount of liquids and fats in the dough, I highly recommend using a stand mixer. I usually mix the dough on low until there isn’t much loose flour on the edges of the mixing bowl (see photo above). Then, I increase the speed to medium-low and let the mixer work the dough for 8 minutes. After 8 minutes, turn the dough over a lightly floured surface and knead it a few times. The dough should be smooth and supple. Then, shape the dough into a ball and place it inside a lightly greased bowl. Cover the bowl with plastic or a silicone lid, and let the dough rise for 1 hour in a warm place, until it doubles in size (see photos below). If you are using instant yeast, the dough will not rise as high because the milk wasn’t warmed to 110ºF to 120ºF.
NON-TANGZHONG DOUGH METHOD
For this dough method, you can omit the step of making the tangzhong and start with activating the yeast. You’ll need more milk and yeast for this dough method, but everything else in the dough making process is the same as I described above.
MAKE THE FILLING
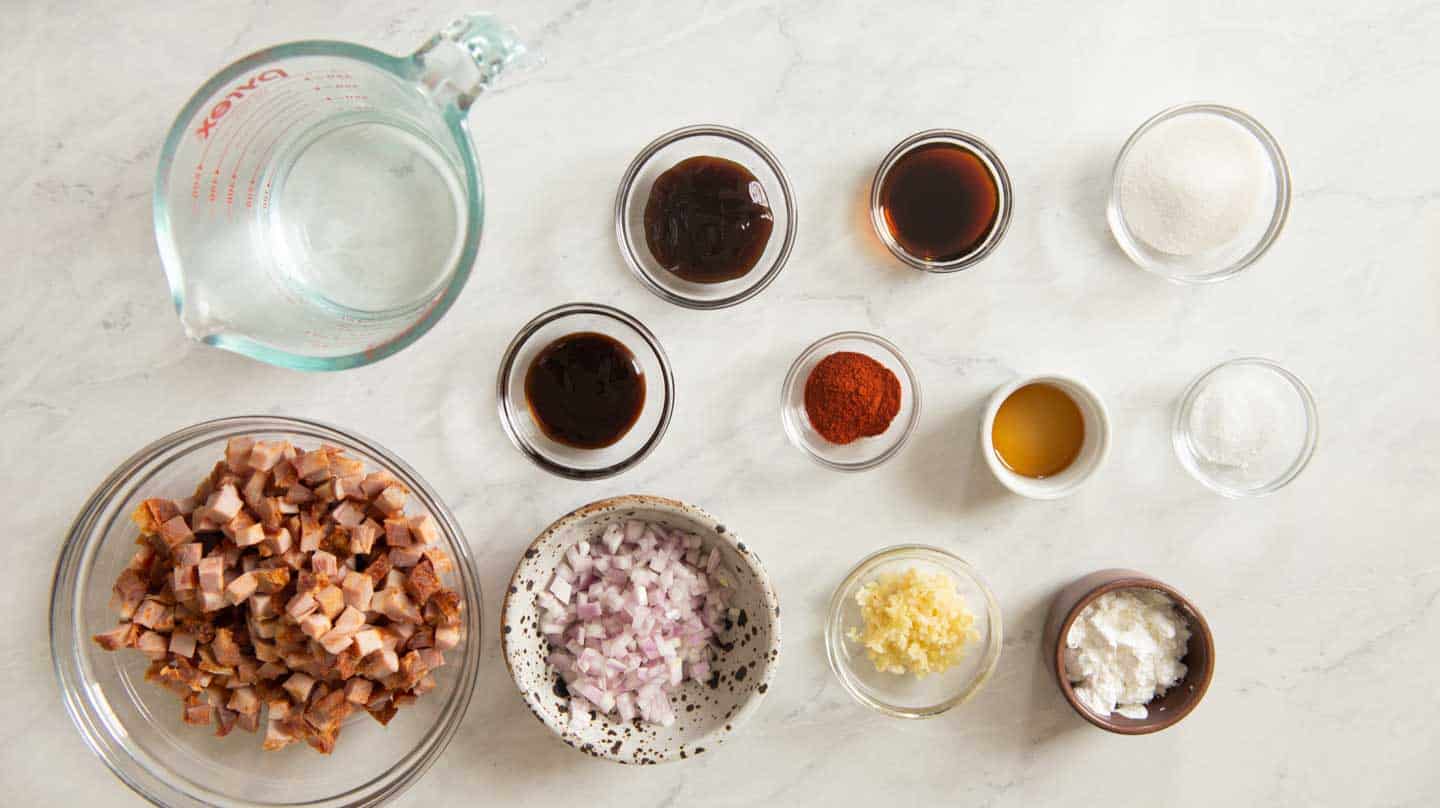
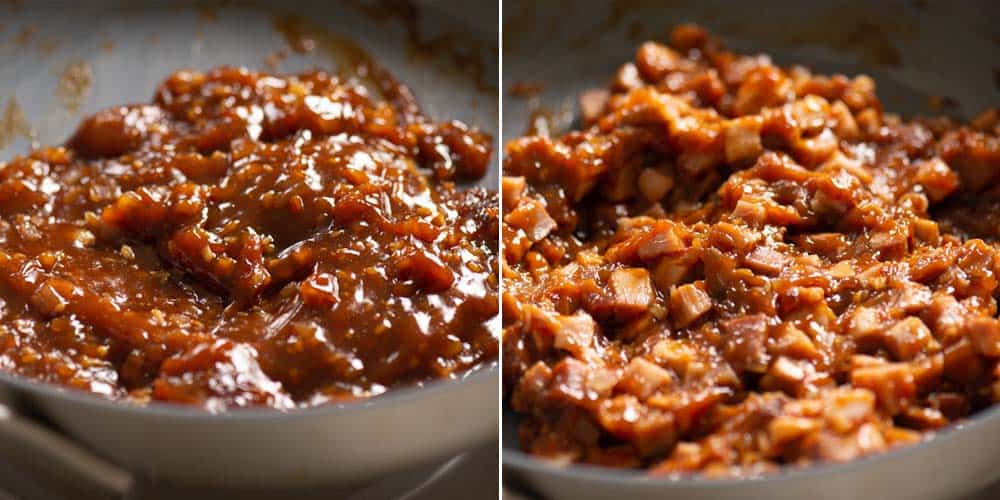
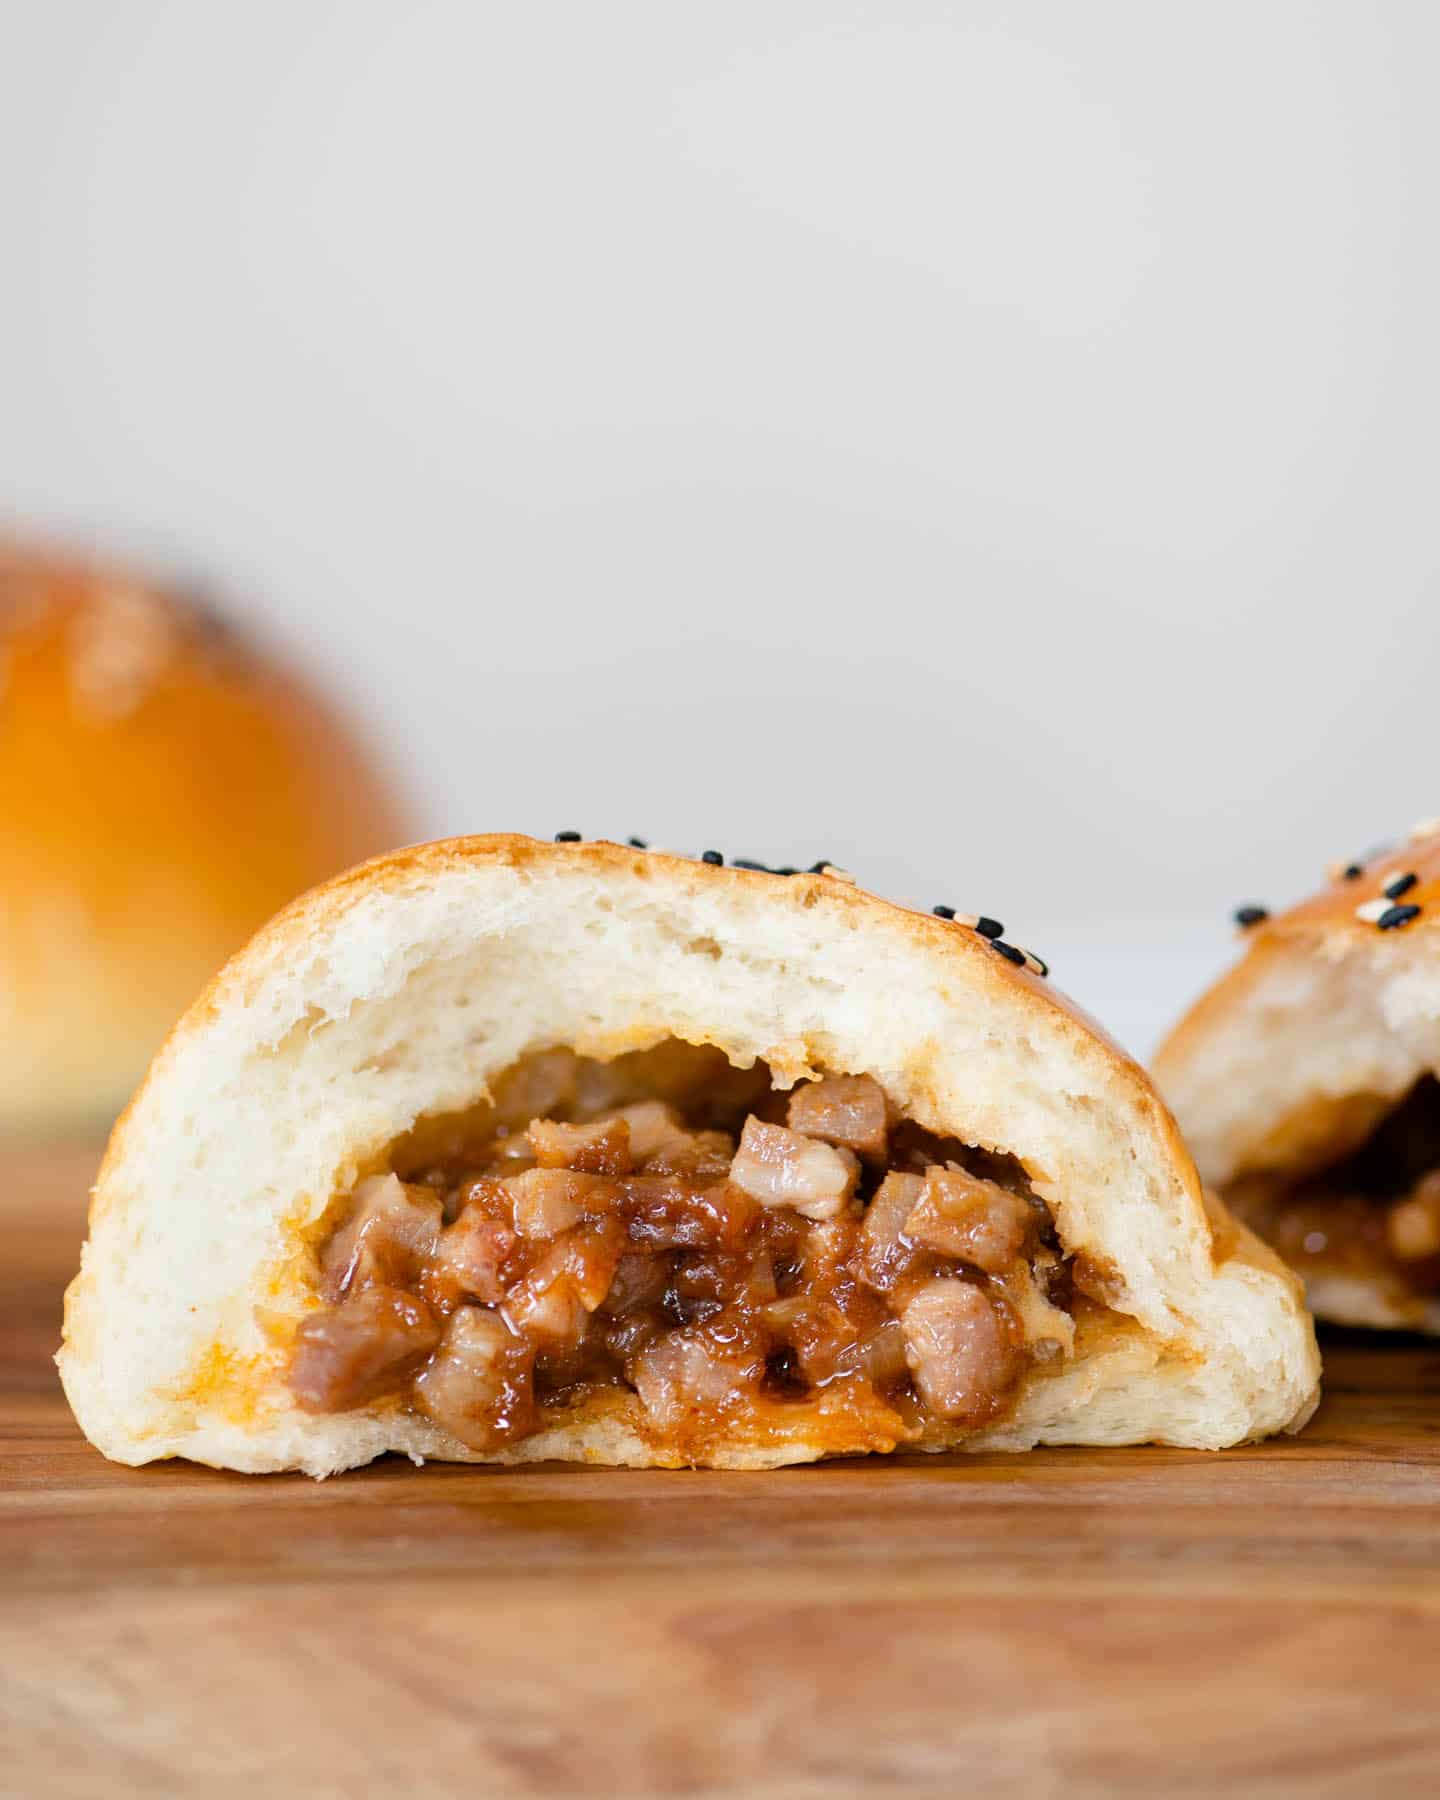
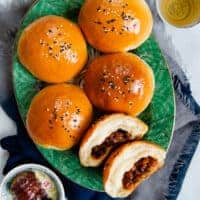
The filling consists of mixing diced pieces of Chinese BBQ pork (char siu/cha siu) with a thick sauce for flavor. This is a good recipe for using leftovers you might have from my char siu recipe. First, mix sugar, oyster sauce, hoisin sauce, soy sauce, sesame oil, paprika, and salt in a small bowl. Then, sauté shallots with garlic in a nonstick pan. Add the sauce to the pan along with some water and simmer for 2 minutes. Next, you’ll thicken the liquids with a cornstarch slurry so that the sauce can act as a paste to bind the pieces of char siu together. Mix 2 tablespoons of cornstarch and 1/4 cup of water together to create a slurry and pour that into the pan. The cornstarch slurry will start thickening the sauce immediately, so make sure to stir the liquids as you pour the slurry into the pan. Keep stirring for about 2 minutes. Turn off the heat and mix in the diced char siu. Chill the filling in the refrigerator until you are ready to shape the bao.
MAKE THE BUNS
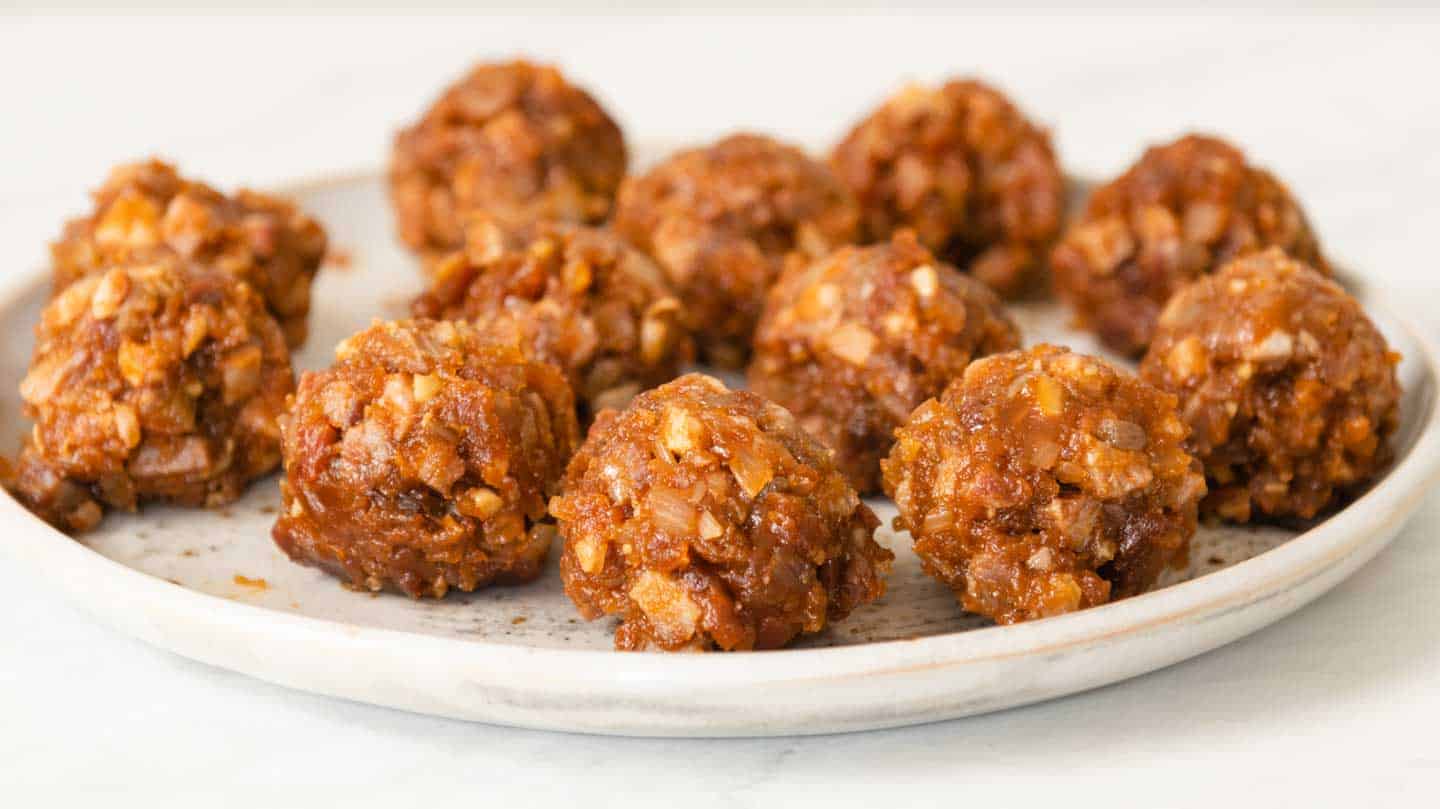
Before rolling out the dough, I like to divide the filling into 12 pieces (about 40 to 45 grams each) and shape each piece into balls. This makes the bao shaping a lot easier because the filling won’t move around as much. Line 2 large baking sheets with parchment paper. If you have any baking sheets that are the same size as the ones you have lined with parchment, I recommend stacking them below. Stacking baking sheets of the same size will help keep the bottom of the buns from browning too much. In the photo below, the bao on the left was baked with 2 baking sheets stacked while the bao on the right was baked on a single baking sheet. Punch down the risen dough and divide it into 2 pieces, about 440g to 450g each. Place one half back into the bowl and cover the bowl. Take the other half and divide it into 6 equal pieces, about 70 to 75 grams each. Take 1 small piece of dough and knead it a few times to get rid of any air bubbles. Then, shape the dough into a ball. I like to gather all the seams on one side of the ball of dough, leaving the other side completely smooth. That smoother side will be outside of the bao. Continue shaping the remaining 5 pieces of dough into balls. Take a ball of dough with the seam side facing up and the smooth side facing down. Roll out the dough into a circle of about 5 1/4 inches wide. I usually roll out the edges more than the center so that the center of the dough is thicker. See video below for visual reference.
SHAPE THE BAO ON COUNTER (EASIER METHOD)
Take a ball of filling and place it in the center of the rolled out dough. If your fingers get dirty, wipe them off with a towel so that you don’t stain the outside of the bun. Then, take 2 opposite sides of the dough and fold it up, like a taco. Next, take the remaining 2 sides of the dough and fold them up as well. You’ll see that the dough is starting to form an x-shape. Watch the video above for a visual reference. Transfer the bao to your right hand while you use the crook of your left hand to gather the dough together and start closing up the bao. Then, use your fingers to pinch the dough together and seal up the bao. If you see big folds forming along the side of the bao, use your fingers to pinch the dough together to seal up those folds. Transfer the bao to a parchment-lined baking sheet with the seam side of the bao facing down.
SHAPE THE BAO IN YOUR HAND
Once you have rolled out the dough to about 5 1/4 inches, place the dough on your left hand. Pick up a ball of filling and place it in the center of the dough. If your fingers get dirty, wipe them off with a towel so that they don’t stain the outside of the bao. Using your right hand start gathering up the dough around the filling. I usually use my left thumb to hold the filling in place while I gather up the dough. Once you’ve gathered all the dough, use the crock of your left hand to start closing up the bao. Use your fingers to pinch the dough together to seal the bao. Watch the video above for a visual reference. Transfer the bao to a parchment-lined baking sheet with the seam side of the bao facing down.
LET THE BAO RISE
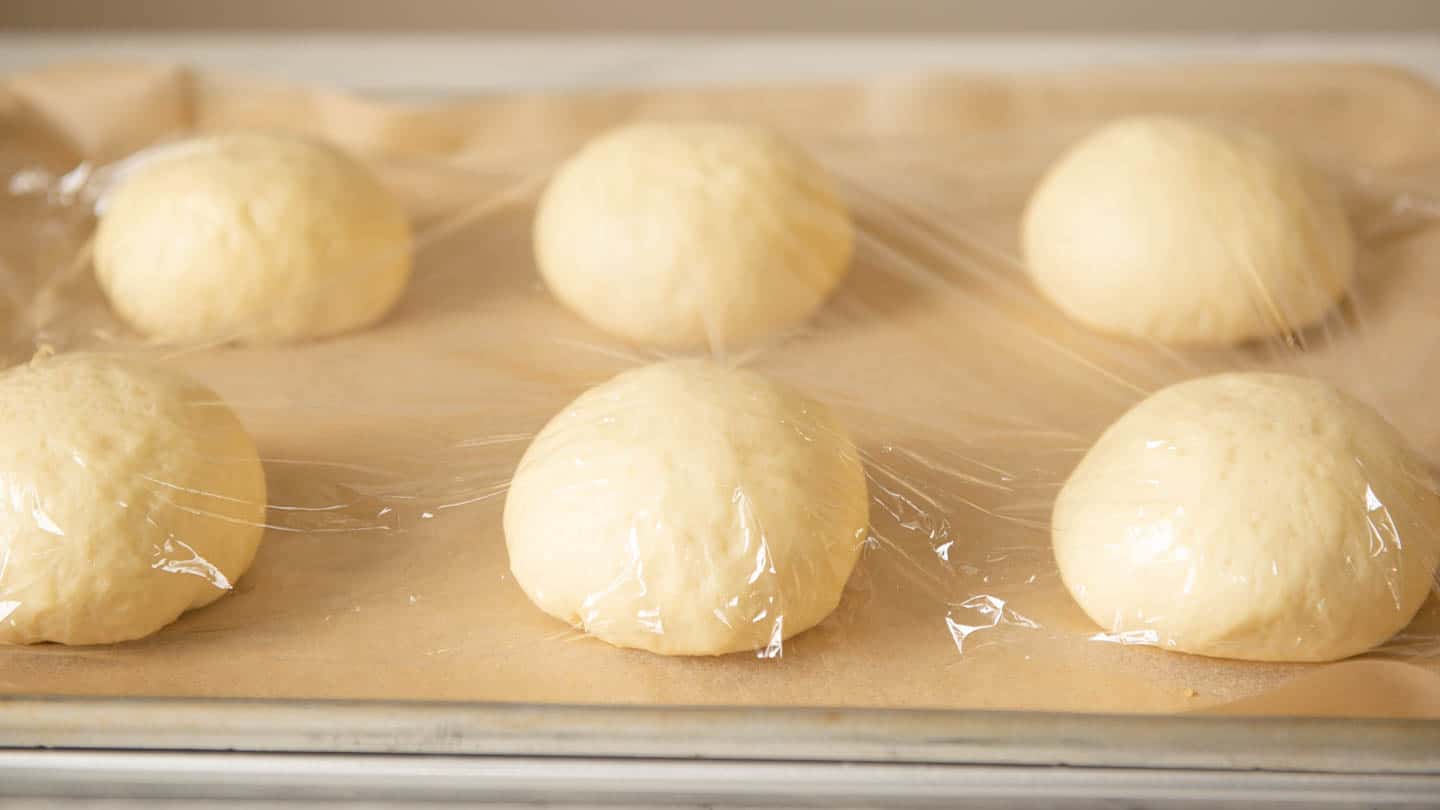
After you have shaped all the bao, cover them loosely with plastic wrap. If you are making these during the winter, let the bao rise for 90 to 105 minutes, until the bread doubles in size. If you are making these during the summer or inside a warm kitchen, they should be ready to bake in 75 to 90 minutes. One way to check to see if the bao are ready to bake is to gently press the bao with a finger. It should leave a small indent and the dough shouldn’t spring back immediately. This dough can be a little sticky, so dip your finger in a bit of flour before you perform this test.
BAKE THE BAO
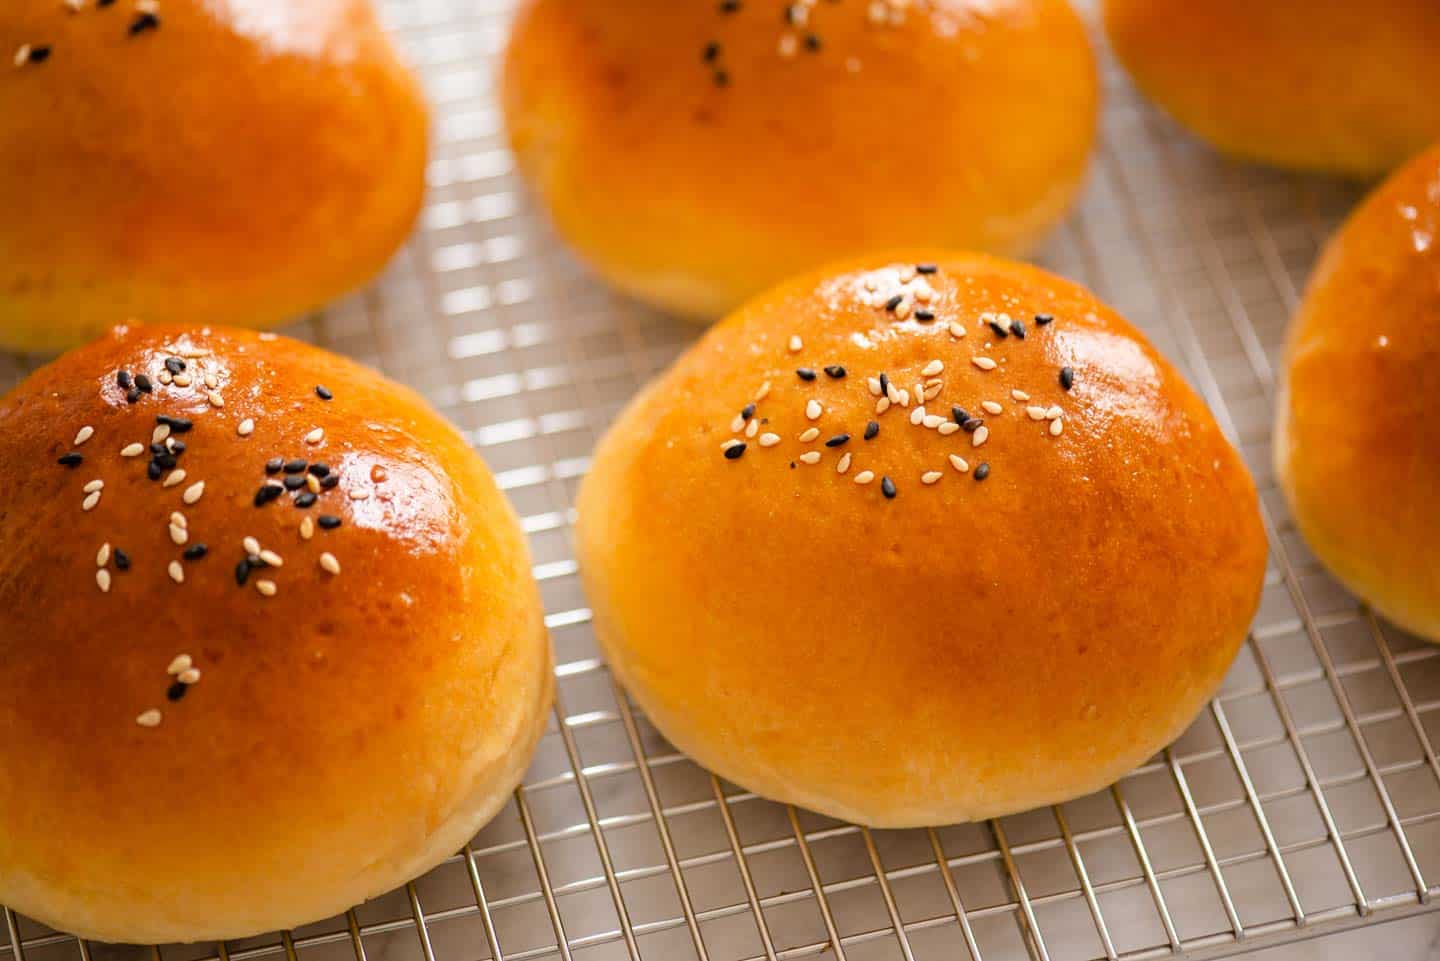
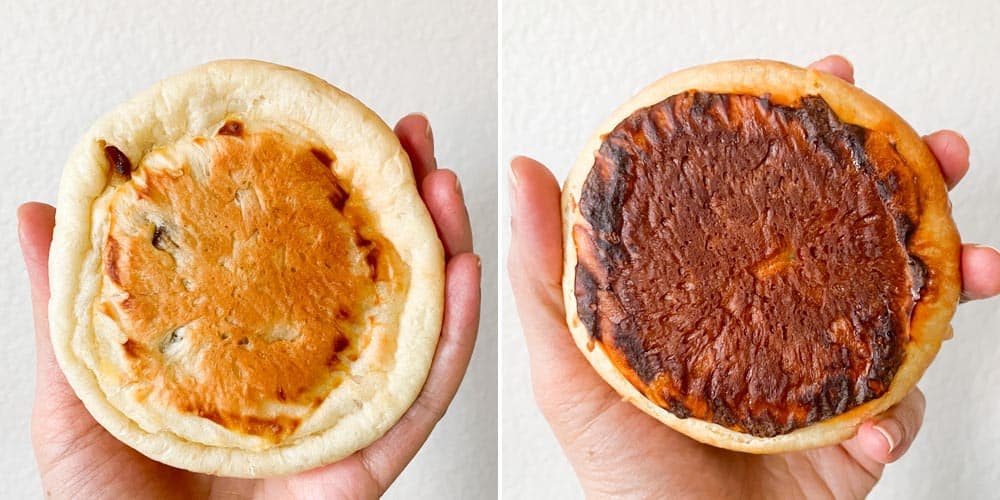
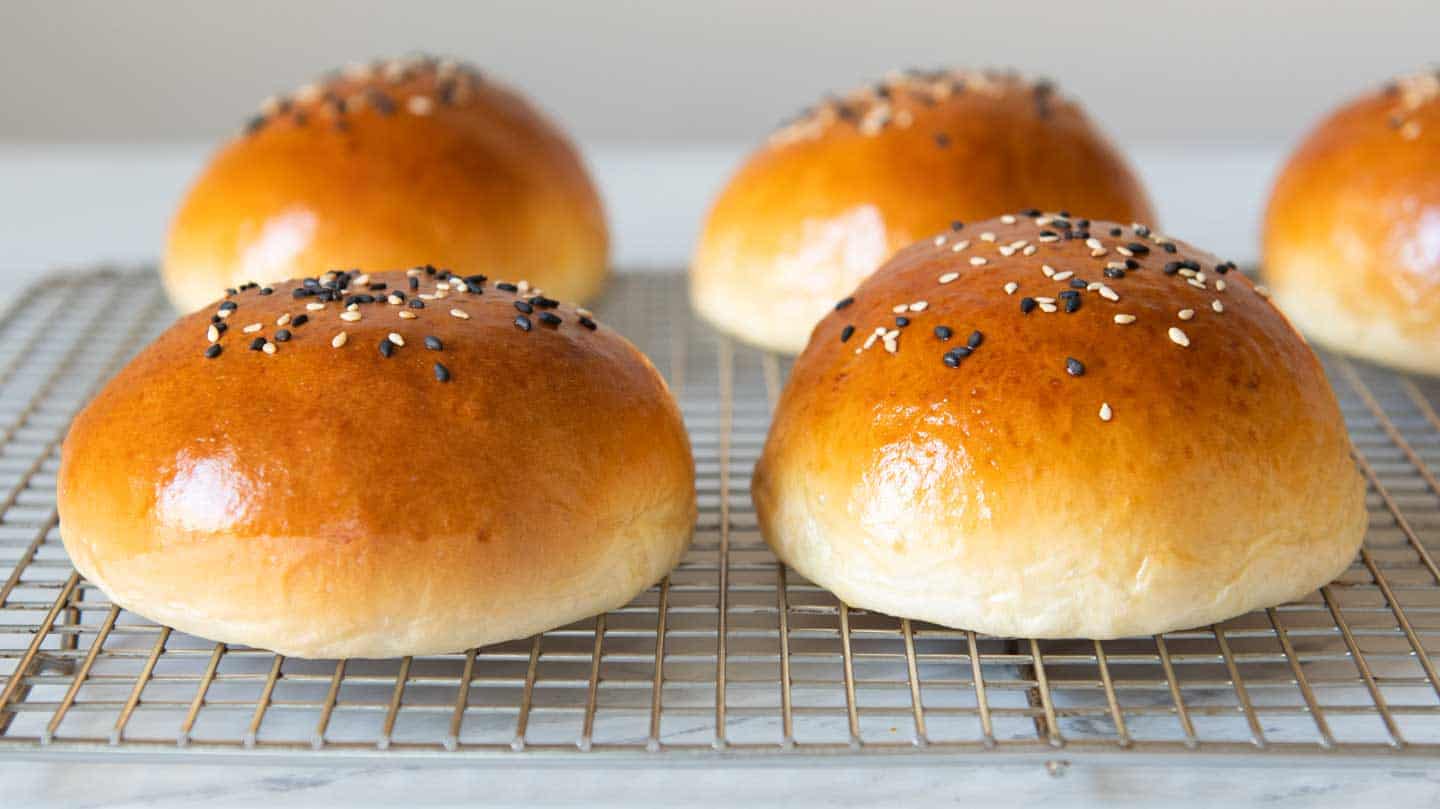
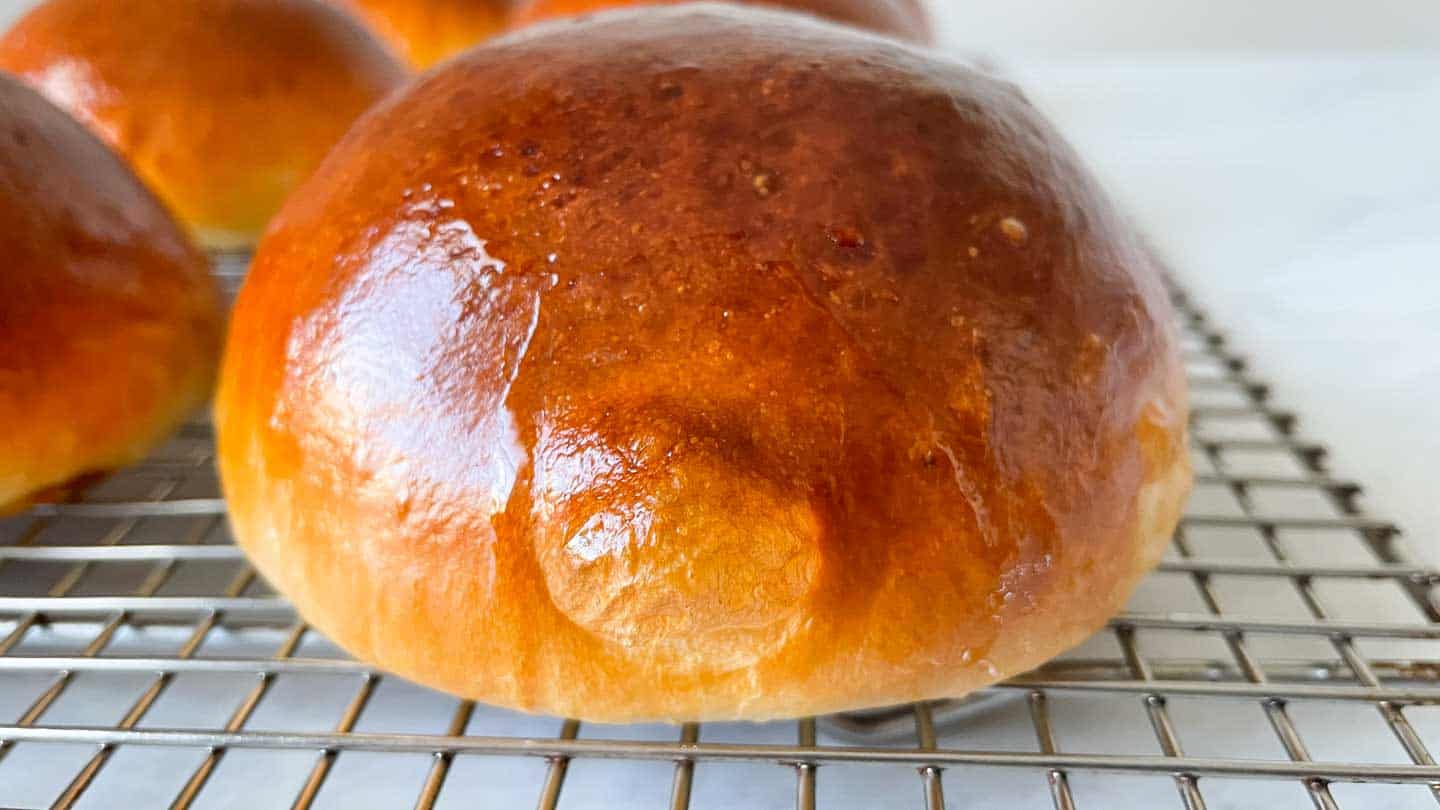
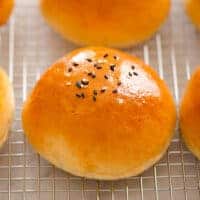
Preheat the oven to 350ºF. Arrange the oven racks to the top third and lower third positions. Whisk 1 egg with 1 tablespoon of milk for the egg wash. Using a brush, apply a thin layer of egg wash over the buns. You can brush the buns with a single layer of egg wash or give the buns the double egg wash treatment. If you are doing a double egg wash, wait 10 to 15 minutes before applying the second layer of egg wash. The benefit of brushing the buns with 2 layers of egg wash is that you can ensure the entire bun will get an even coating of egg wash. In the photo above, the bun on the left got a single layer of egg wash while the bun on the right got double egg wash. However, the double egg wash can occasionally cause bubbles to form on the surface of the bao (see photo below). If you’d like to top the char siu bao with sesame seeds for garnish, sprinkle some on top after applying egg wash. Bake the bao for 20 to 22 minutes, until the tops of the bao are evenly golden brown. You can swap the baking sheets around halfway through baking to ensure even baking. Let the char siu bao cool on the baking sheets for 3 to 5 minutes before transferring them to a cooling rack. They’re best eaten when they’re still a little warm. Store leftover BBQ pork buns in an airtight container for 2 or 3 days.
CAN I MAKE THE DOUGH AND FILLING AHEAD?
Yes, you can make both the dough and filling a day ahead.
FOR THE DOUGH
Right after you finish kneading the dough, place the dough in a greased bowl and cover it with plastic wrap. Transfer the bowl to the fridge and let it rise overnight. You do not need to let the dough rise before putting it into the fridge. When you are ready to bake, take the dough out of the fridge. You do not need to let the dough reach room temperature before you shape the bao. Otherwise, you may run into the risk of overproofing the dough. When working with overnight dough, I noticed that the bao were slightly more difficult to shape inside my hands. Because the dough stiffens when chilled, it’s not as easy to wrap the dough around the filling with one hand without making a mess. It is a lot easier if you shape the bao on the counter if you end up chilling the dough overnight.
FOR THE FILLING
Once you mix the char siu with the sauce, transfer the filling into a container and refrigerate the filling overnight. You do not need to let the filling reach room temperature before using it.
CAN I FREEZE CHAR SIU BAO?
Yes, you can freeze baked (not raw) char siu bao. Line large plates or a baking sheet with parchment paper. Then, place the bao on top and freeze them for several hours or overnight, until the exterior of the char siu bao hardens. Then, transfer the baked bao to freezer bags and eat them within several months for optimal flavor. When you are ready to eat the char siu bao, place the frozen bao on a baking sheet. You do not need to defrost the bao before baking. Bake the char siu bao at 350ºF for 10 to 12 minutes. One thing to note is that the texture of the bao won’t be as soft when they are reheated. As a matter of fact, the exterior of the bao will be slightly crunchy. I still devoured the reheated bao in quick haste though.
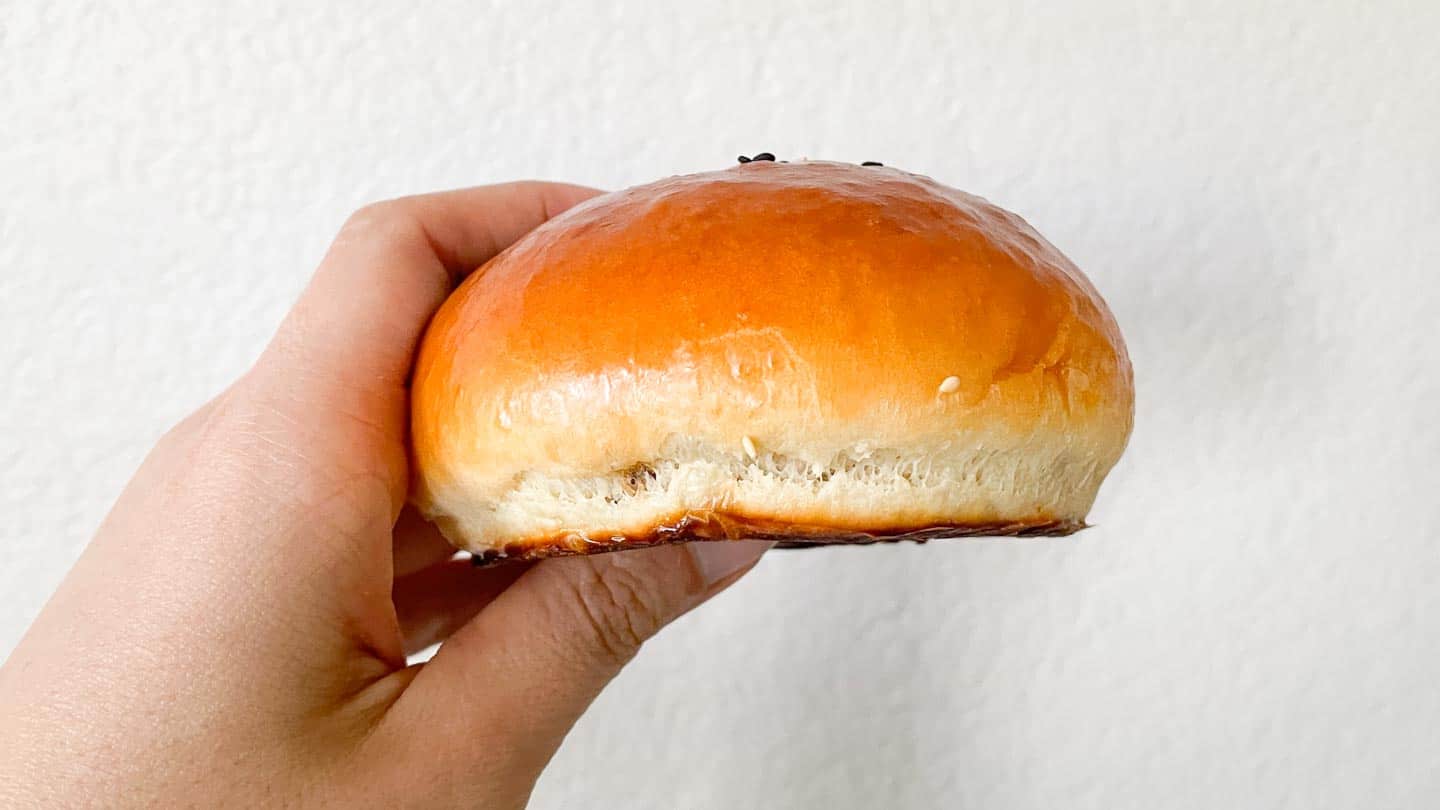
WHY ARE THERE SMALL TEARS AT THE BOTTOM OF THE BUN?
This is a sign that the bao were underproofed during the second rise. This is more of a visual thing, so the buns will taste fine. Next time, let the dough rise for another 15 minutes before baking (assuming your kitchen is about the same temperature).
MORE ASIAN BREAD RECIPES WITH BOB’S RED MILL FLOURS
Japanese Milk BreadPineapple BunsScallion BreadVegetarian Gua Bao
Disclosure: This post was sponsored by Bob’s Red Mill! To learn more about their products and to get more recipe inspiration, follow them on Instagram or Facebook.